Disclaimer

How to change brake caliper repair kit on a car – replacement tutorial
downloads:
550
Views:
3352
Brake caliper repair [AUTODOC TUTORIAL]
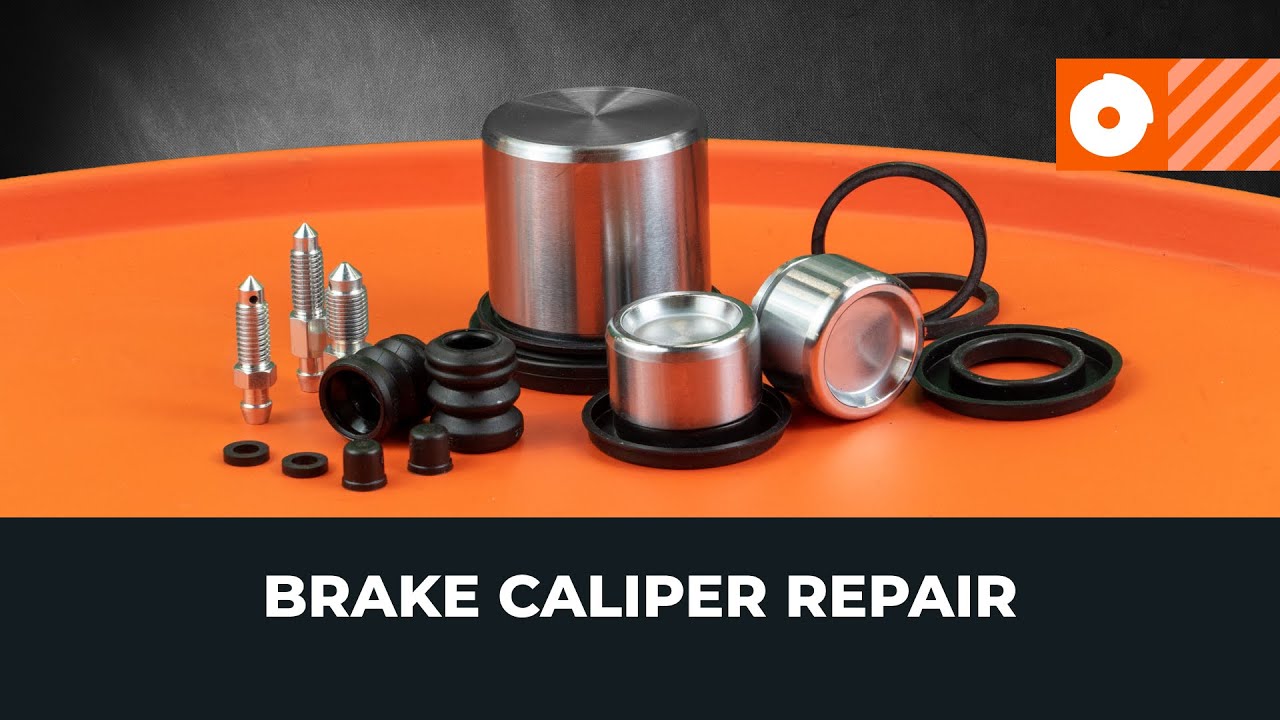
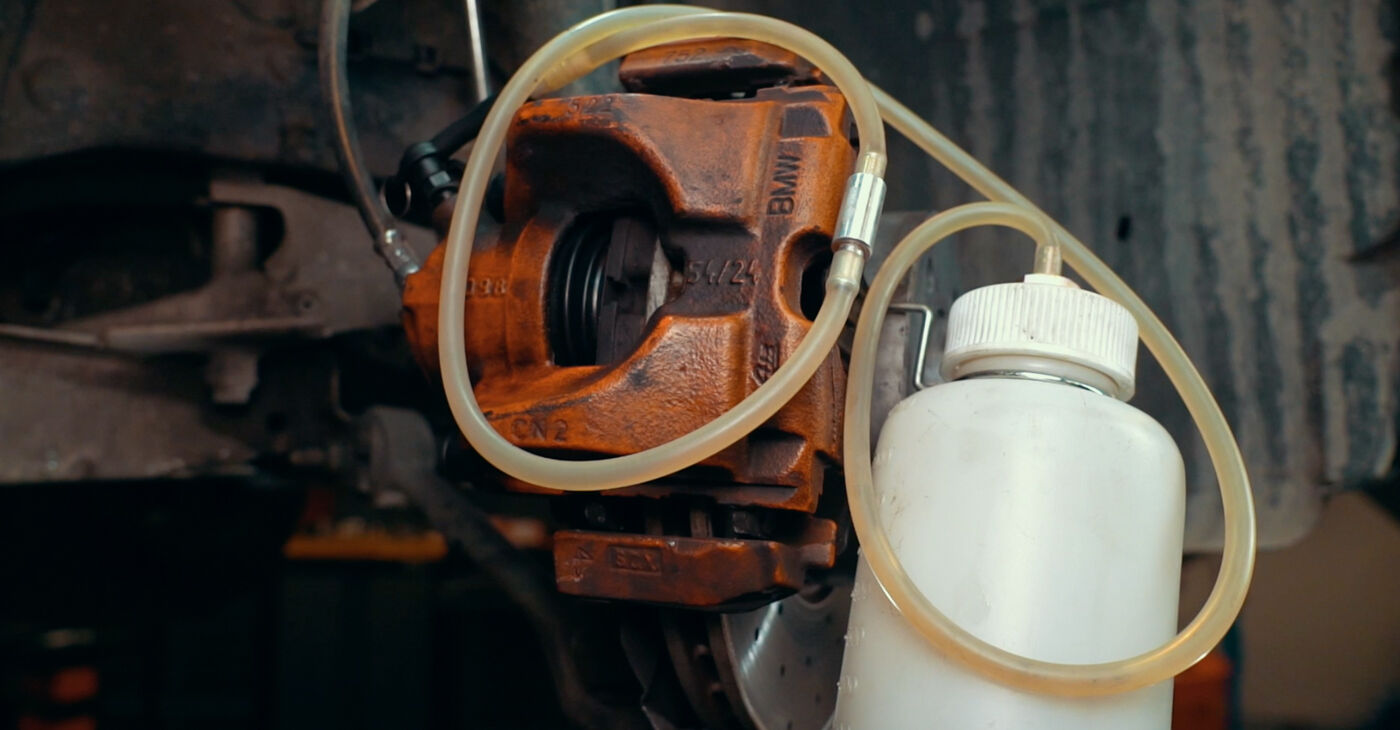
a repair kit and related brake system components
a set of suitable tools
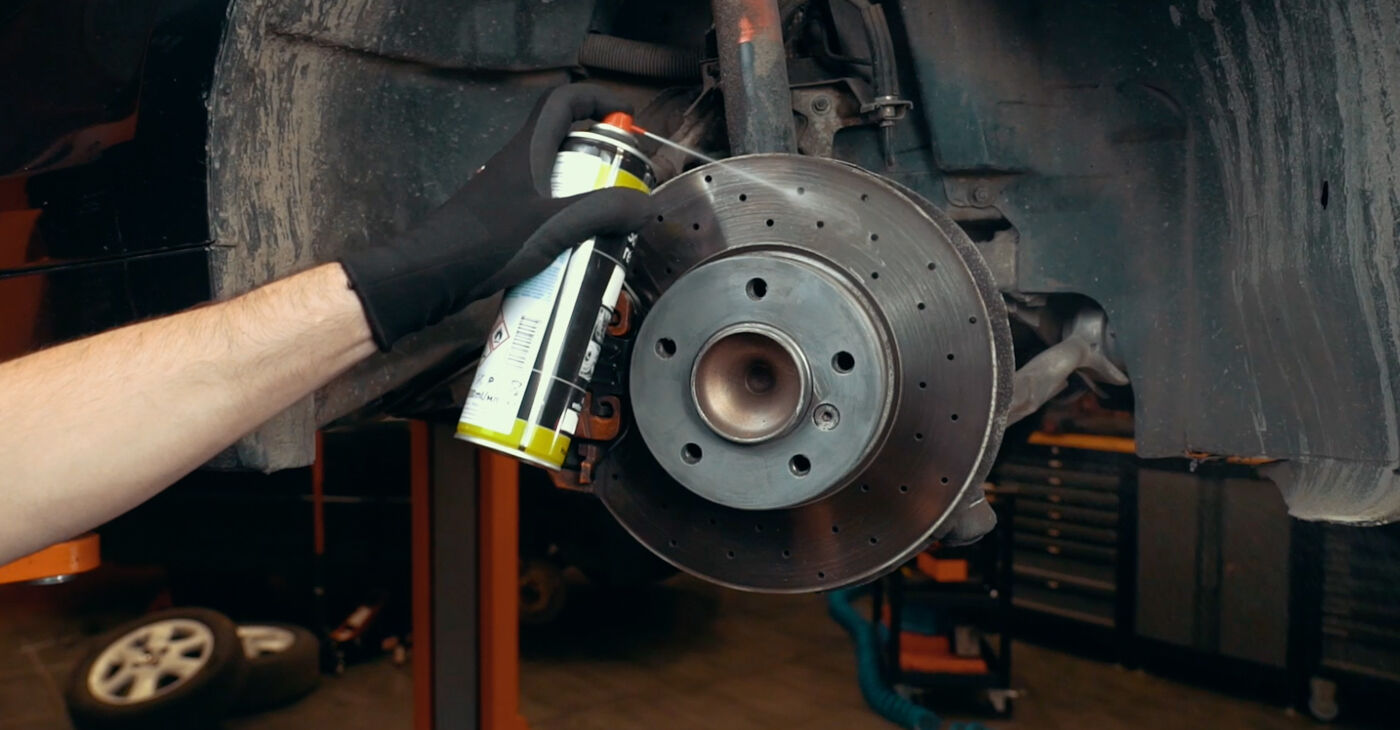
brake cleaner and a brush
a brake hose clamp
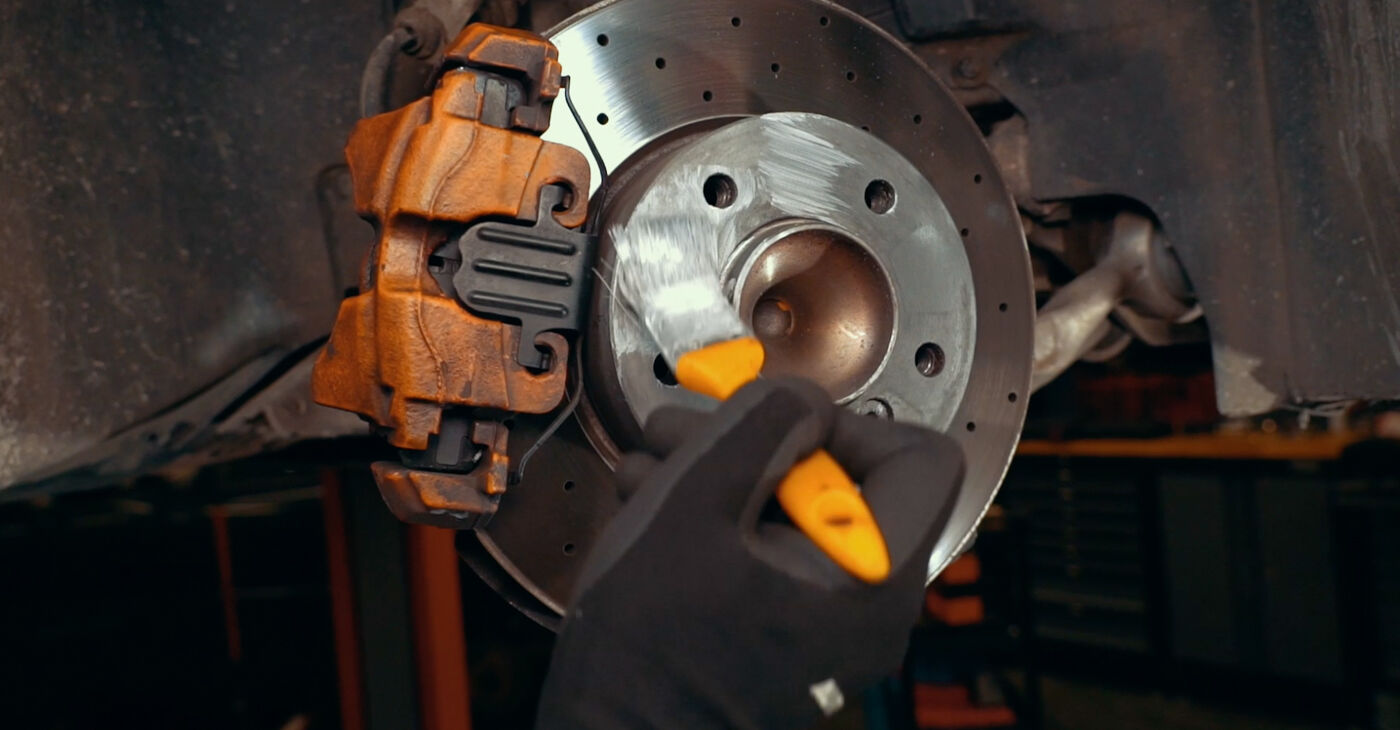
guide pin grease
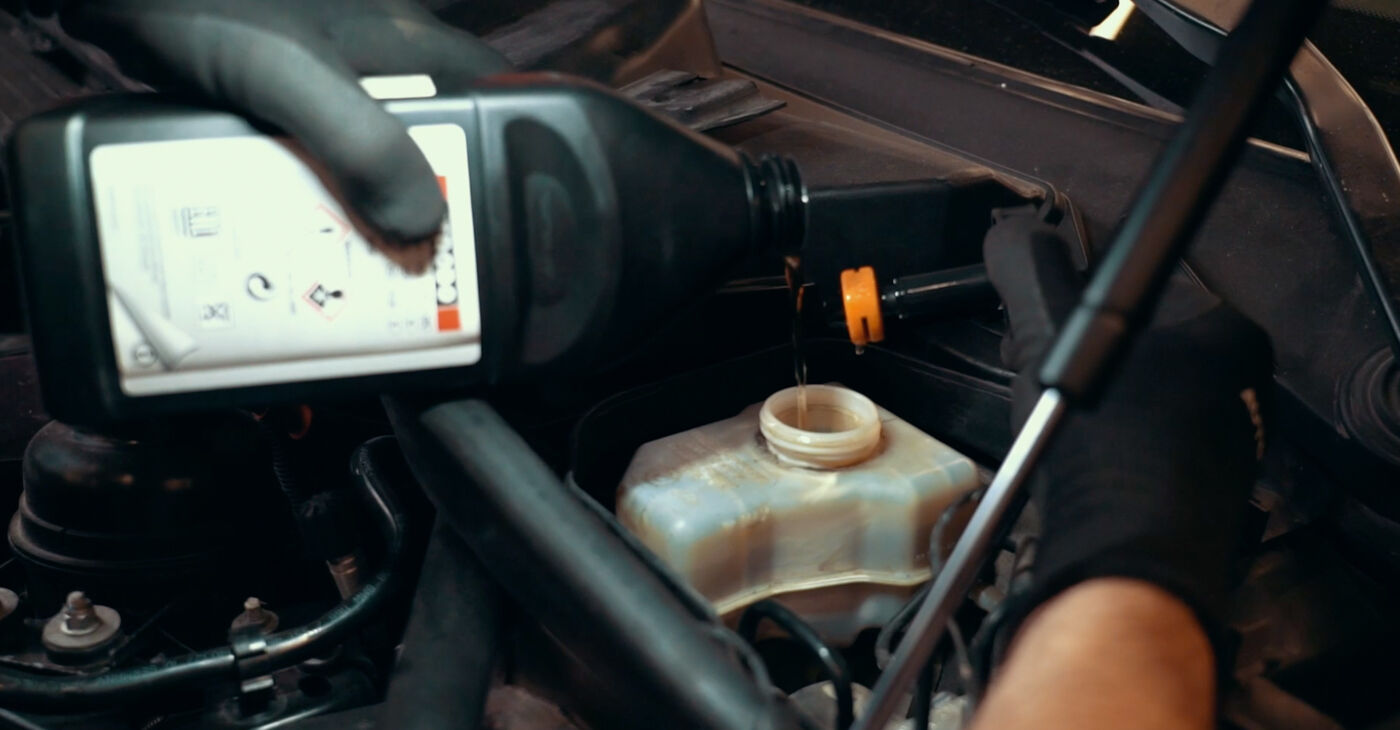
brake fluid suitable for your car
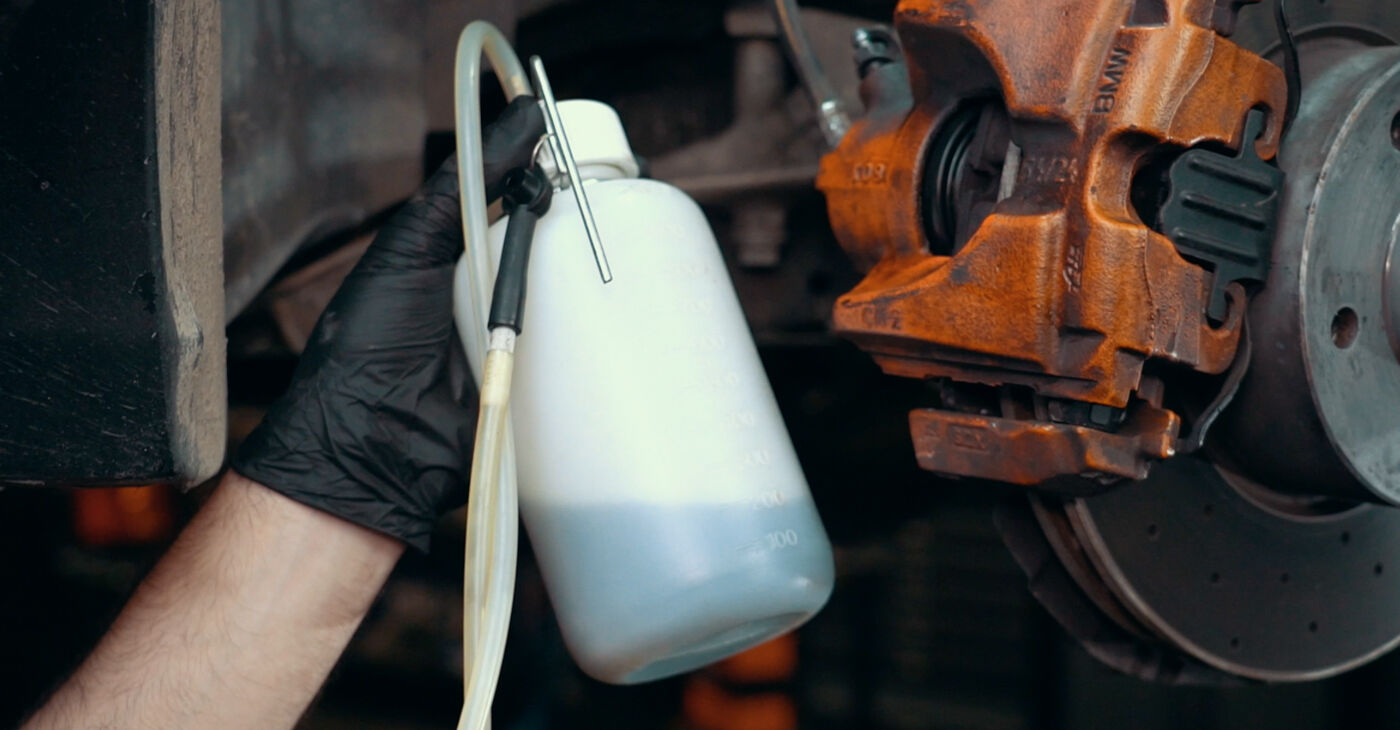
a brake bleeder kit
a piston wind back tool
a torque wrench

AUTODOC recommends
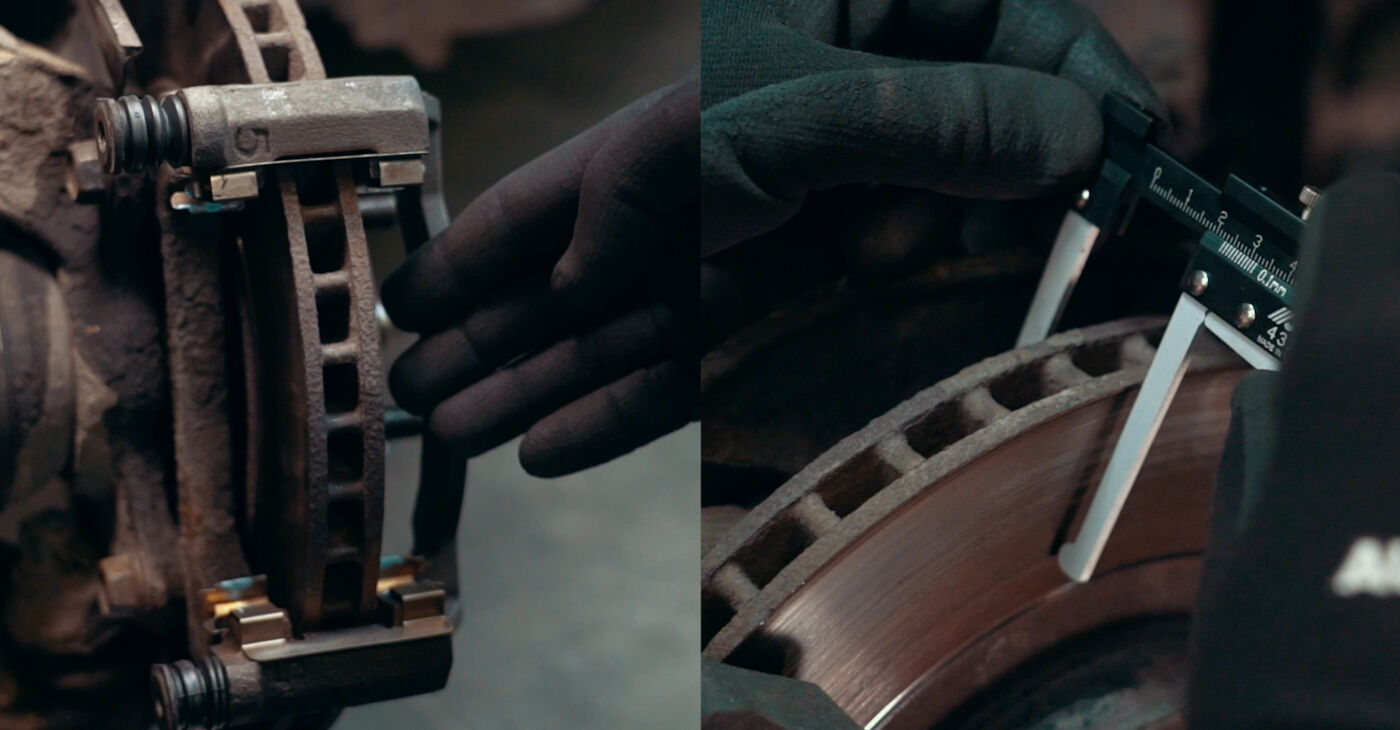
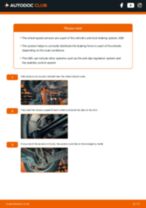
- Look at the design and fasteners of the brake caliper
- Any brake caliper has a piston dust boot and oil seal, which ensure leak-tightness
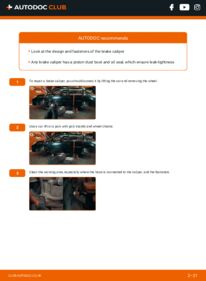
- 1.
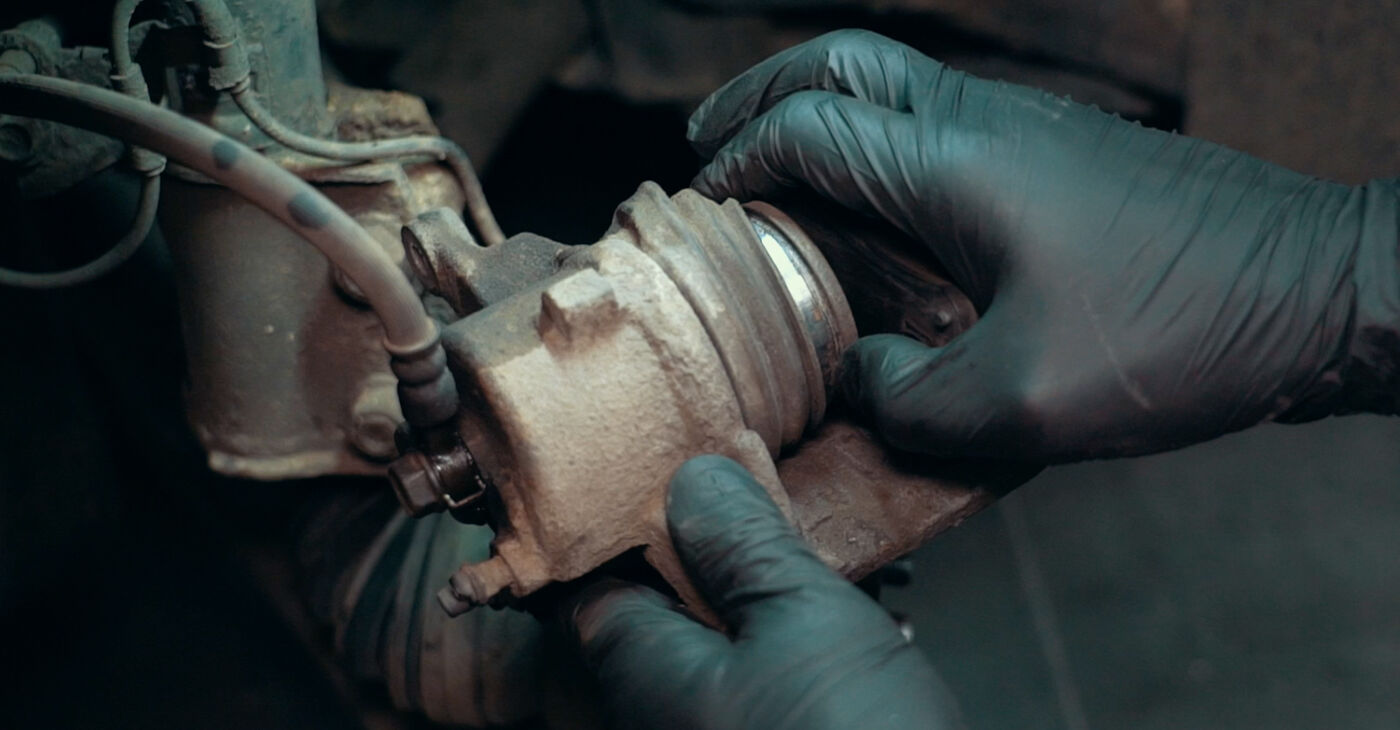
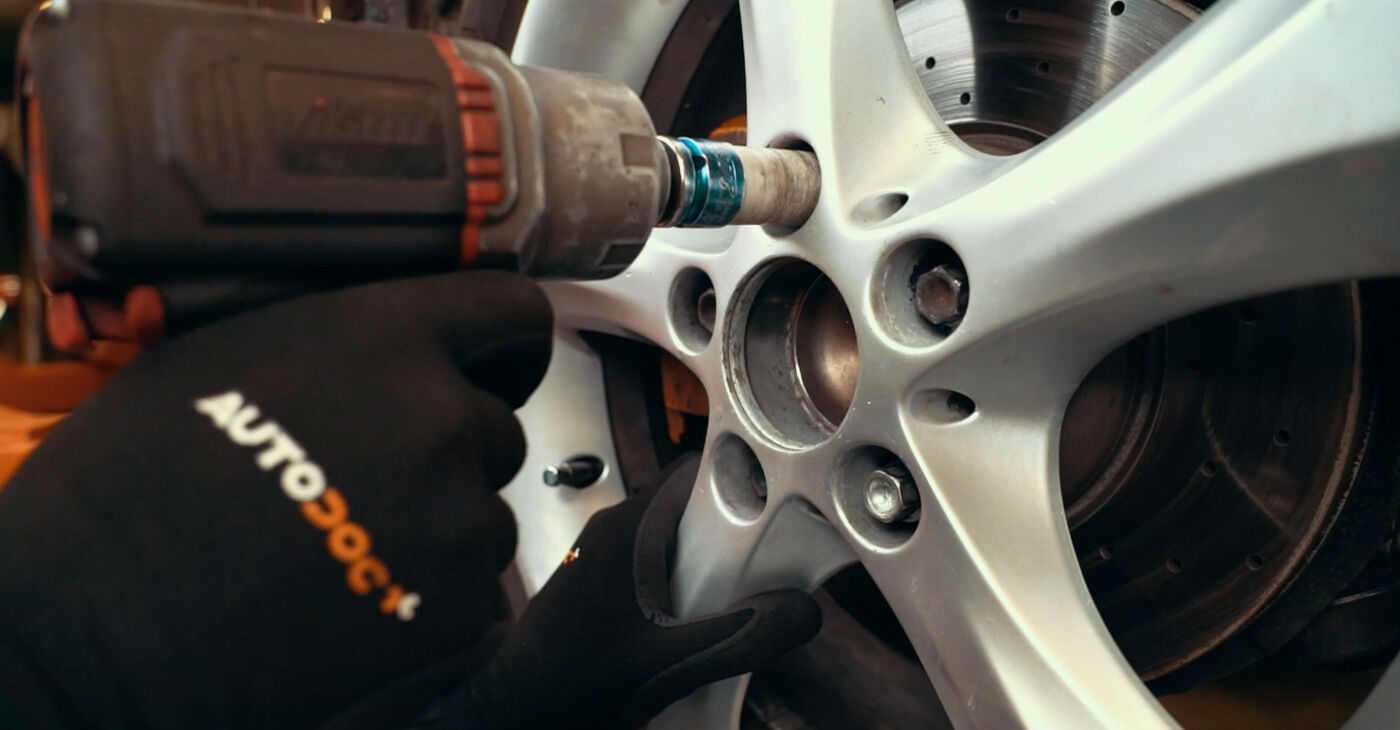
 To repair a brake caliper, you should access it by lifting the car and removing the wheel
 - 2.
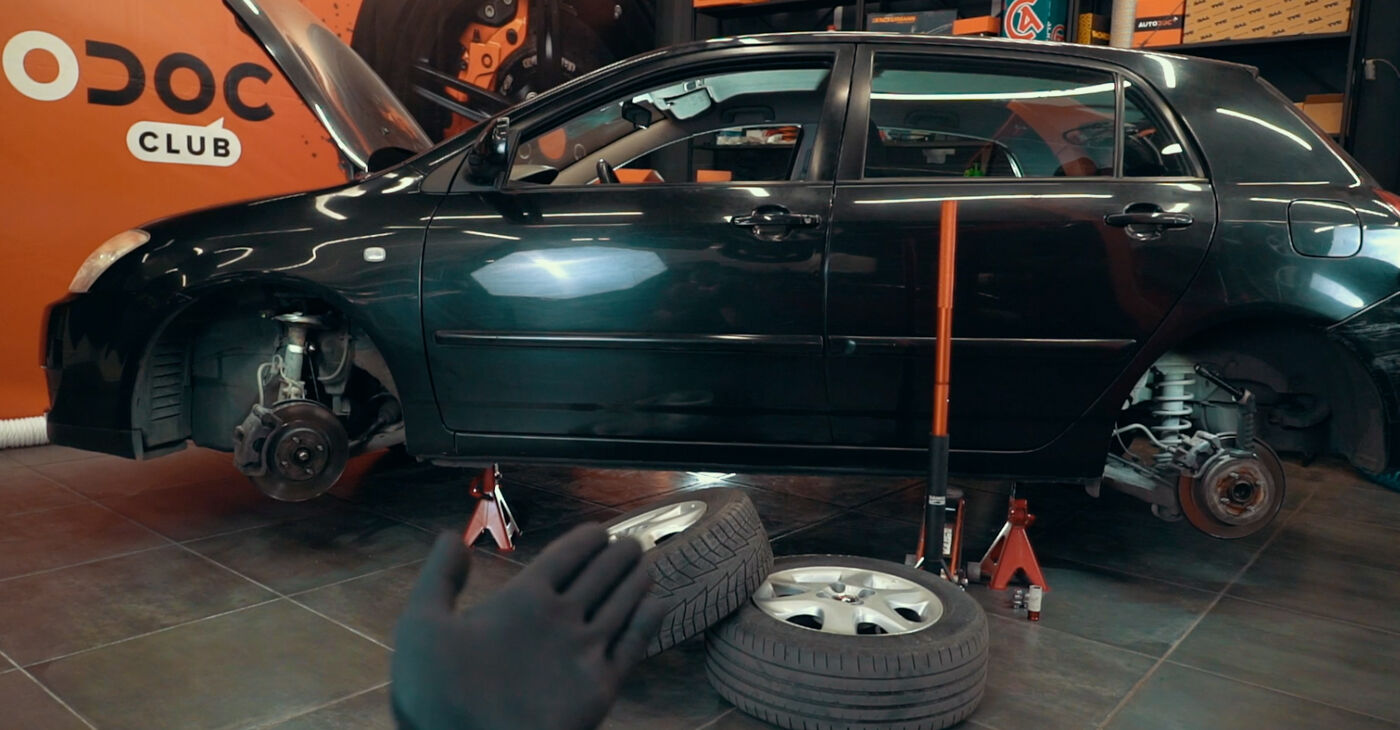 Use a car lift or a jack with jack stands and wheel chocks
 - 3.
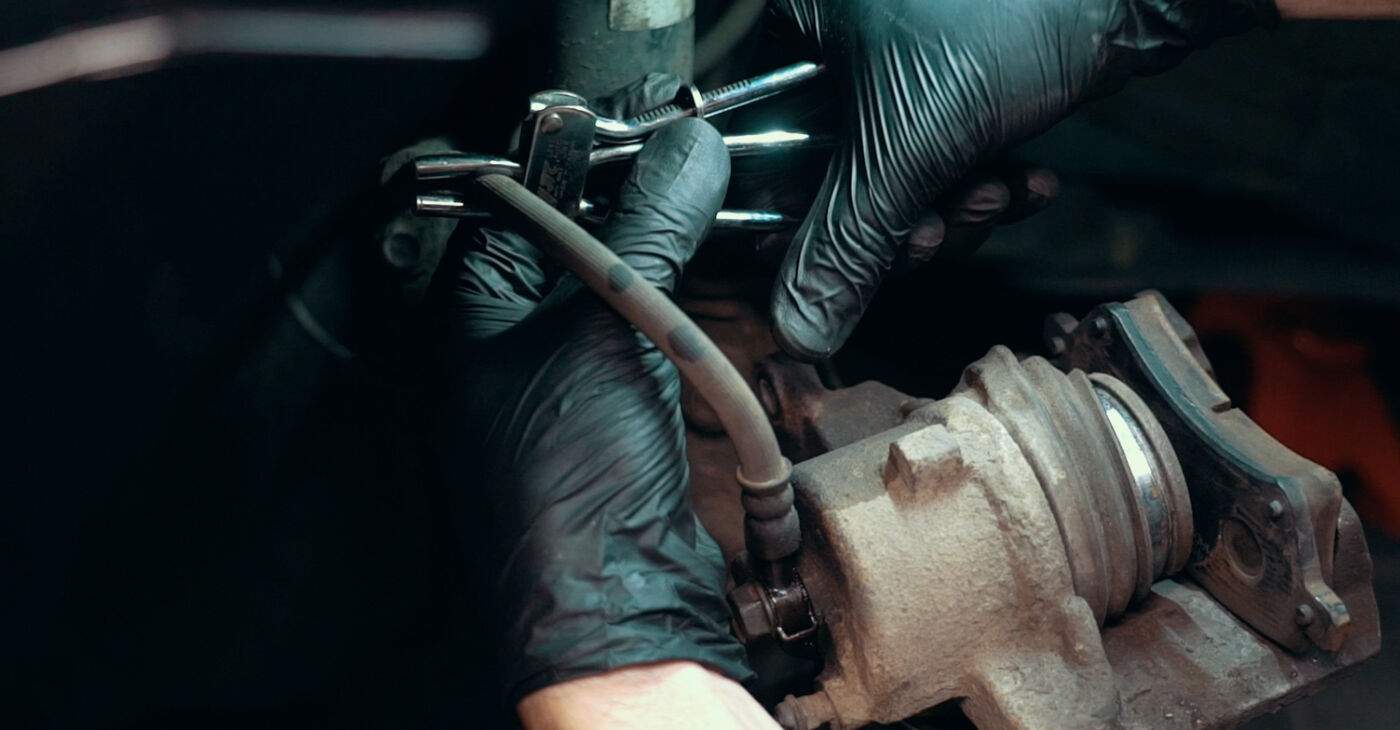
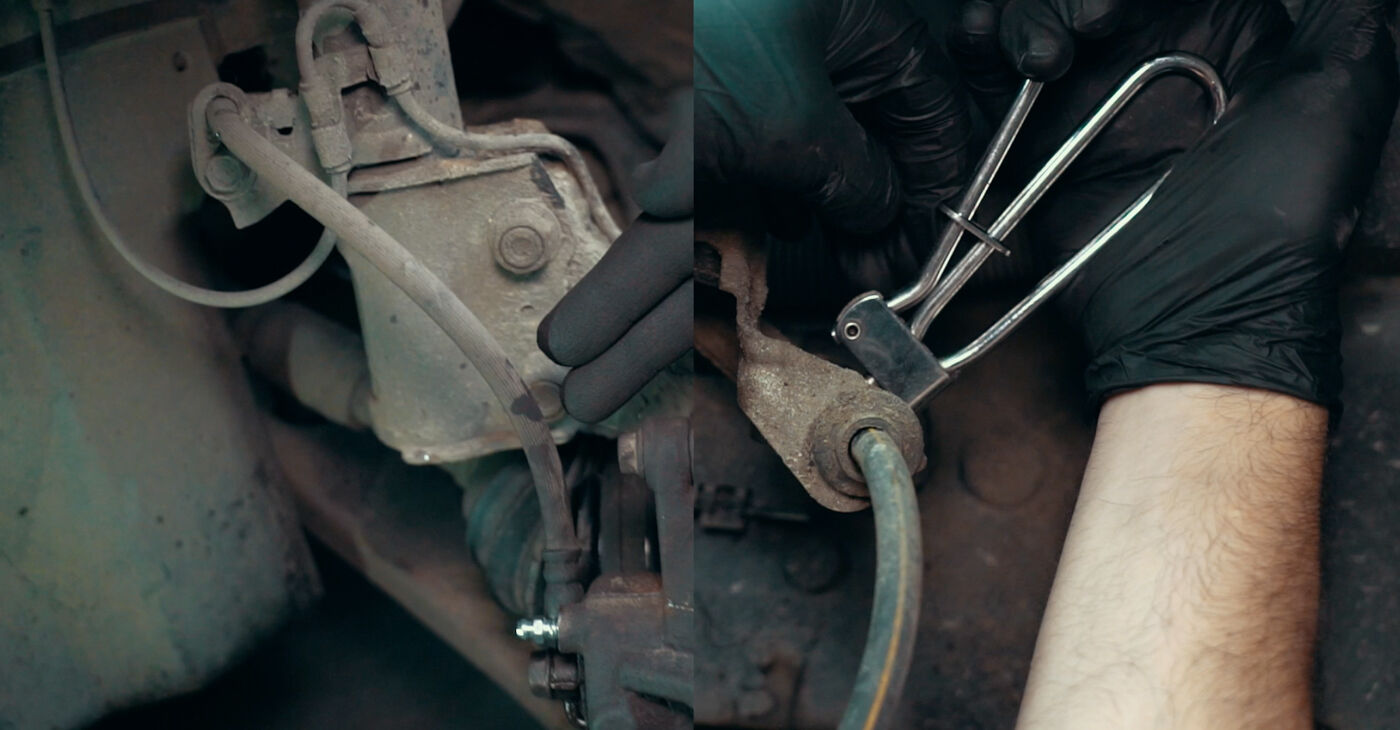
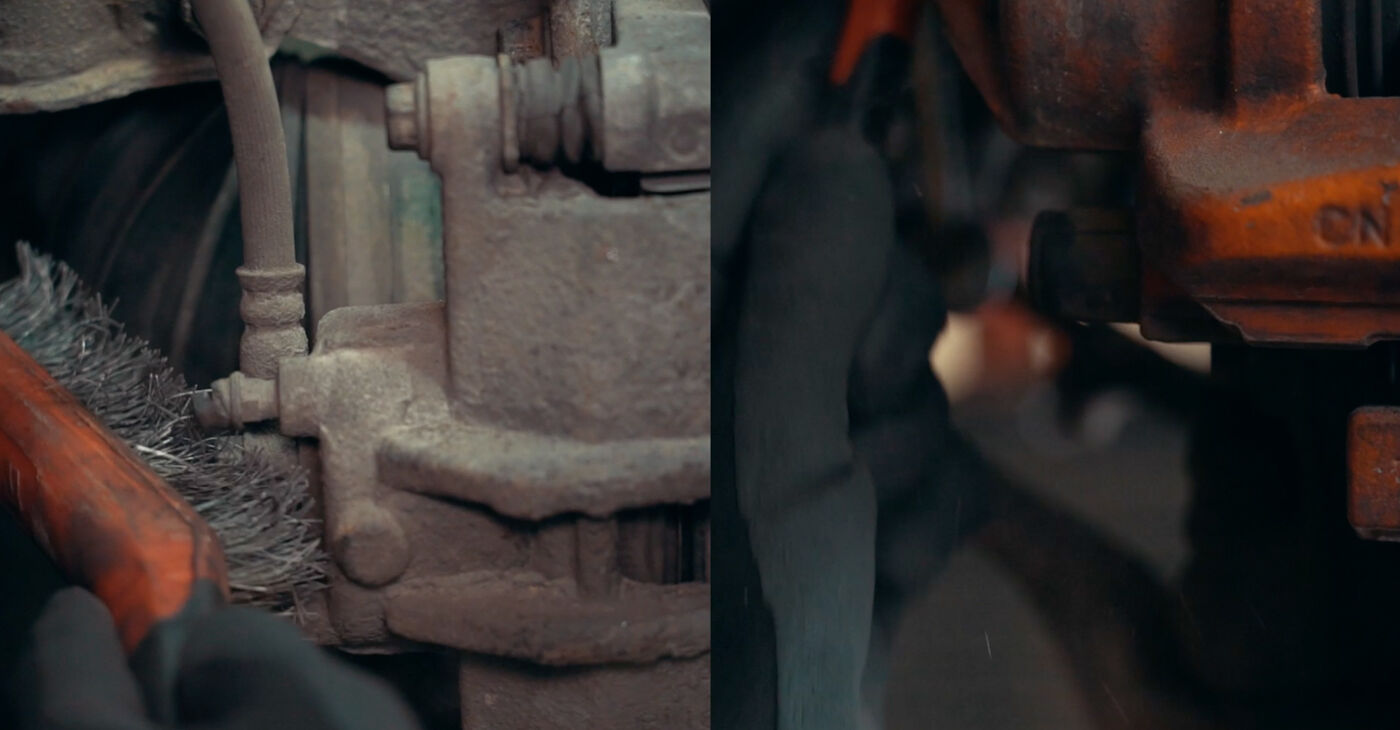 Clean the working area, especially where the hose is connected to the caliper, and the fasteners
 - 4.
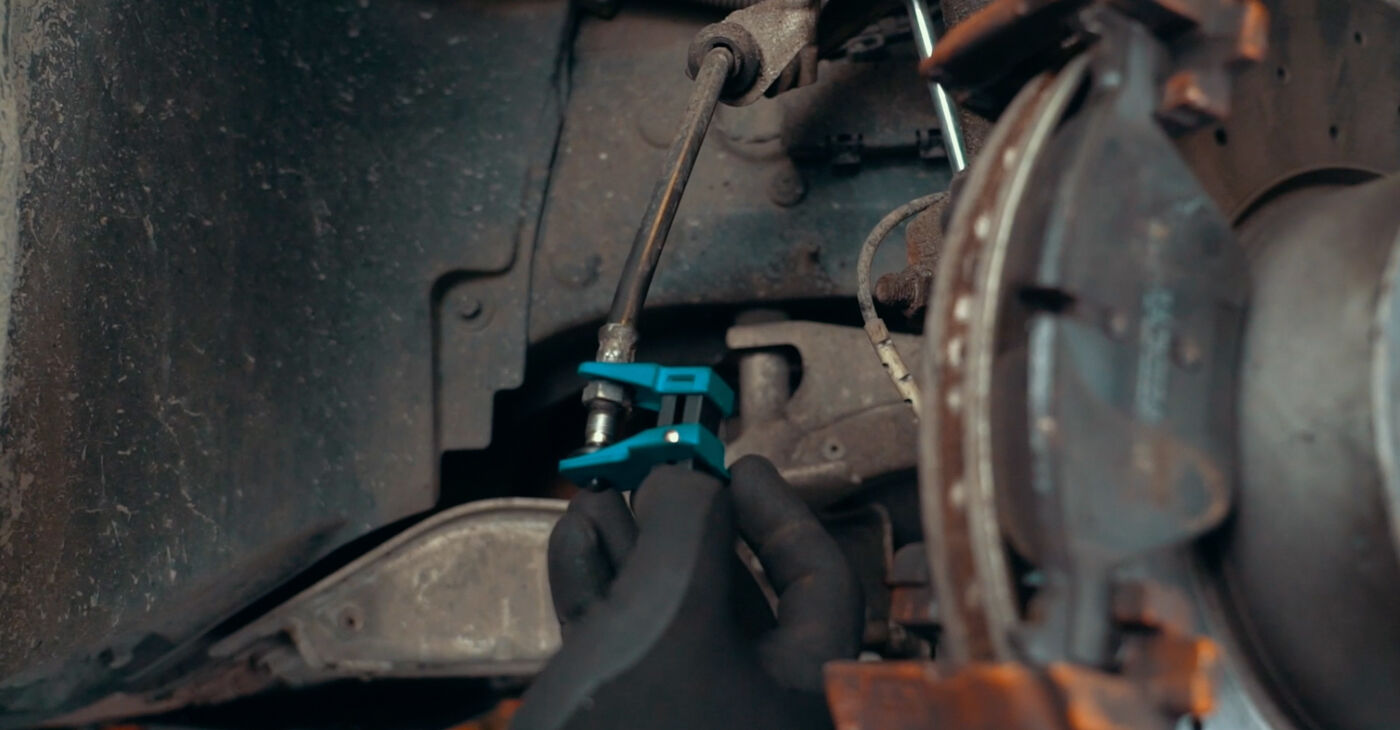
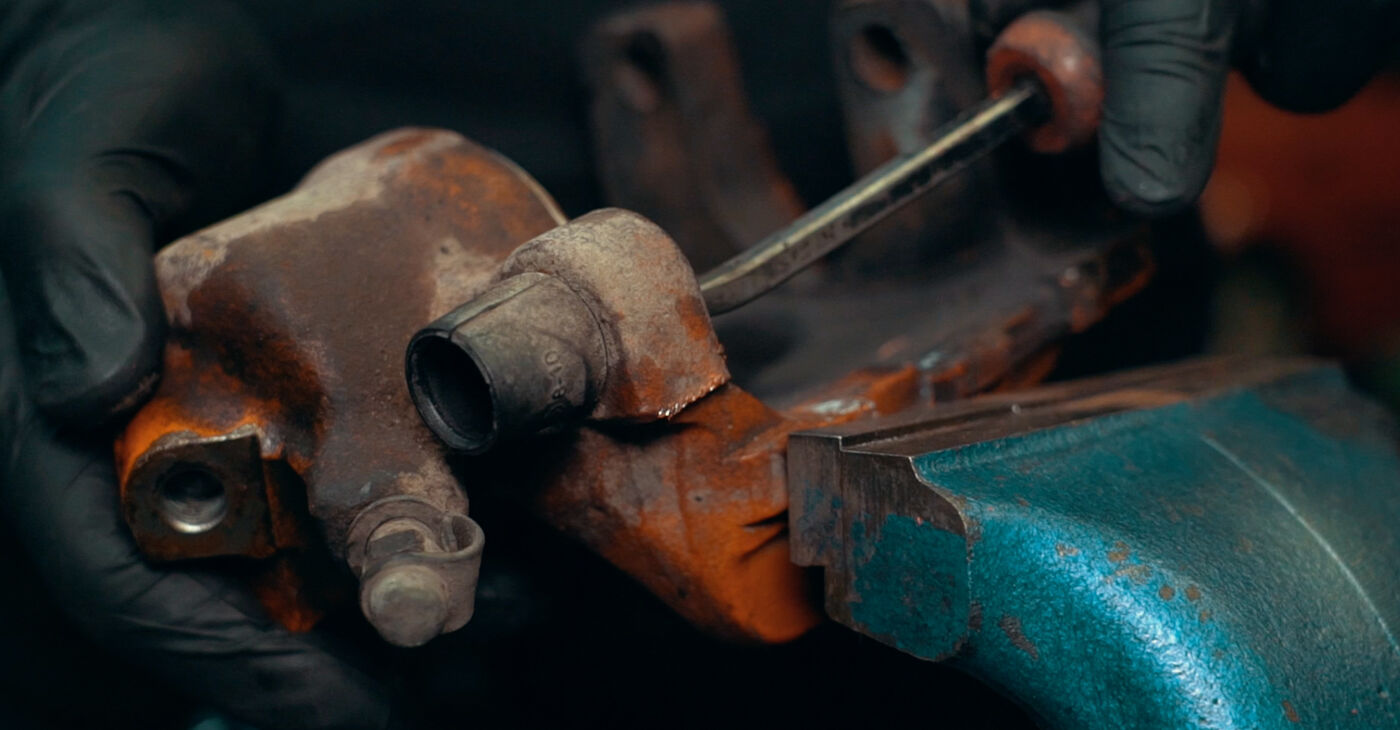
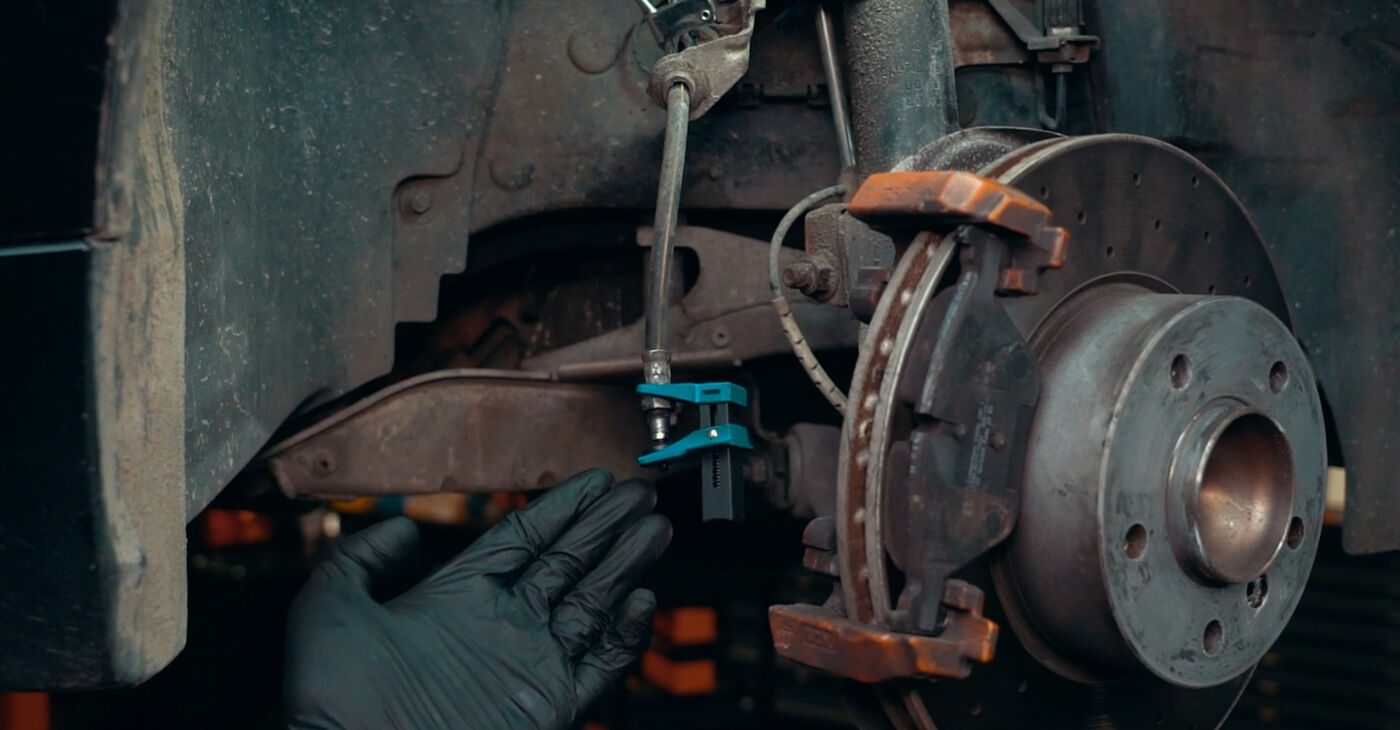
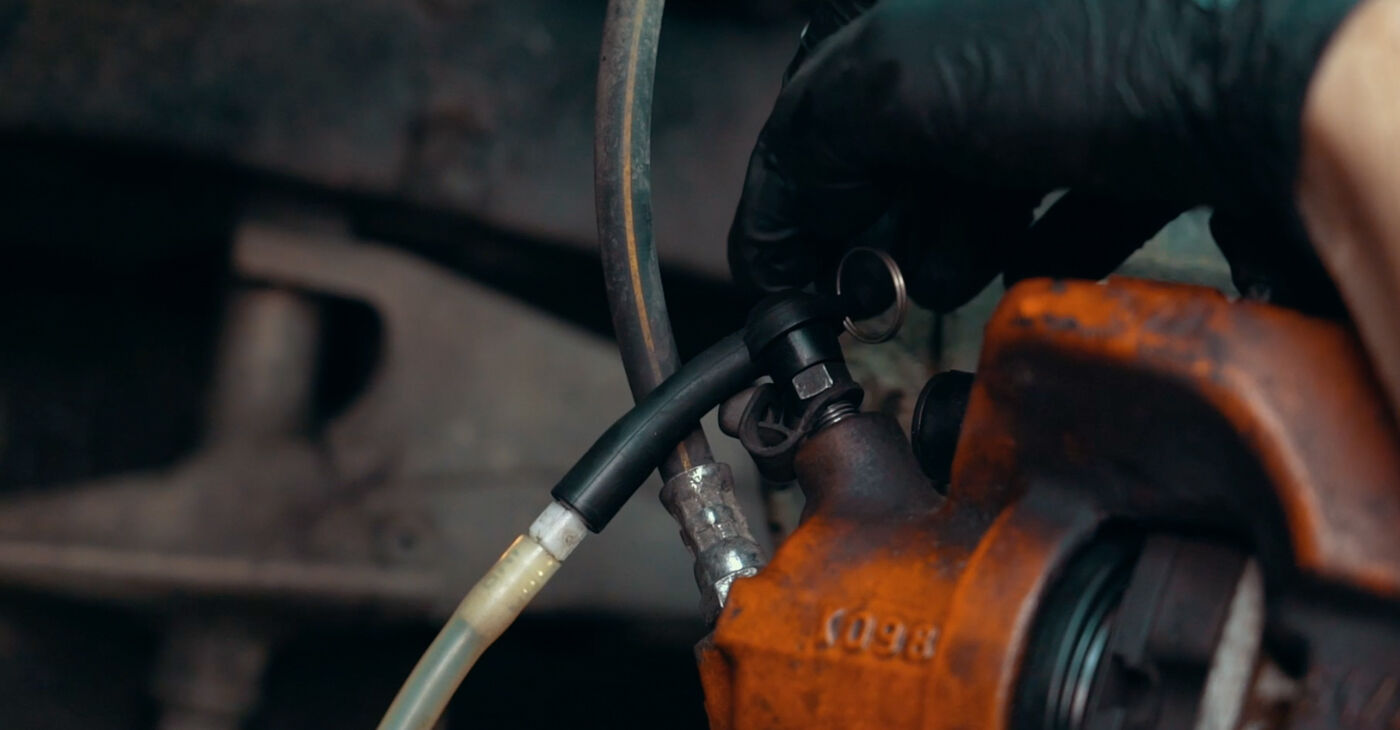
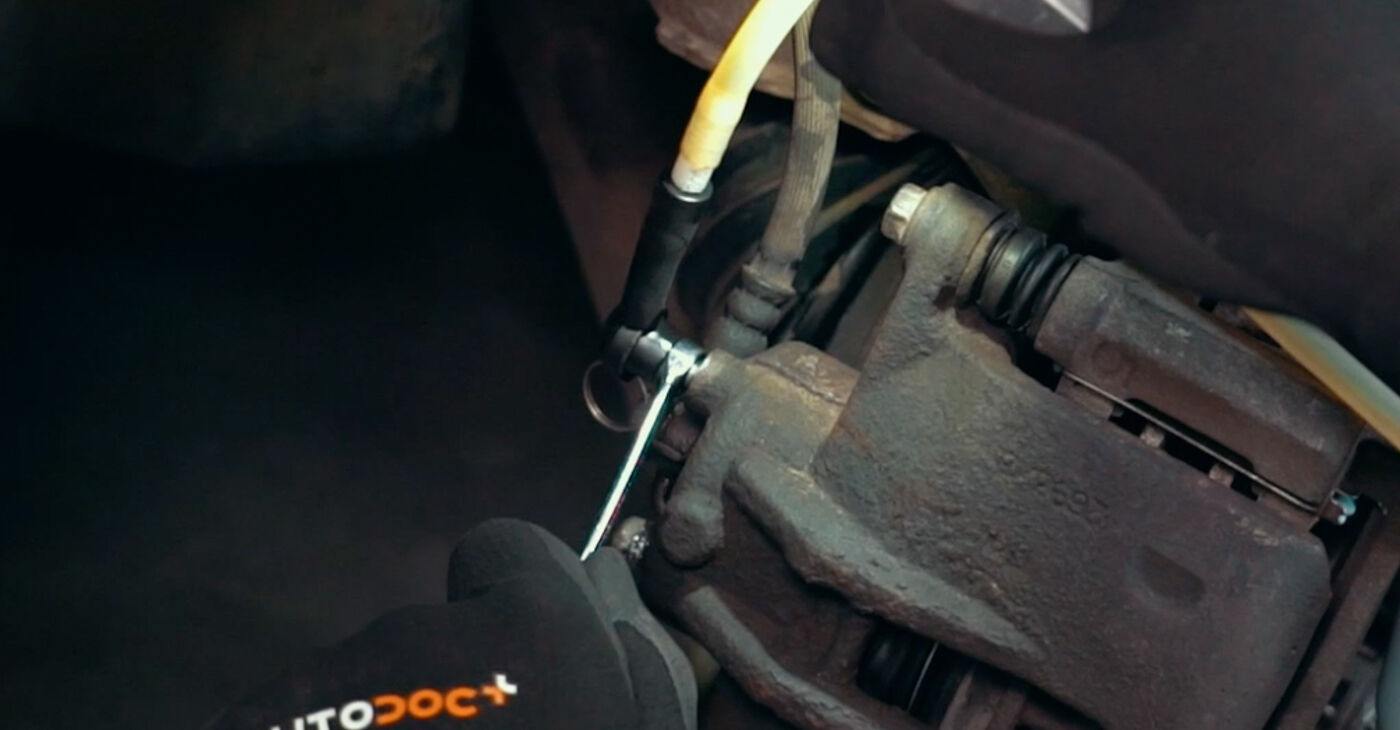
 Unscrew the brake hose fittingImportant!Before doing that, pinch the hose with a clamp to prevent brake fluid leakage
 - 5.
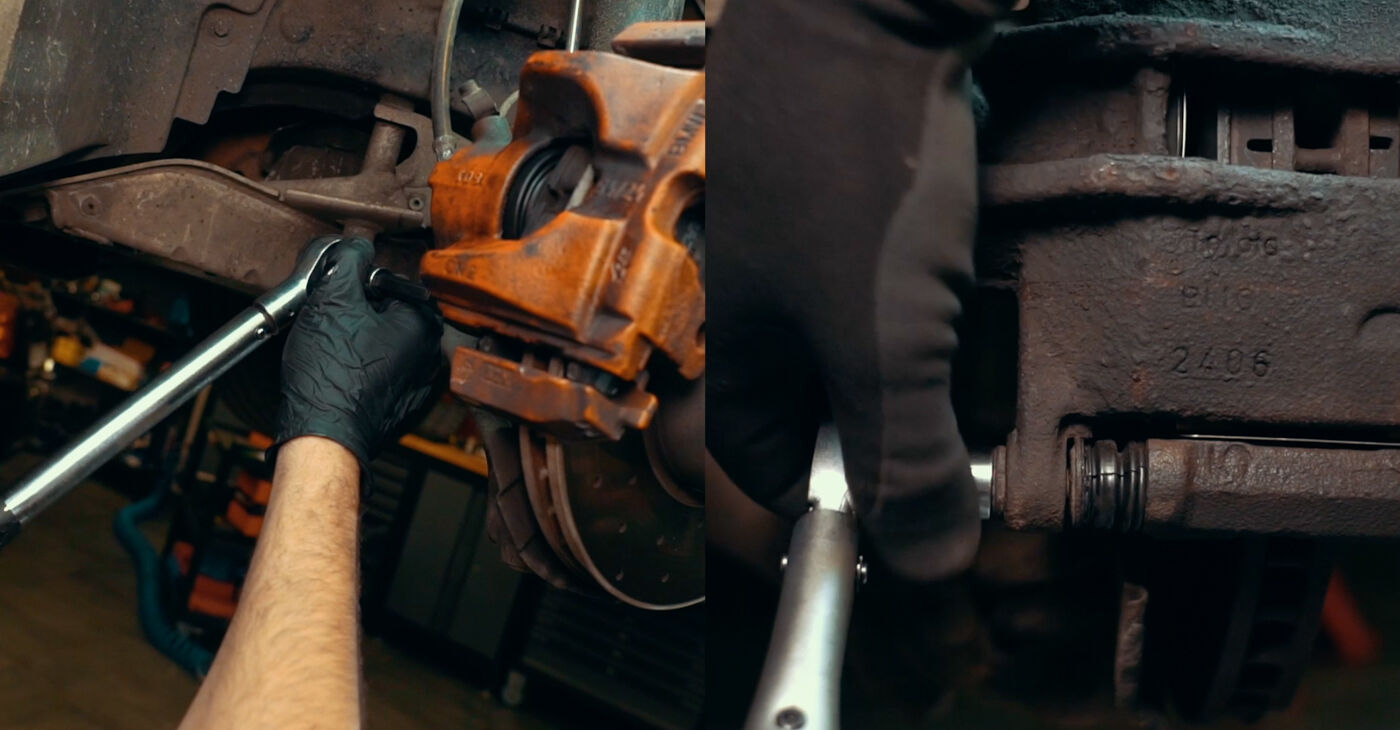
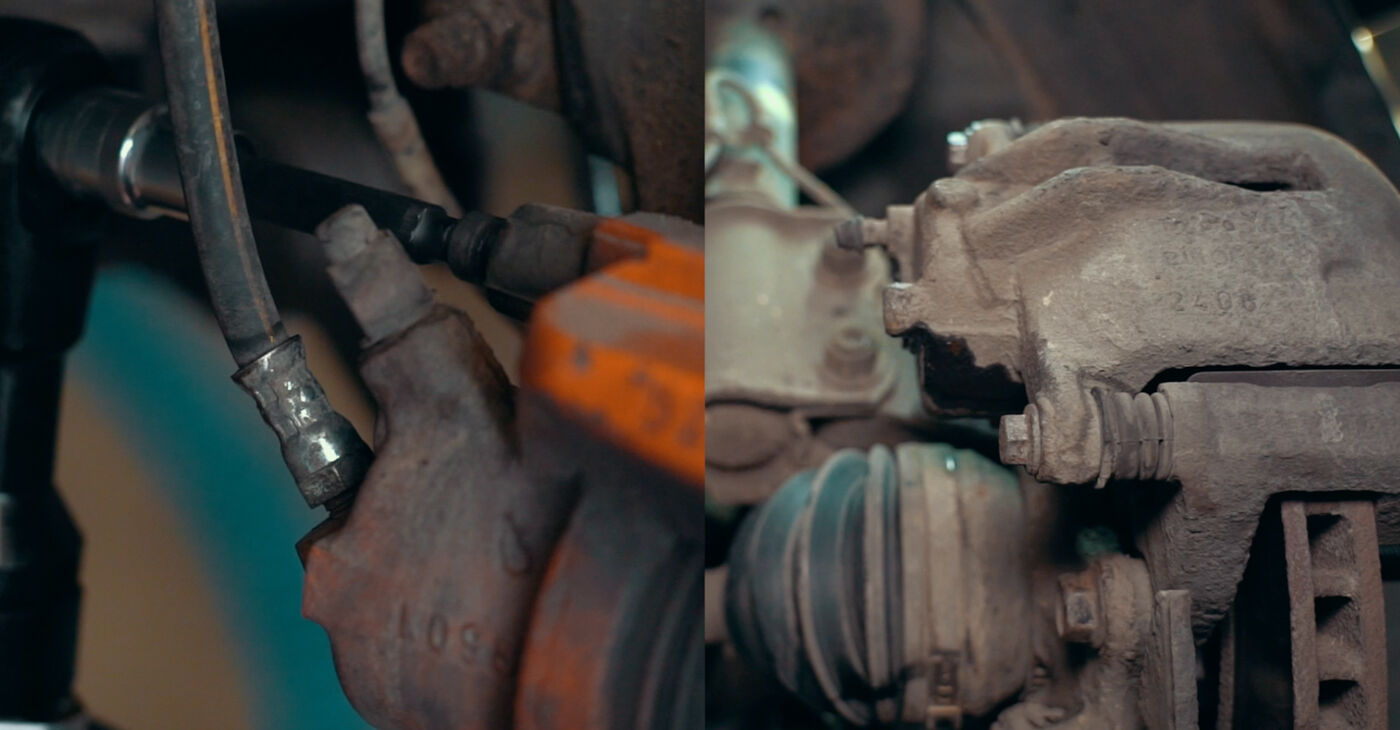 Unscrew the brake caliper fasteners
 - 6.
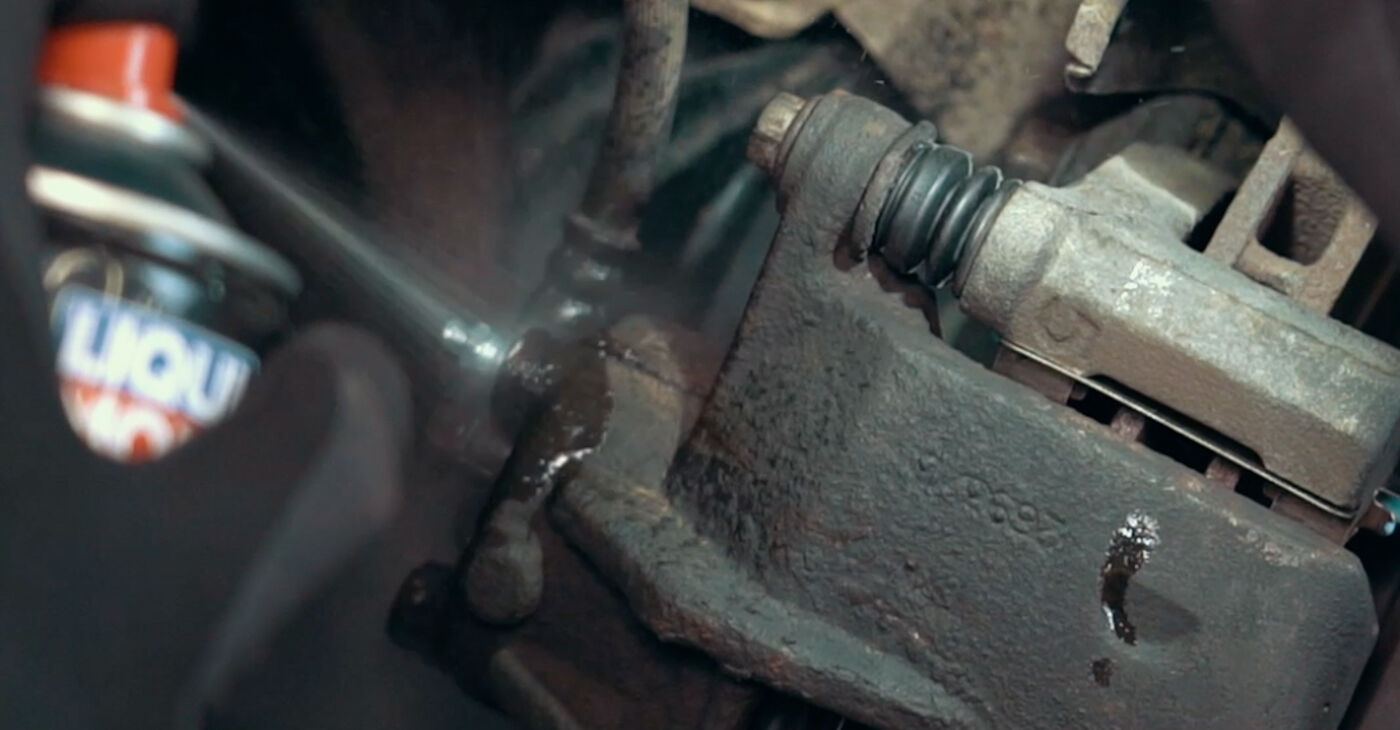
 If the caliper cannot be detached, insert a suitable tool between its housing and the brake disc
 - 7.
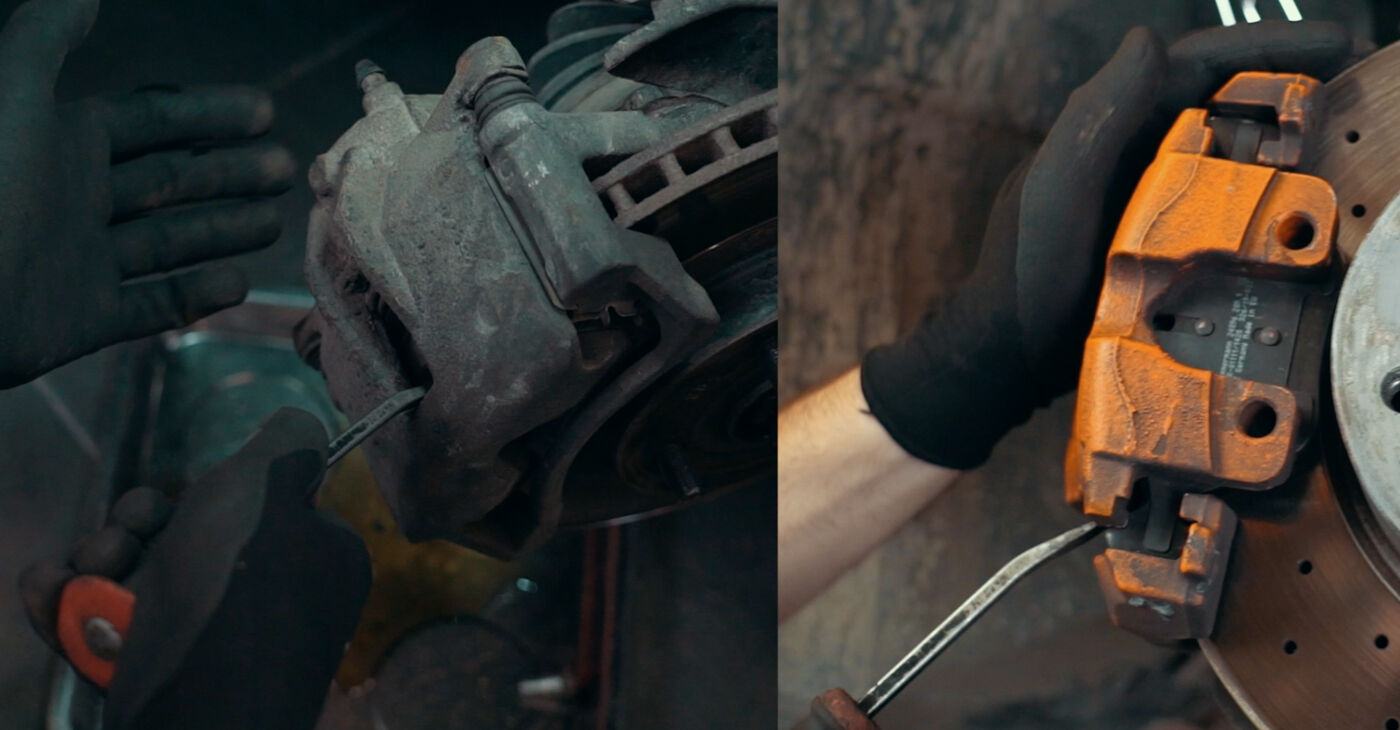 Press on the piston with the tool
 - 8.
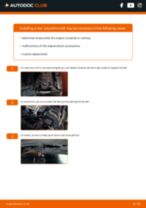
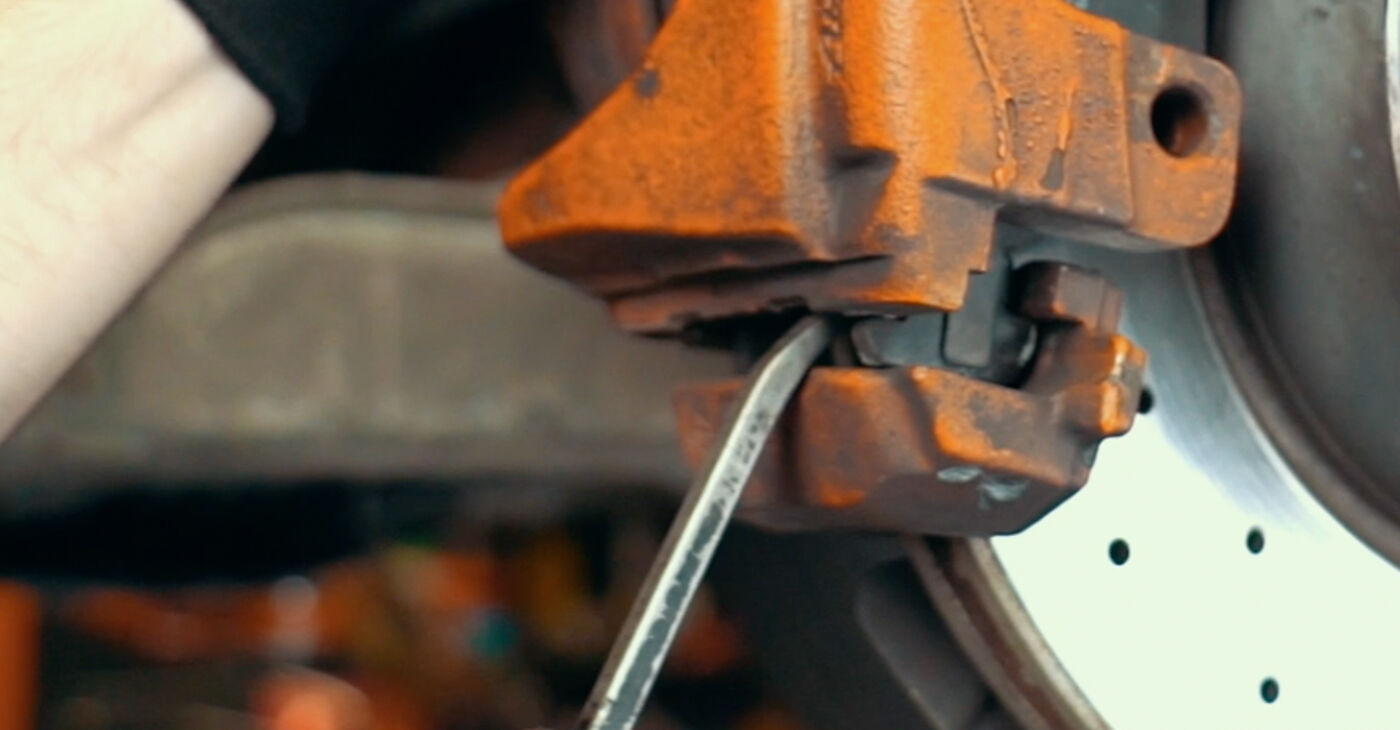 If this doesn’t work, pry the caliper housing off, supporting the tool on the caliper bracketBe careful!Do not leave the brake hose clamped for too long to prevent its deformationIf possible, use a brake line stopper
 - 9.Secure the caliper reliably and prepare a suitable wood block to prevent the piston from shooting out10.
 Press the air nozzle to the opening where the brake hose is connectedImportant!Do not create a fully tight connectionA little air bleeding will allow you to adjust the force that will push the piston out
 - 11.
 Supply air intermittently, watching the piston movementBe careful!The piston is going to pop out of its seal abruptly
 - 12.
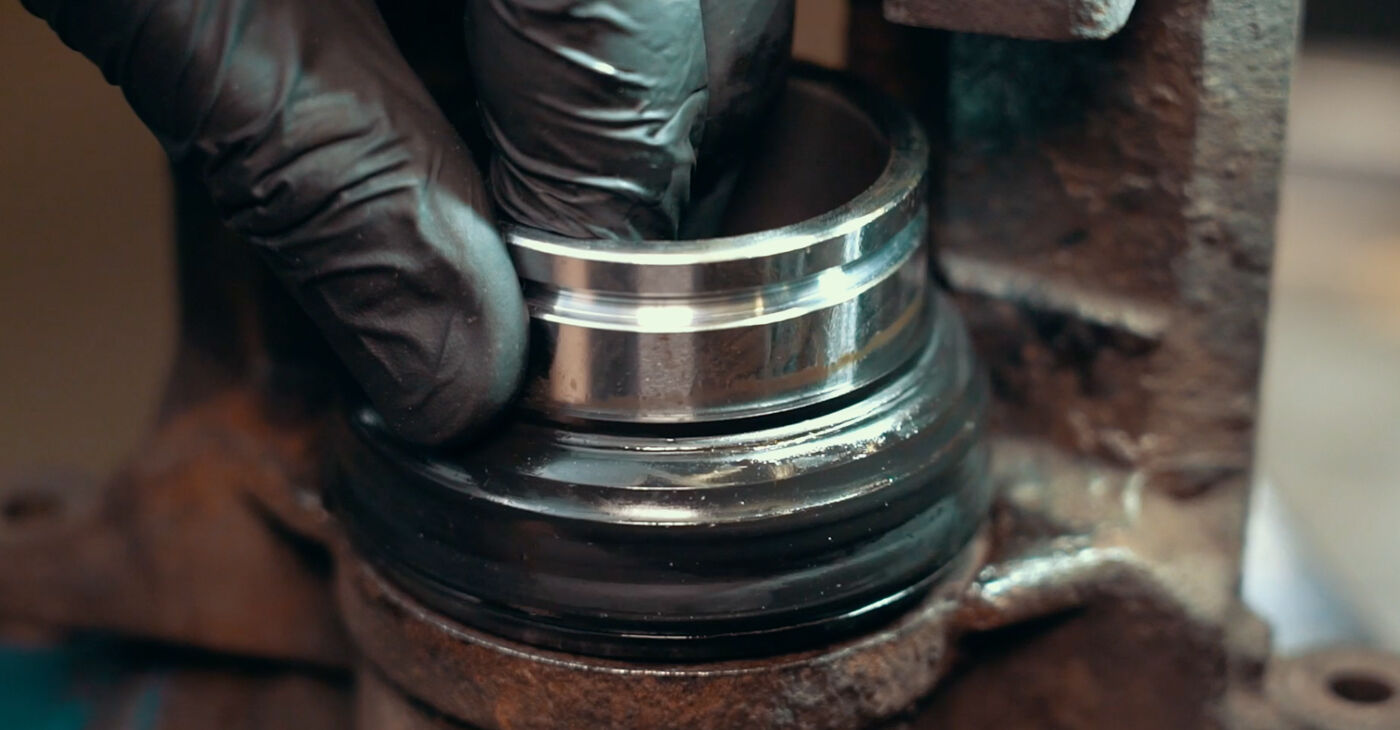
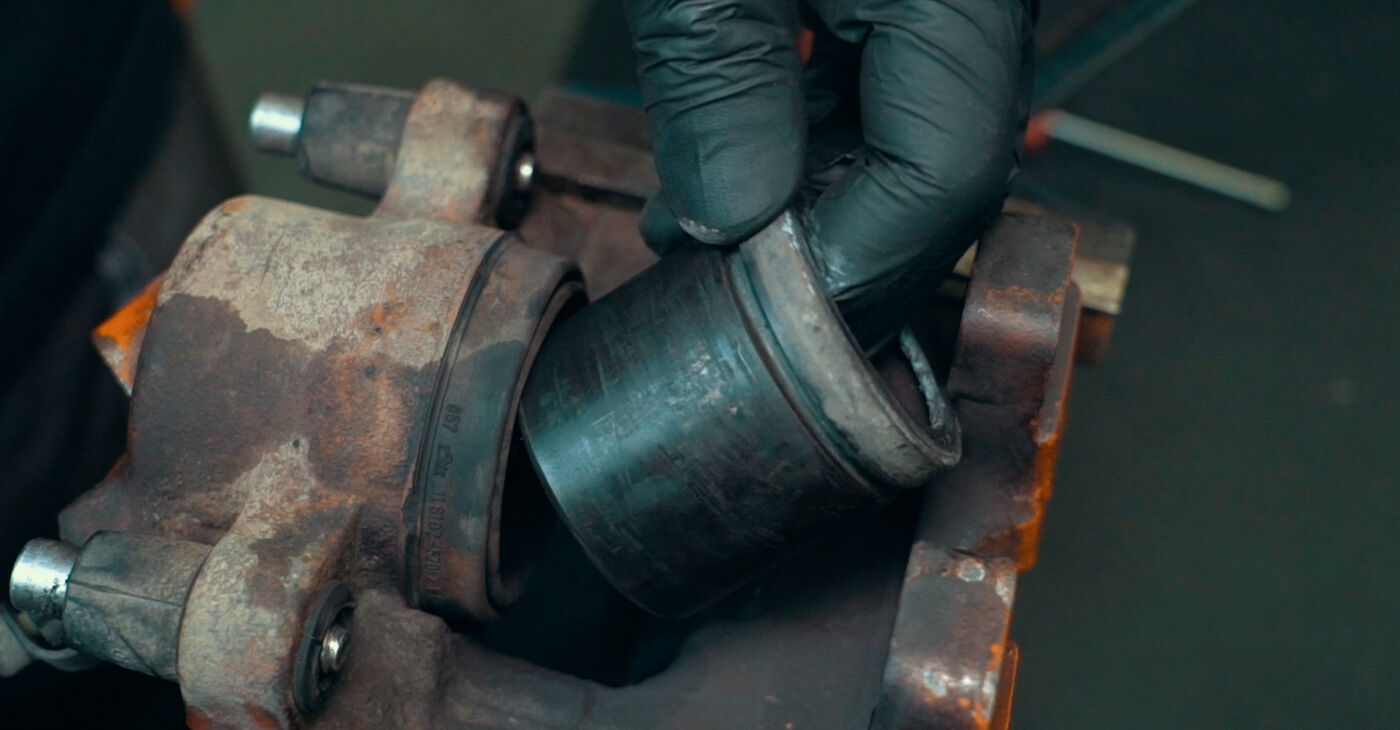 Pry up the boot and slide it off, then demount the pistonPlease note!The piston might be difficult to remove due to corrosionIn this case, you can also use the fluid pressure in the system to apply force to the piston
 - 13.
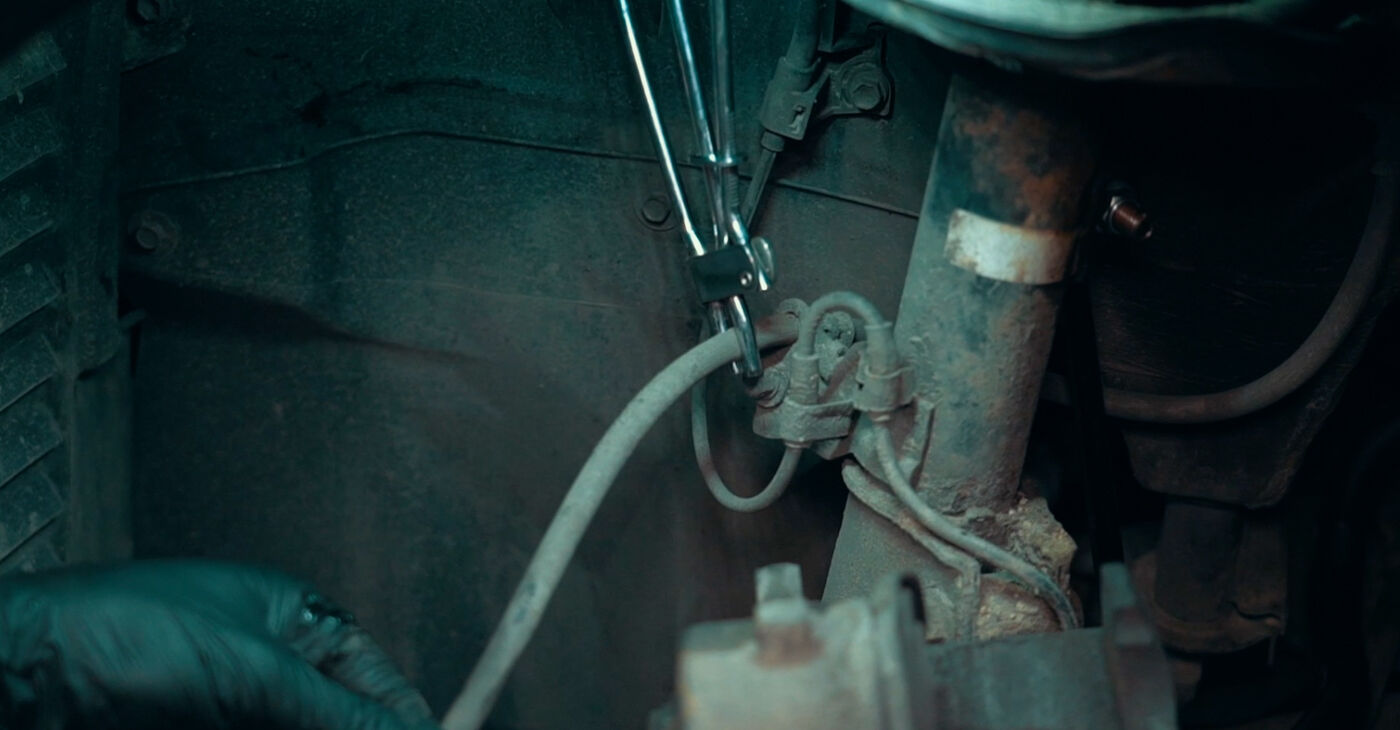 Pinch the brake hose and prepare a container to collect the brake fluid
 - 14.
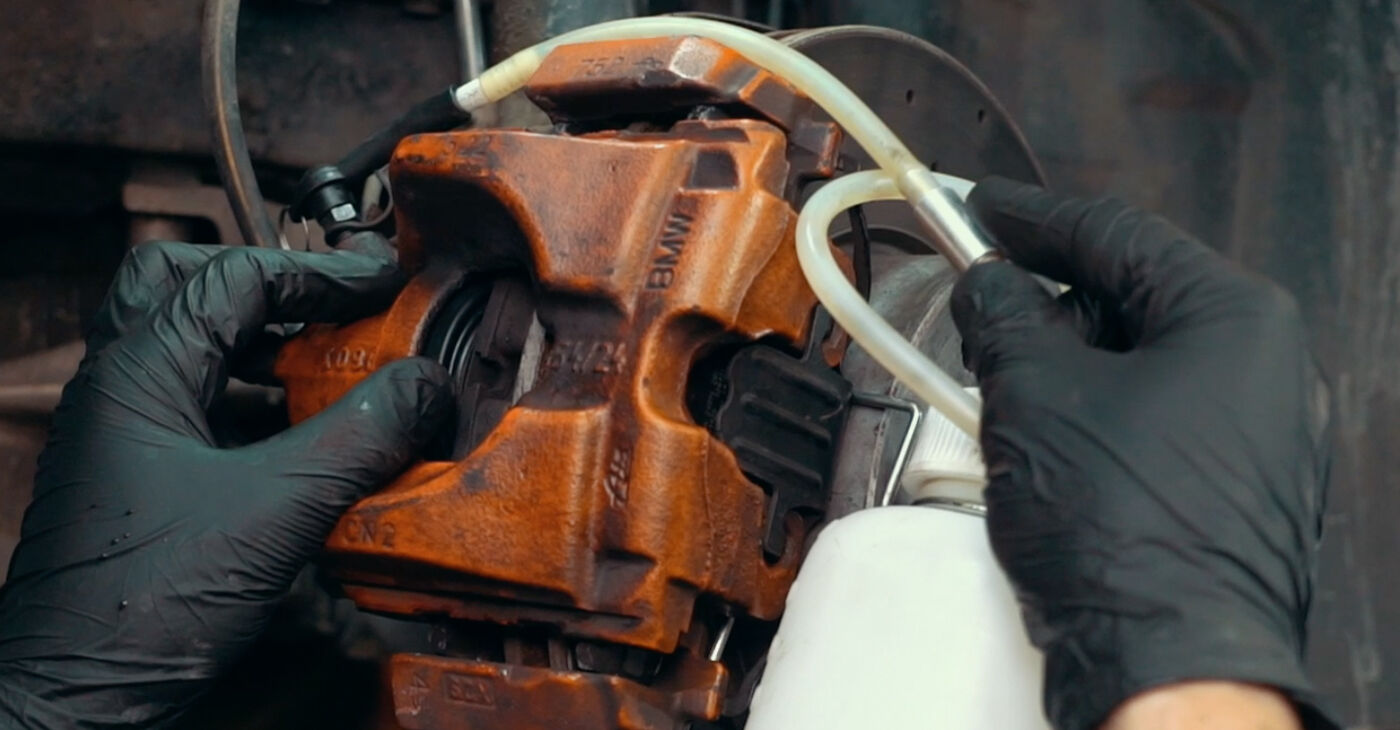
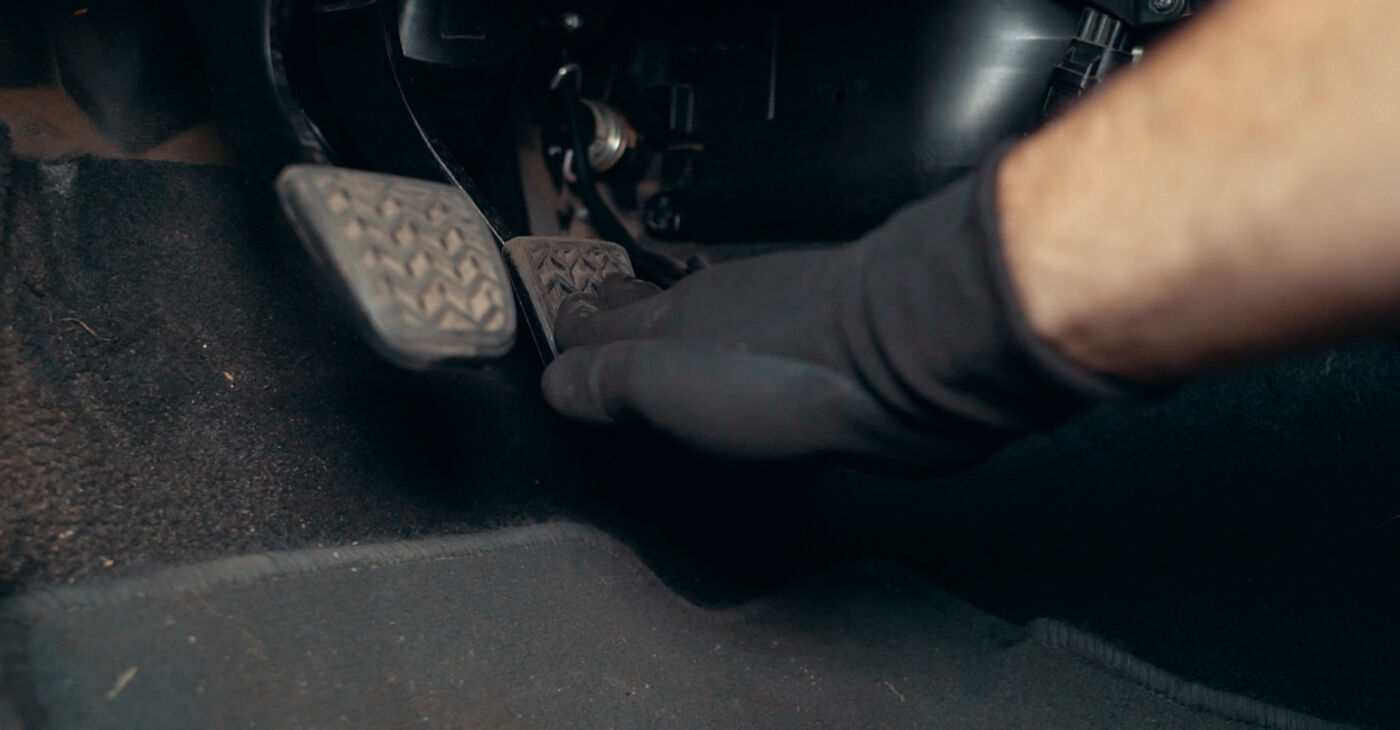
 Put the caliper in the container and connect the brake hose to itAUTODOC experts recommend:To carry out this procedure, you’ll need someone to assist youOne of you will control how far the piston is moving out, and the other will press the brake pedal
 - 15.
 Remove the clamp from the hose to allow the brake fluid to work while the pedal is pressed
 - 16.
 To prevent the piston from popping out abruptly, place the brake pads in front of it
 - 17.
 While pressing the brake pedal, check the brake fluid level in the reservoir. This is necessary to prevent air from getting into the system
 - 18.
 When you hear a distinctive sound or see traces of brake fluid, check whether the piston can be removed easily
 - 19.
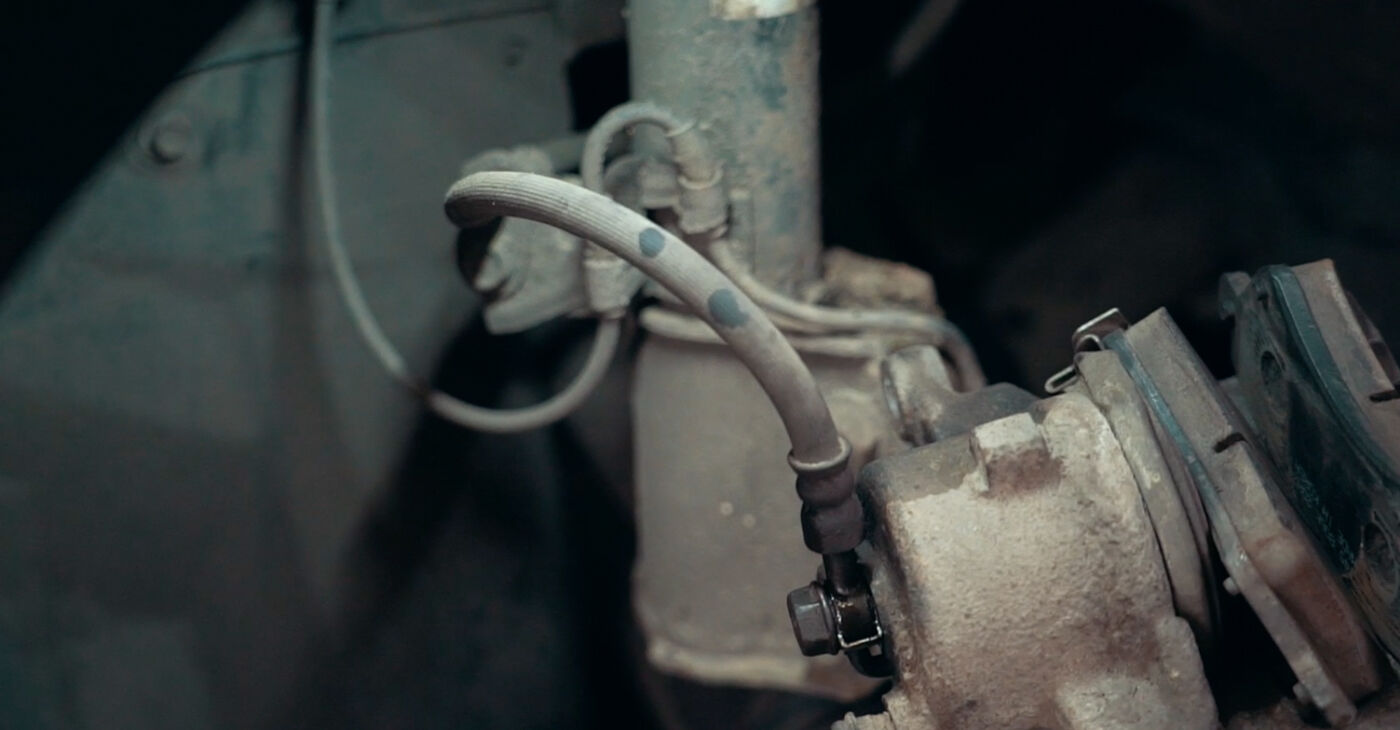
 Pinch the brake hose to prevent brake fluid from leaking
 - 20.
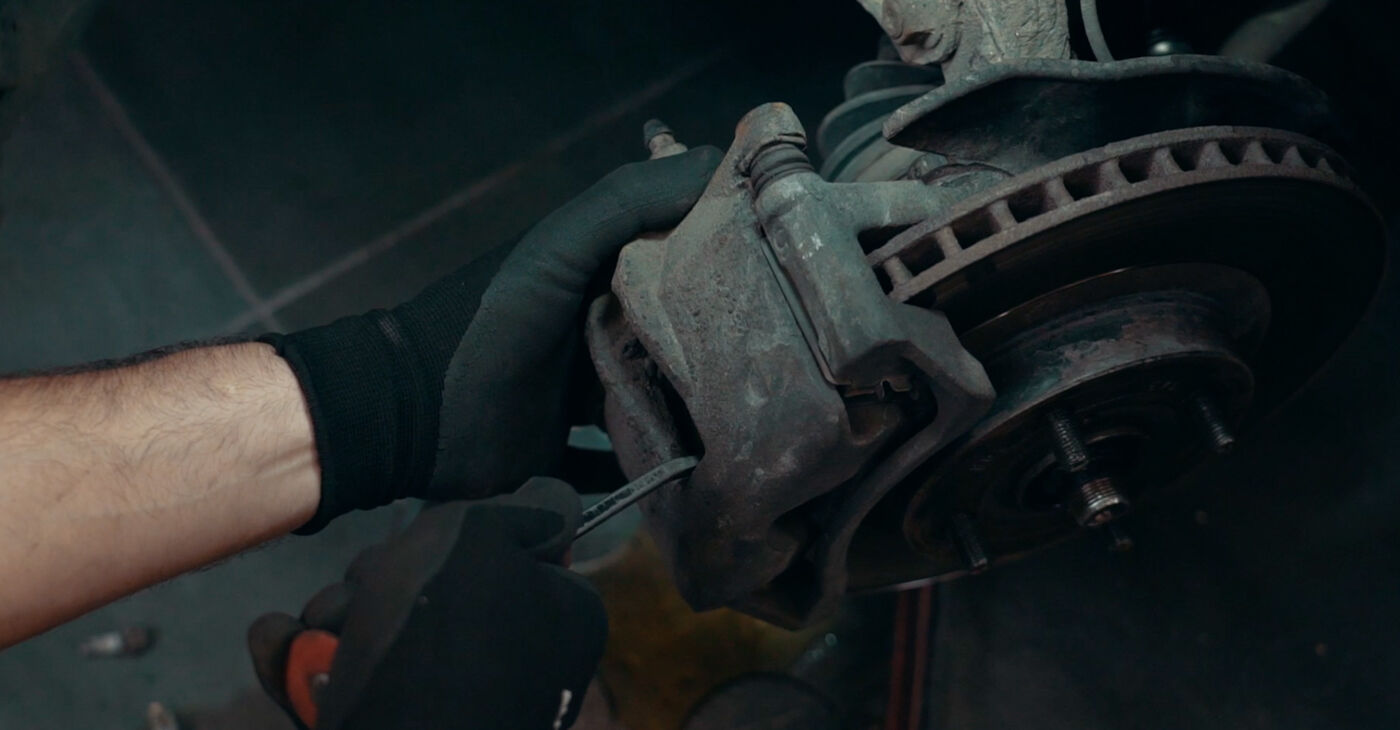
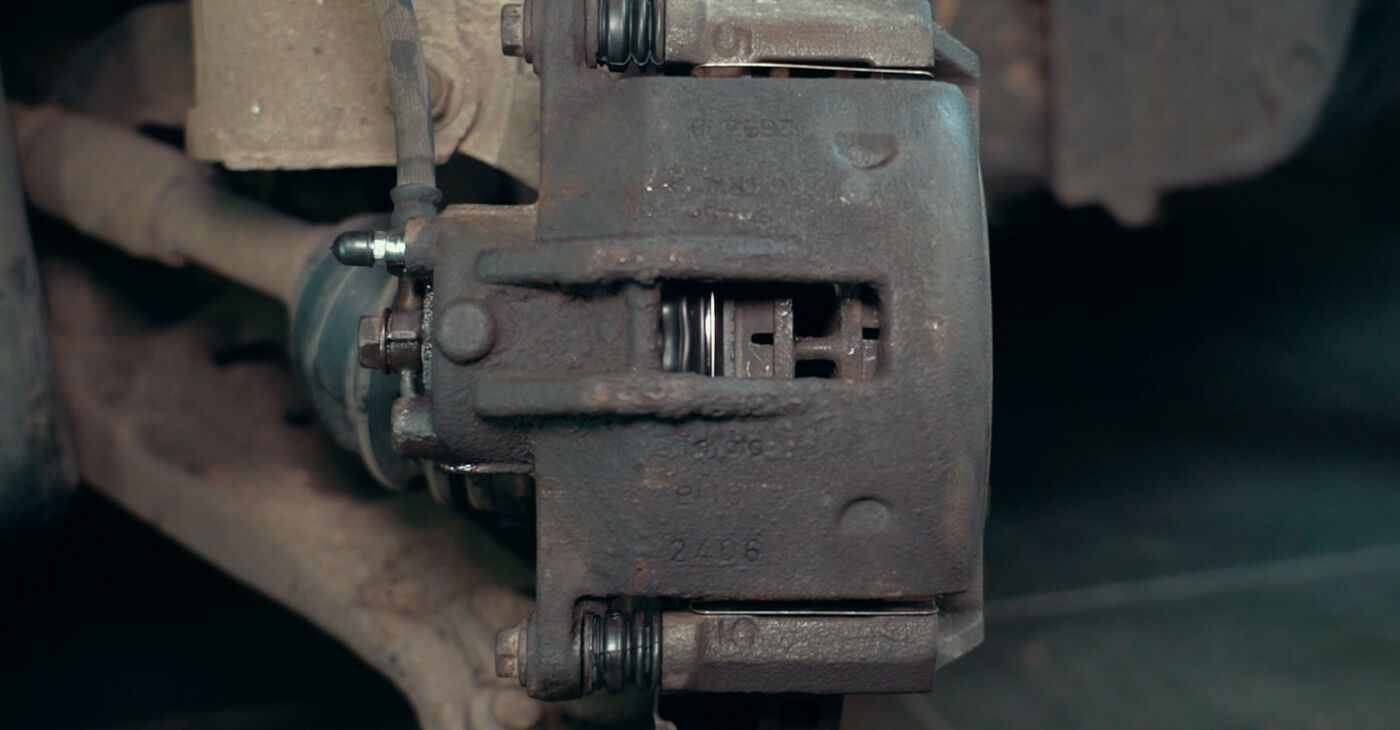
 Remove the brake pads, extract the piston, and disconnect the caliper
 - 21.
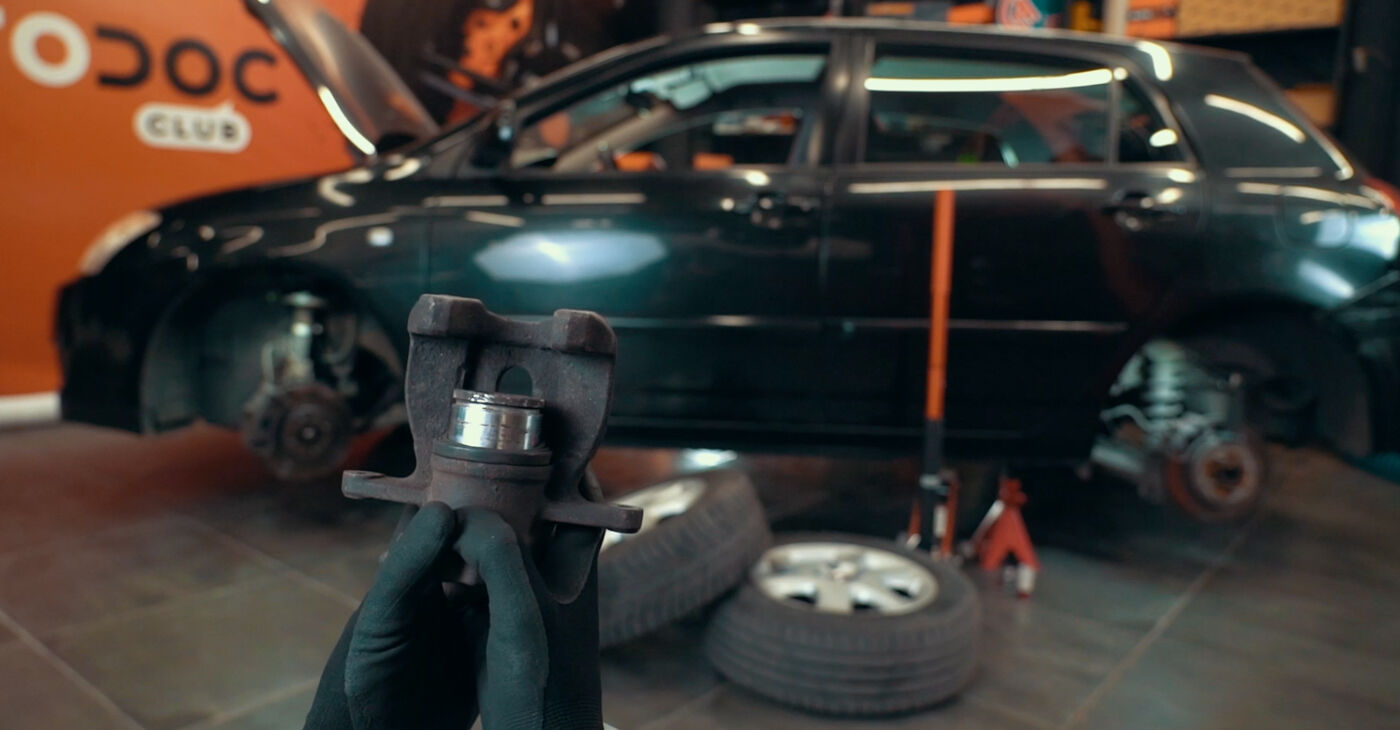
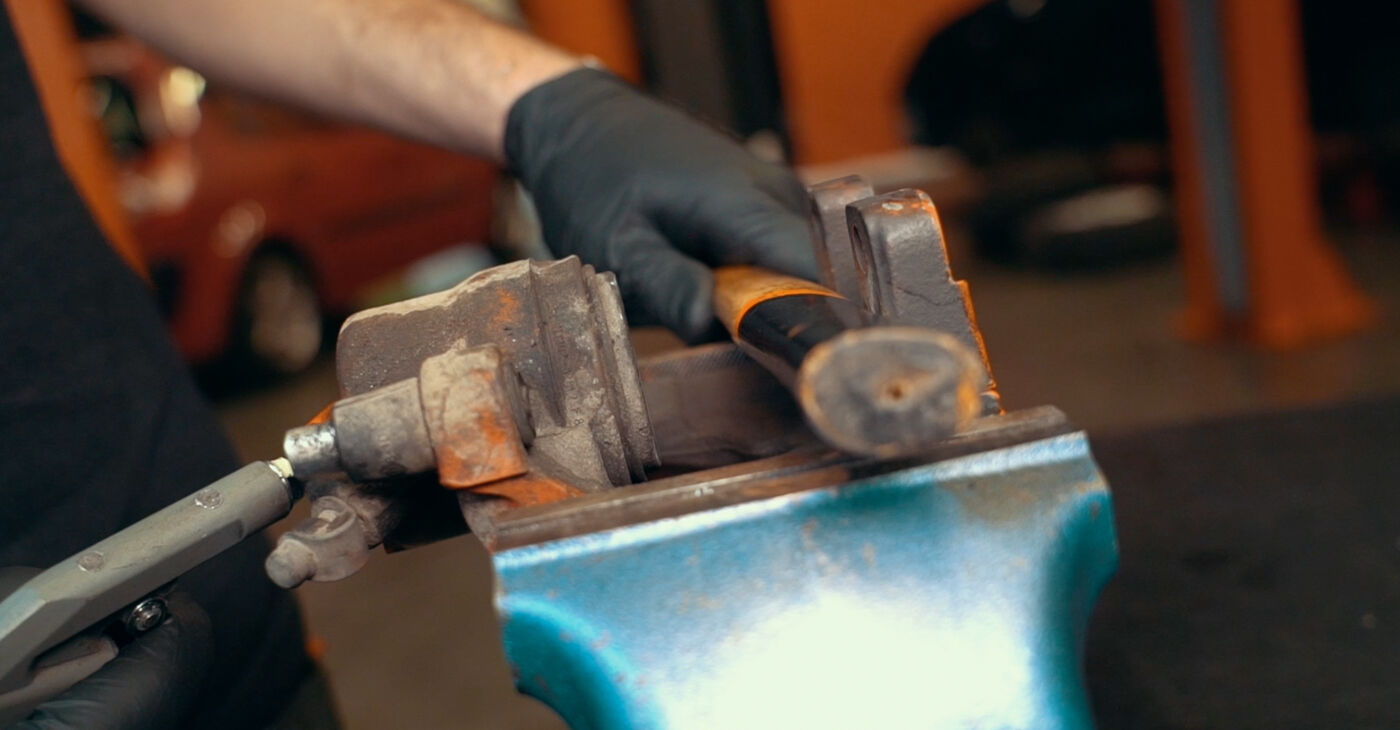
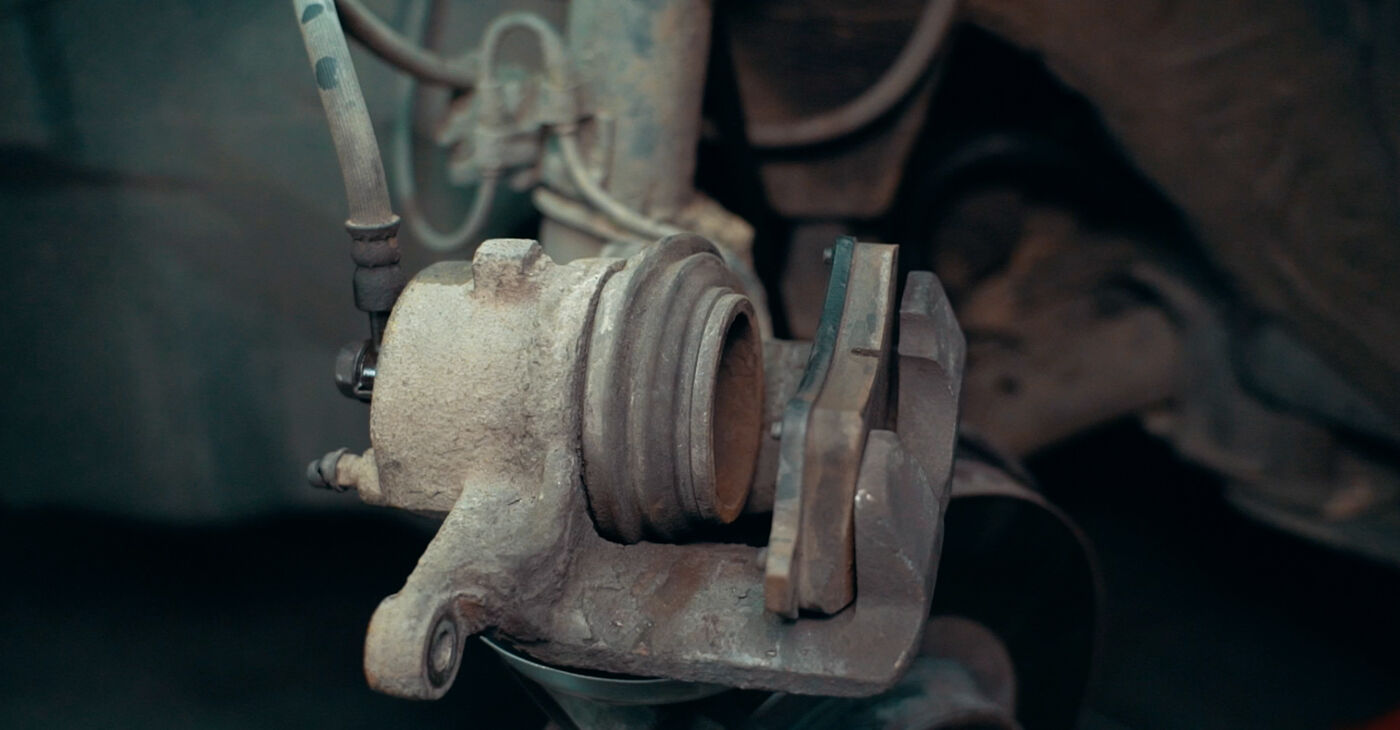
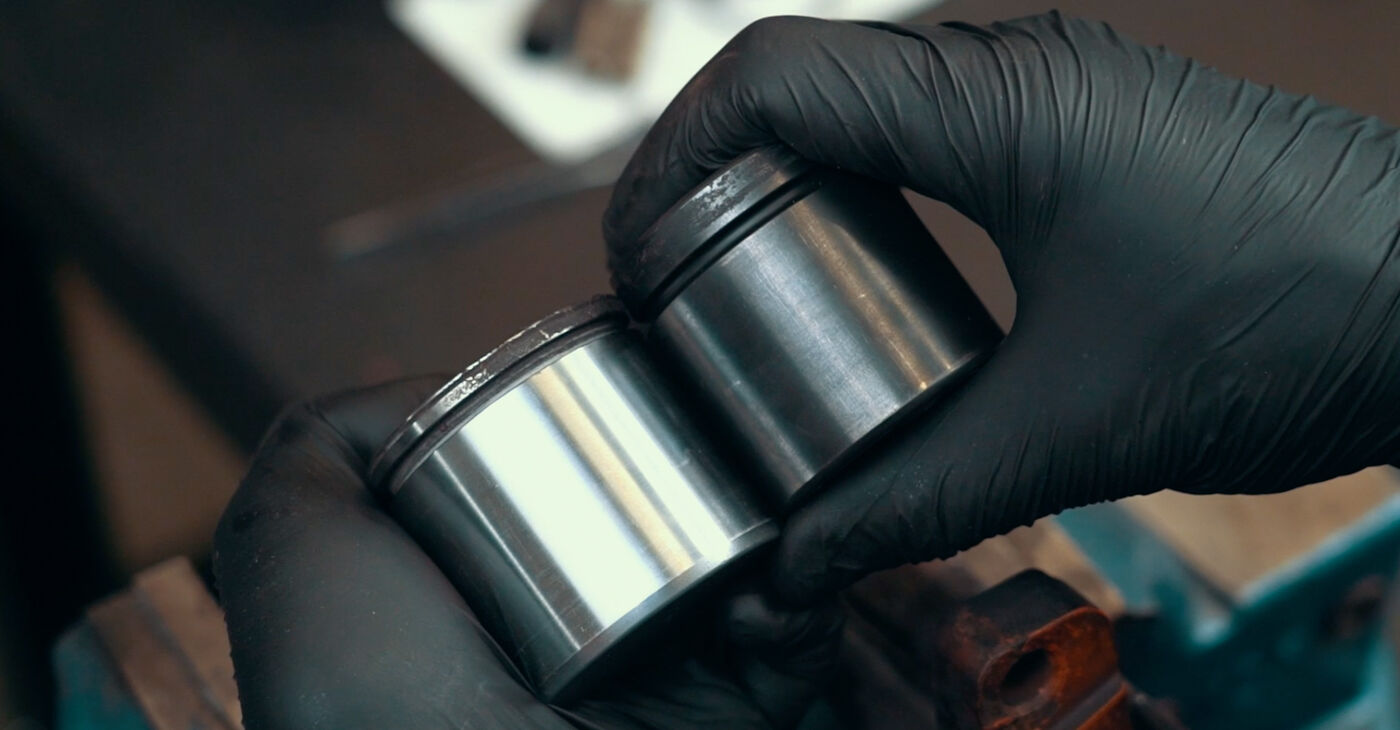
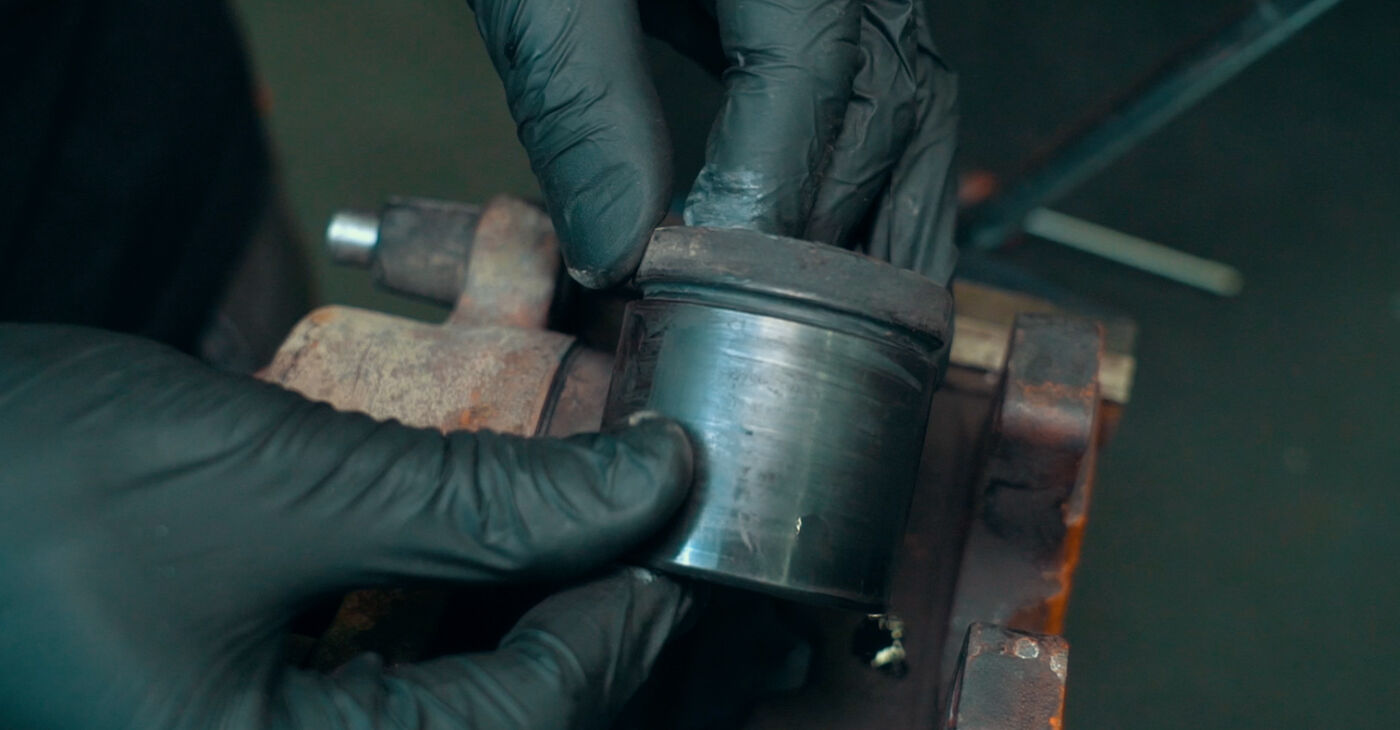 Check the condition of the piston and caliper
 - 22.
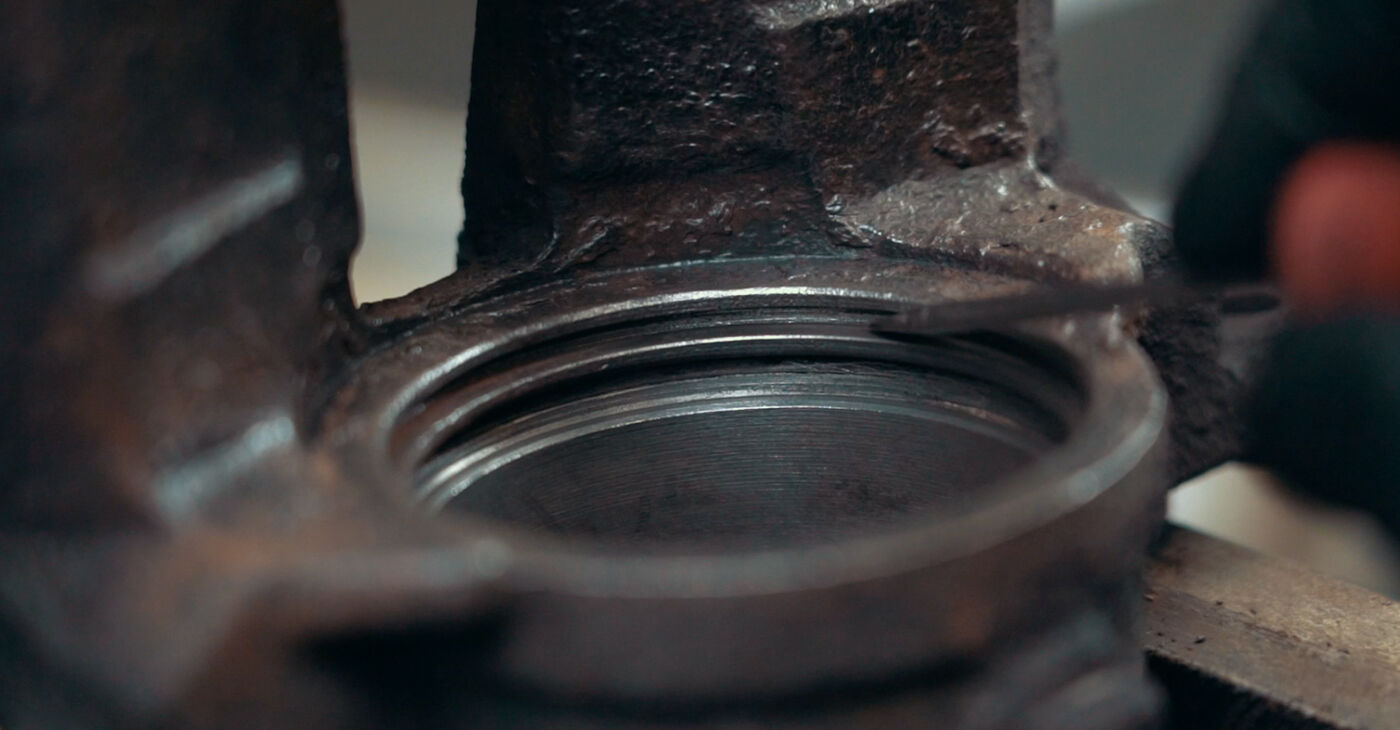
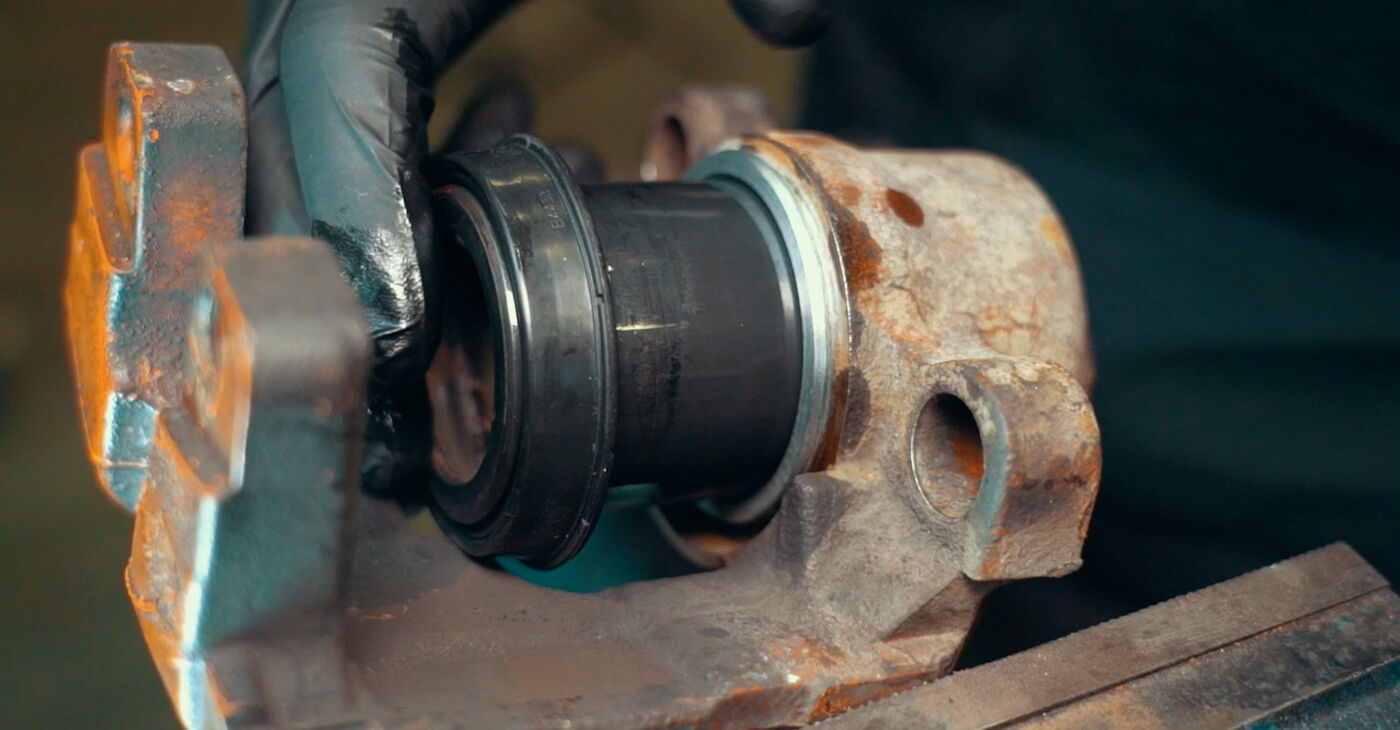
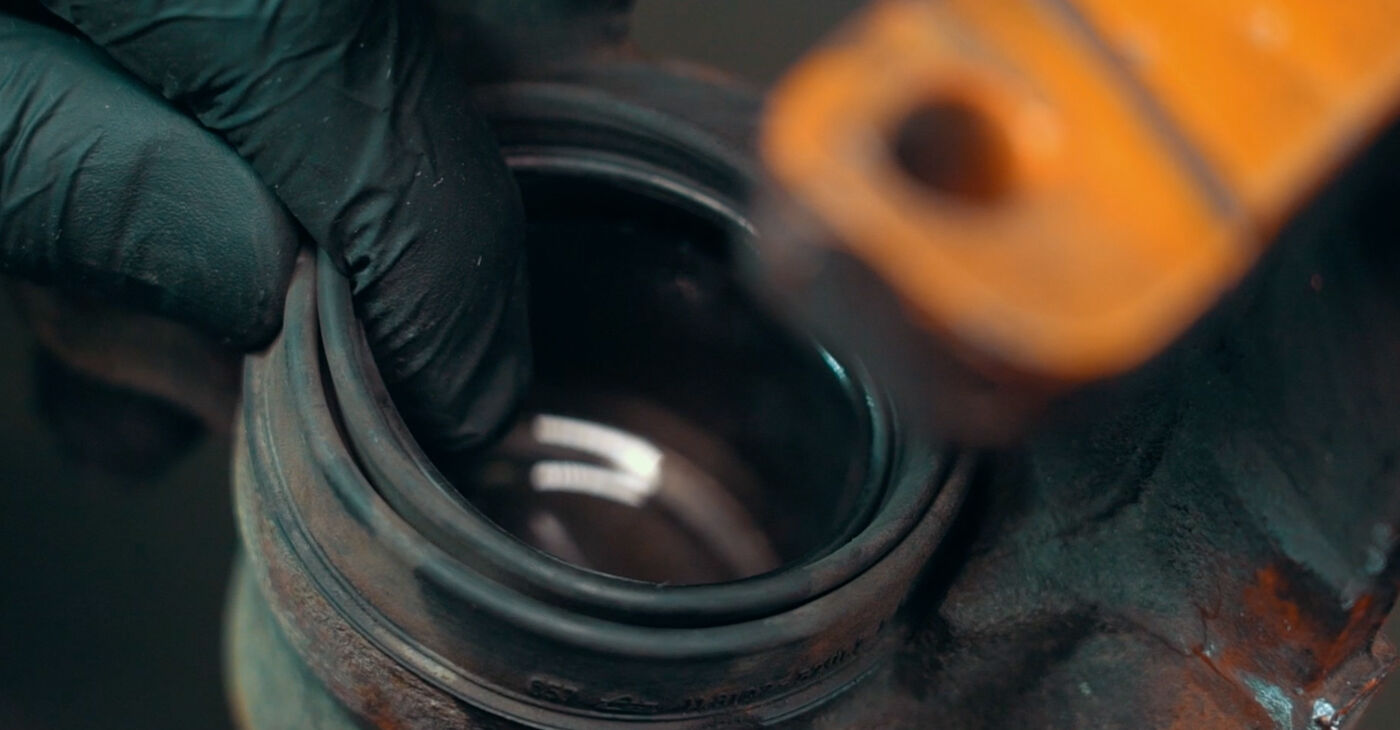 Examine the way the dust boot is attached to the caliper housingPlease note!It might be secured with a retaining ring or simply fitted into the mounting seatFor more reliable fastening the dust boot may have a metal base
 - 23.
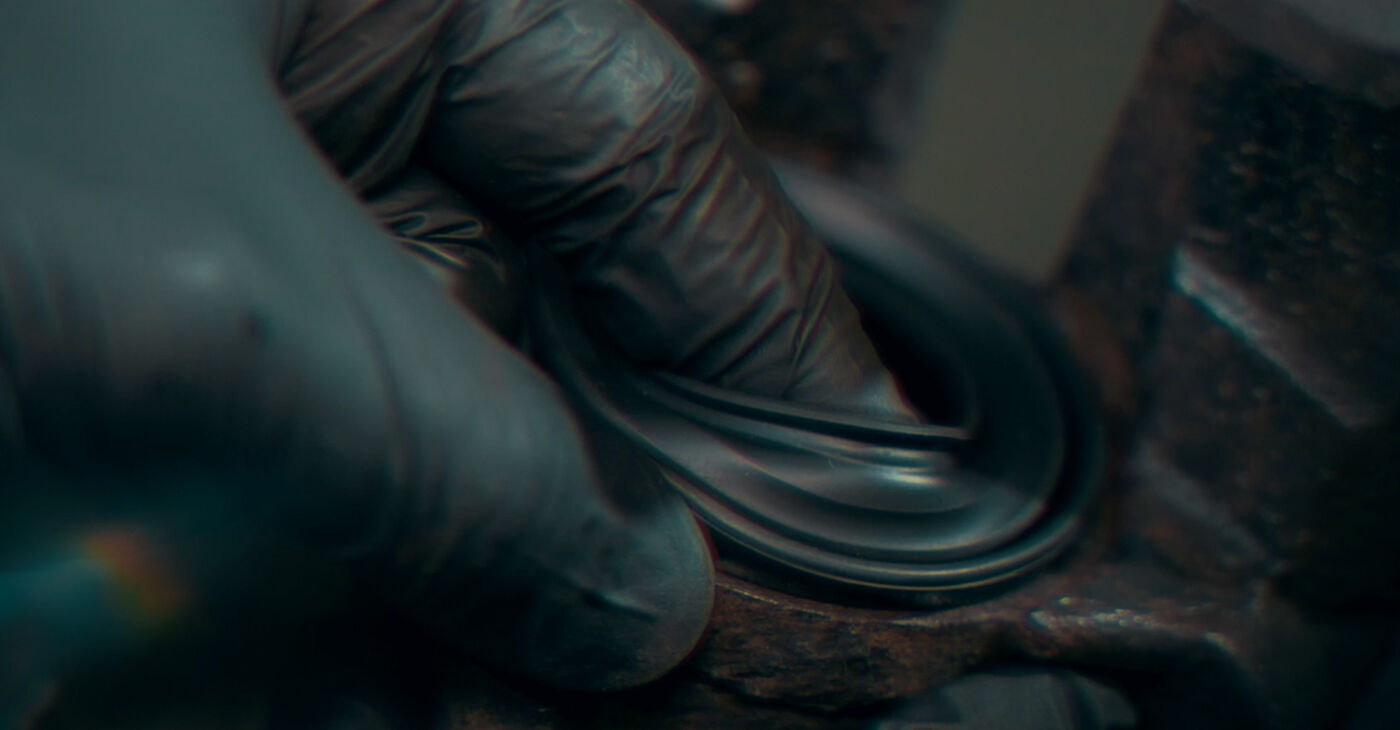
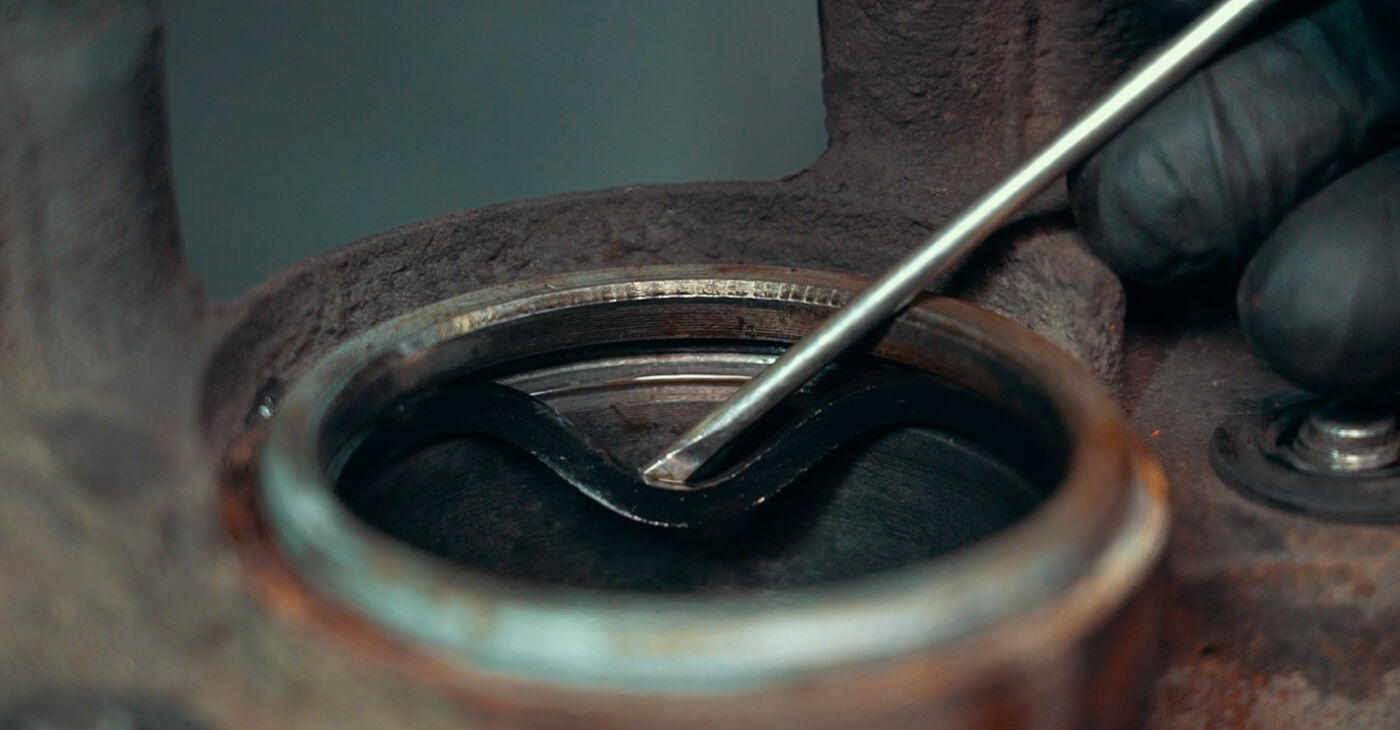 Remove the seal located between the caliper housing and the piston
 - 24.
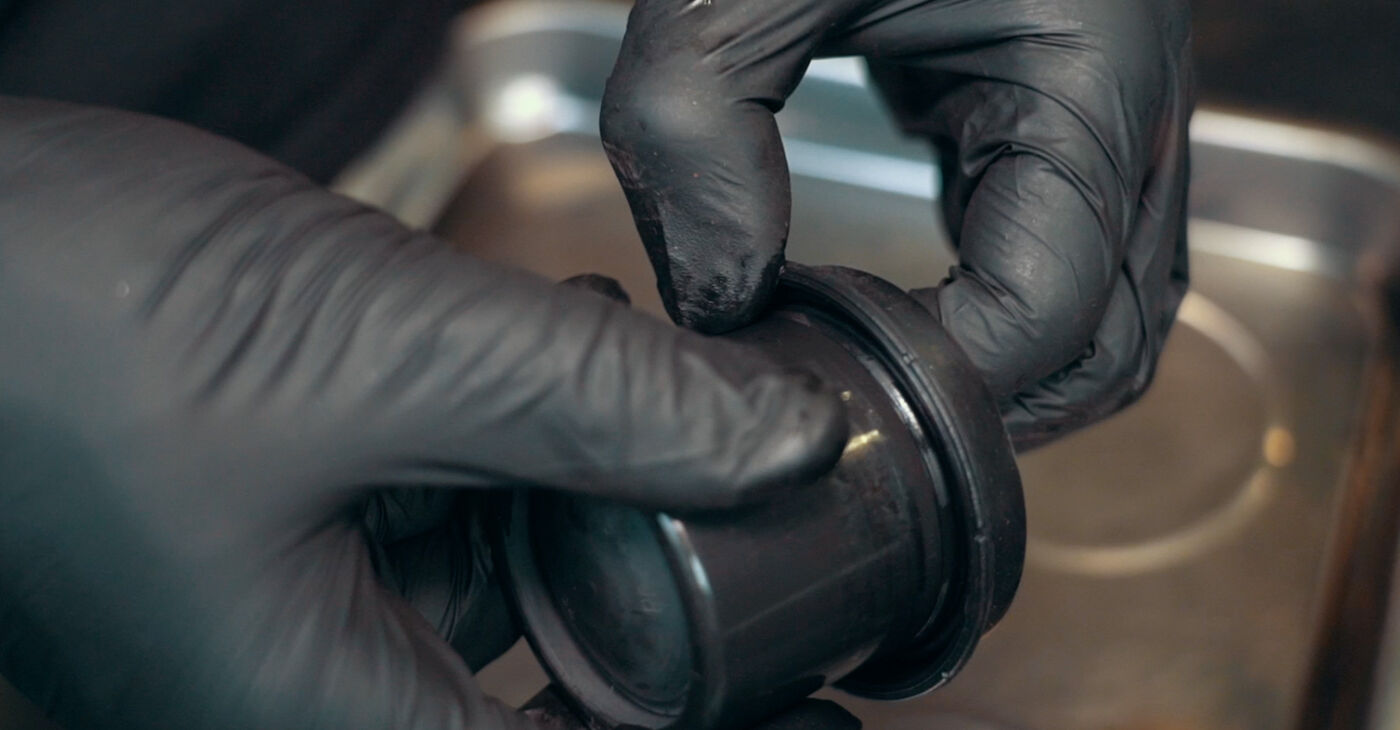
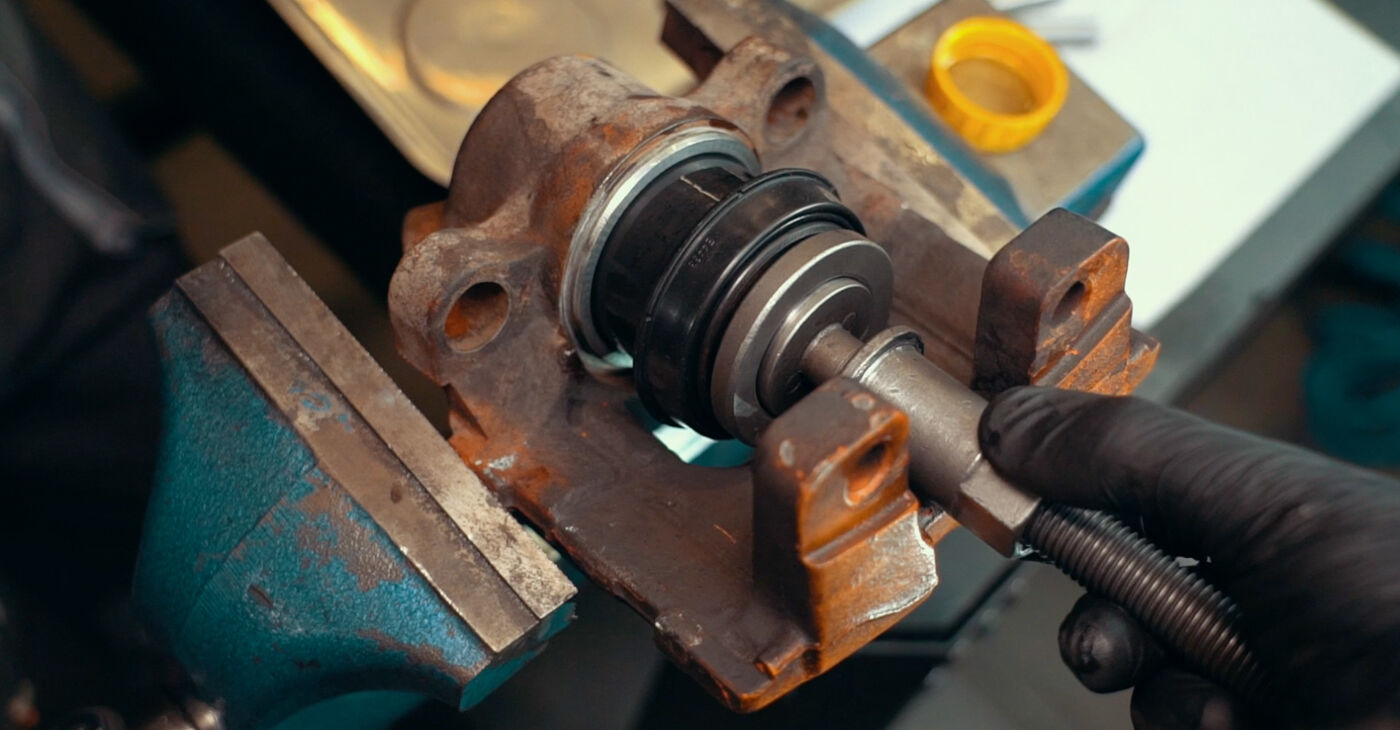
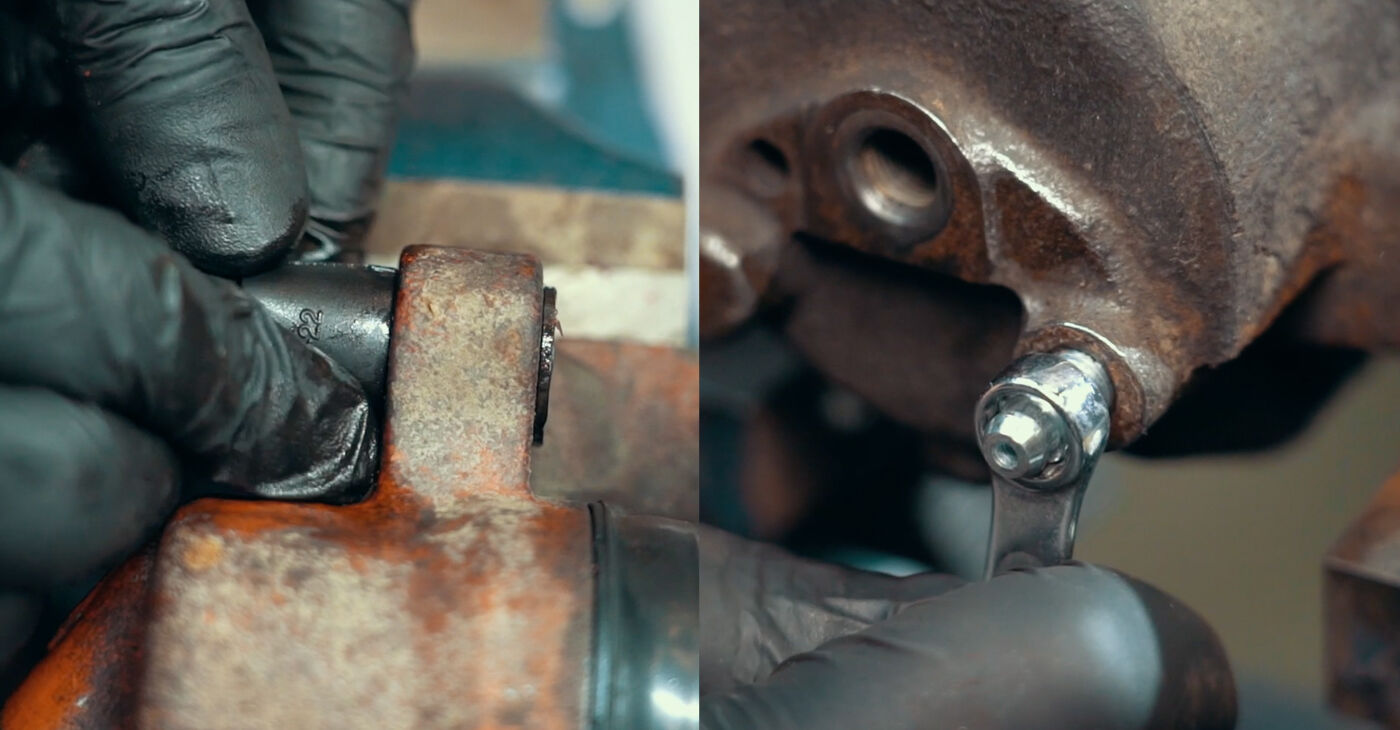
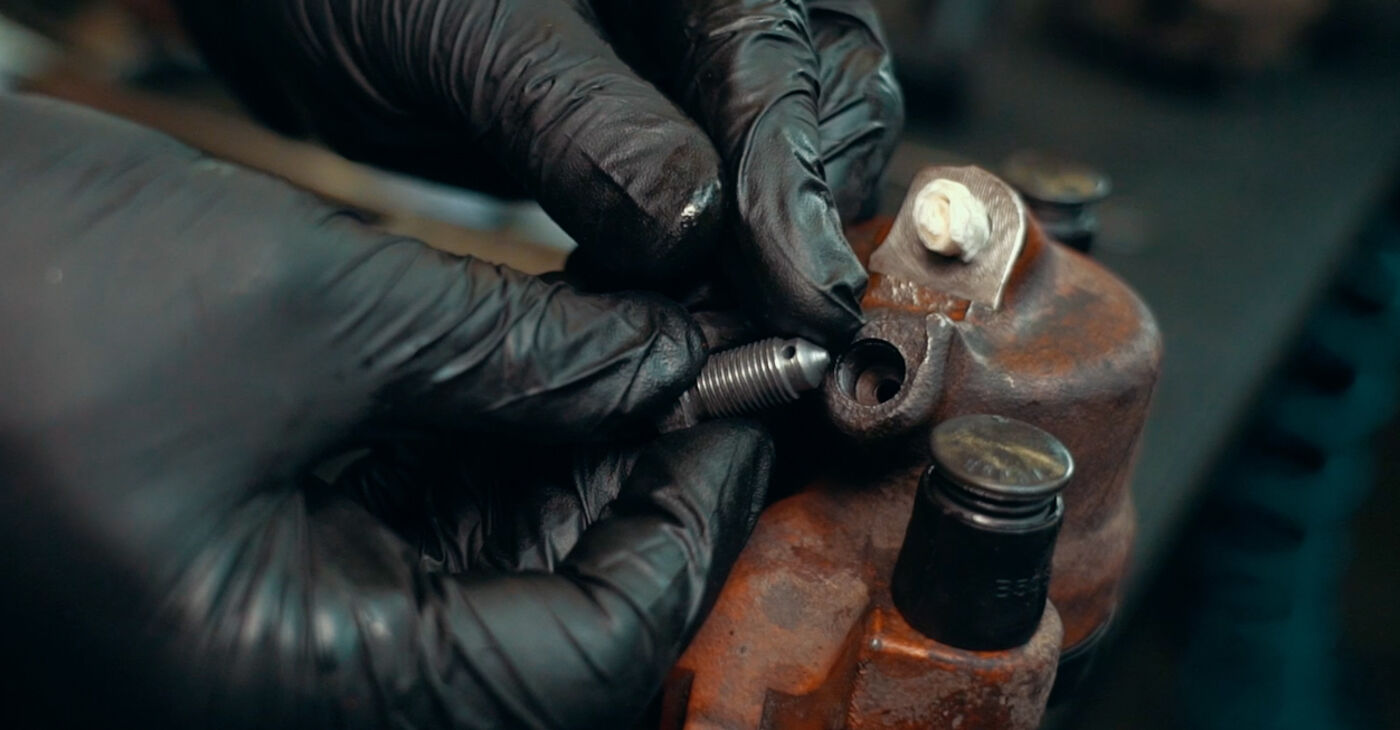
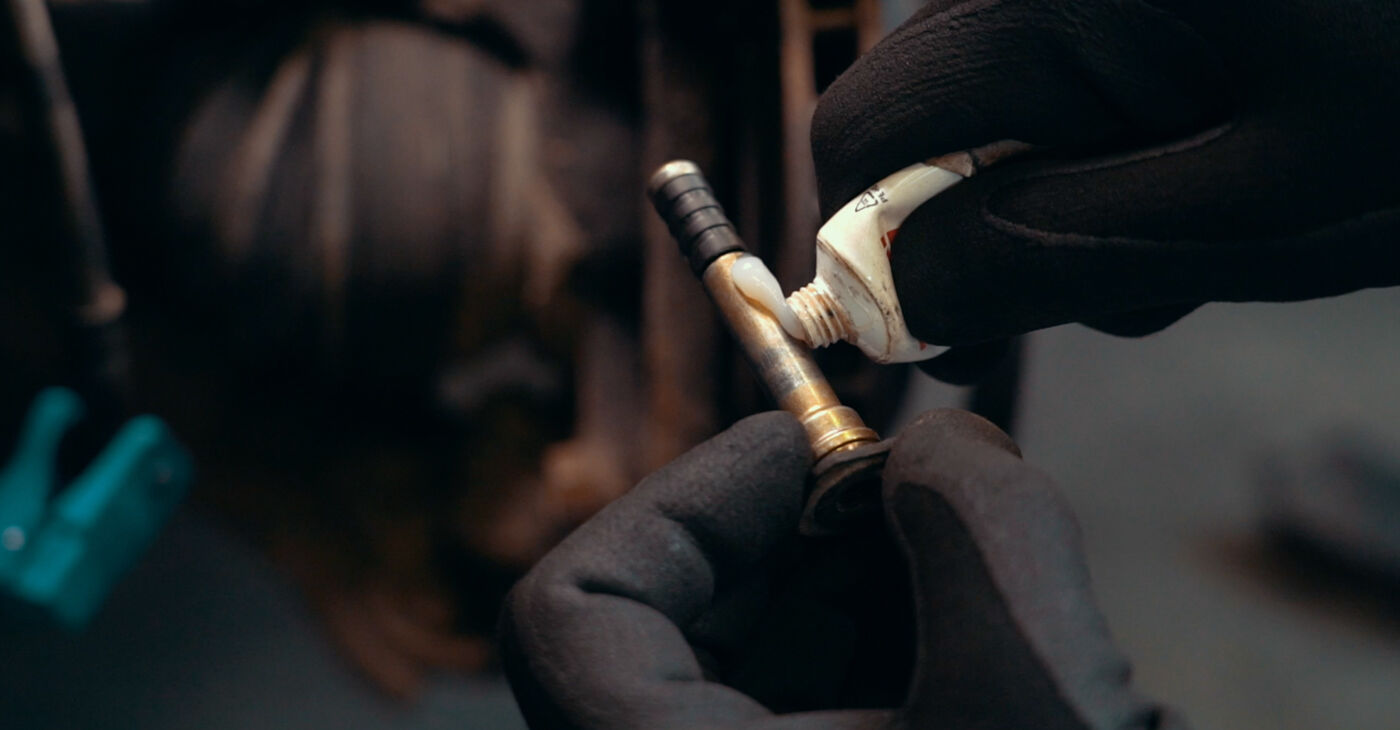
 Dismantle all the parts included in the repair kit, like guide pins and their fasteners and dust boots
 - 25.
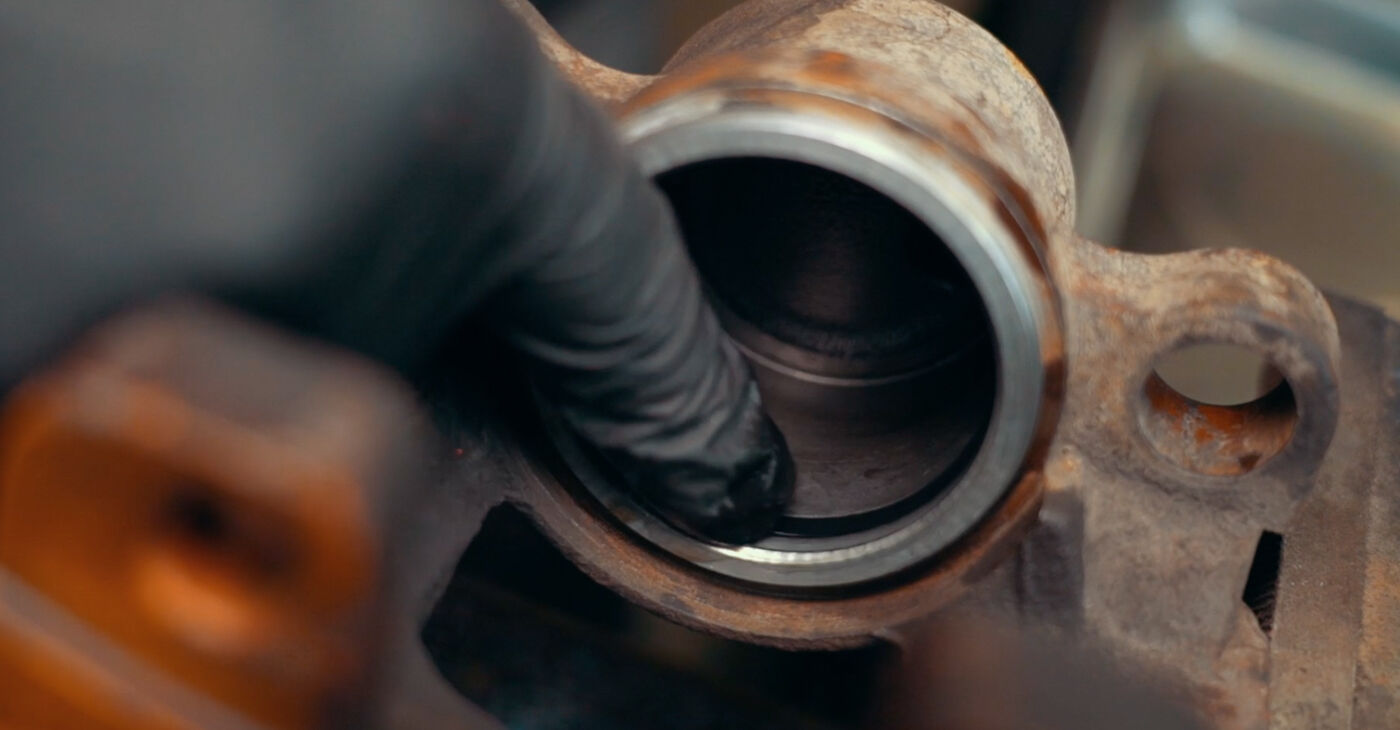
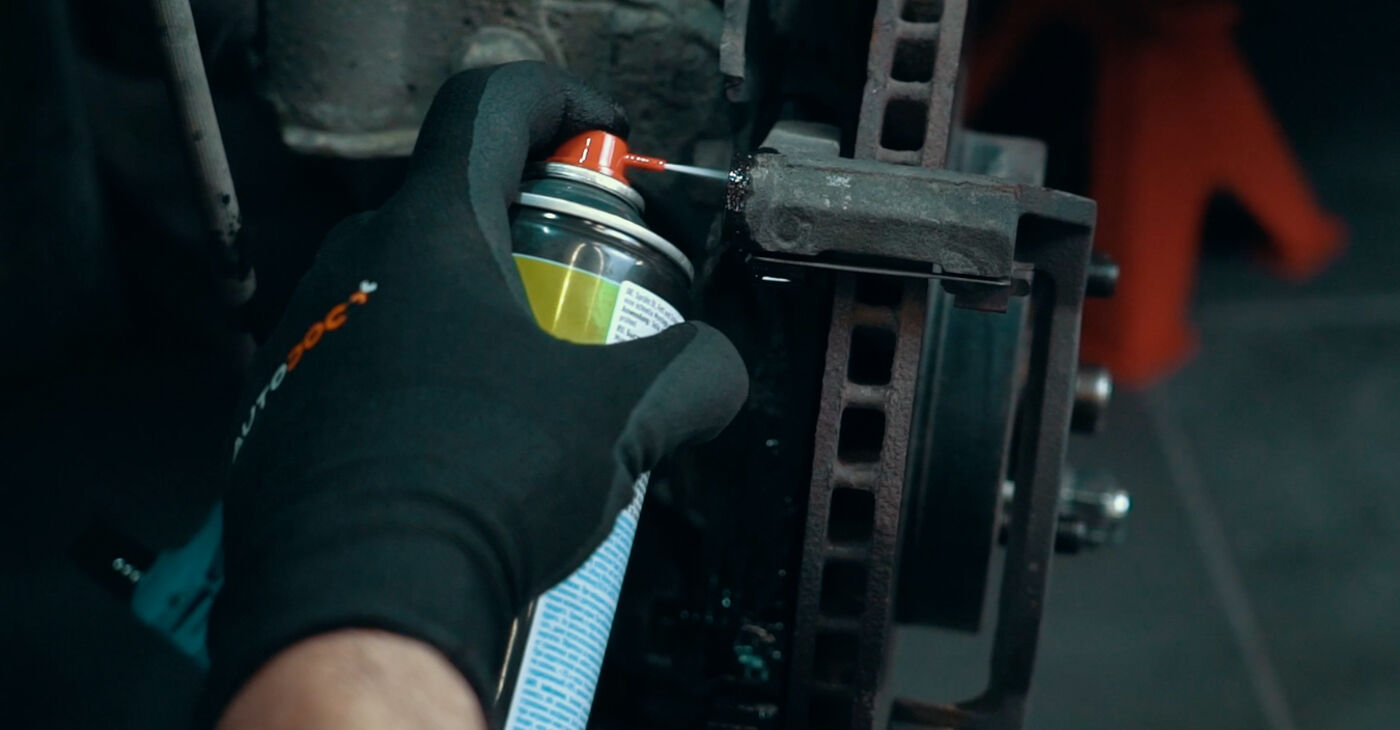
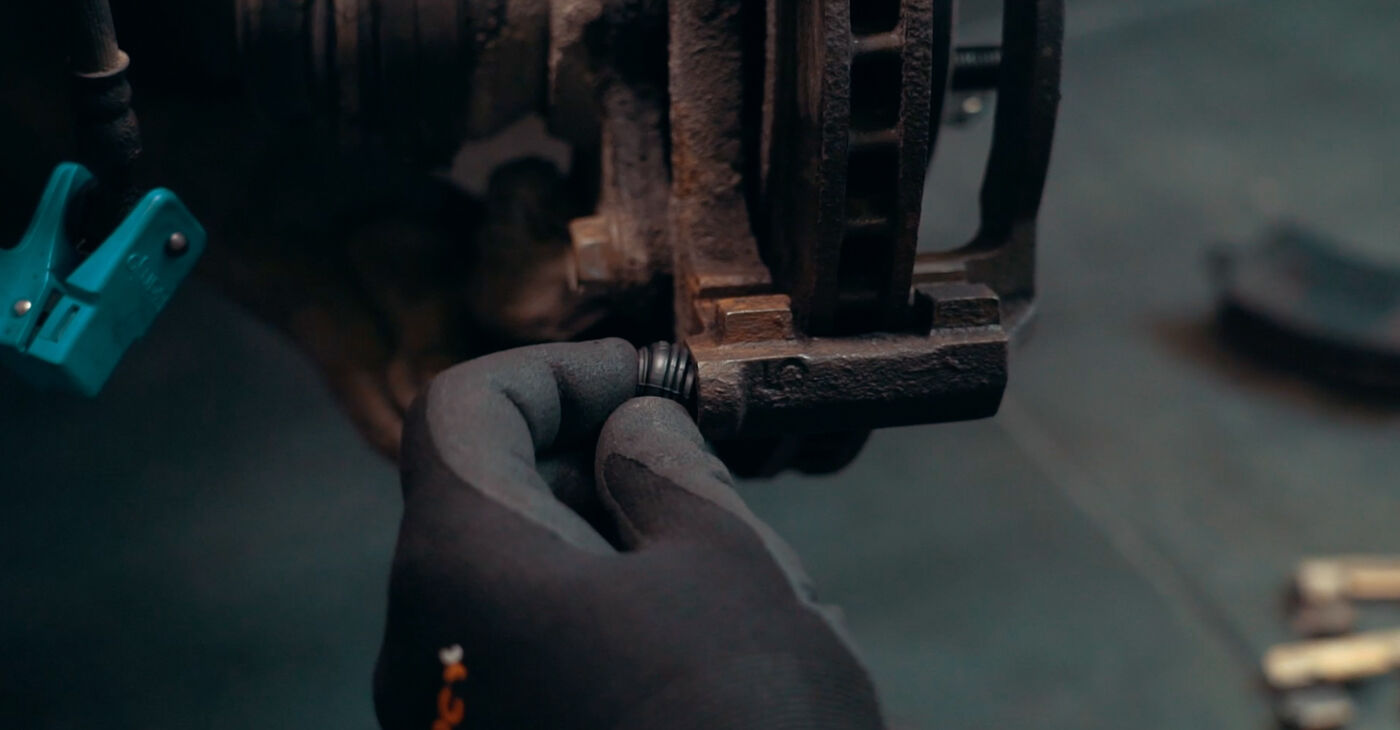
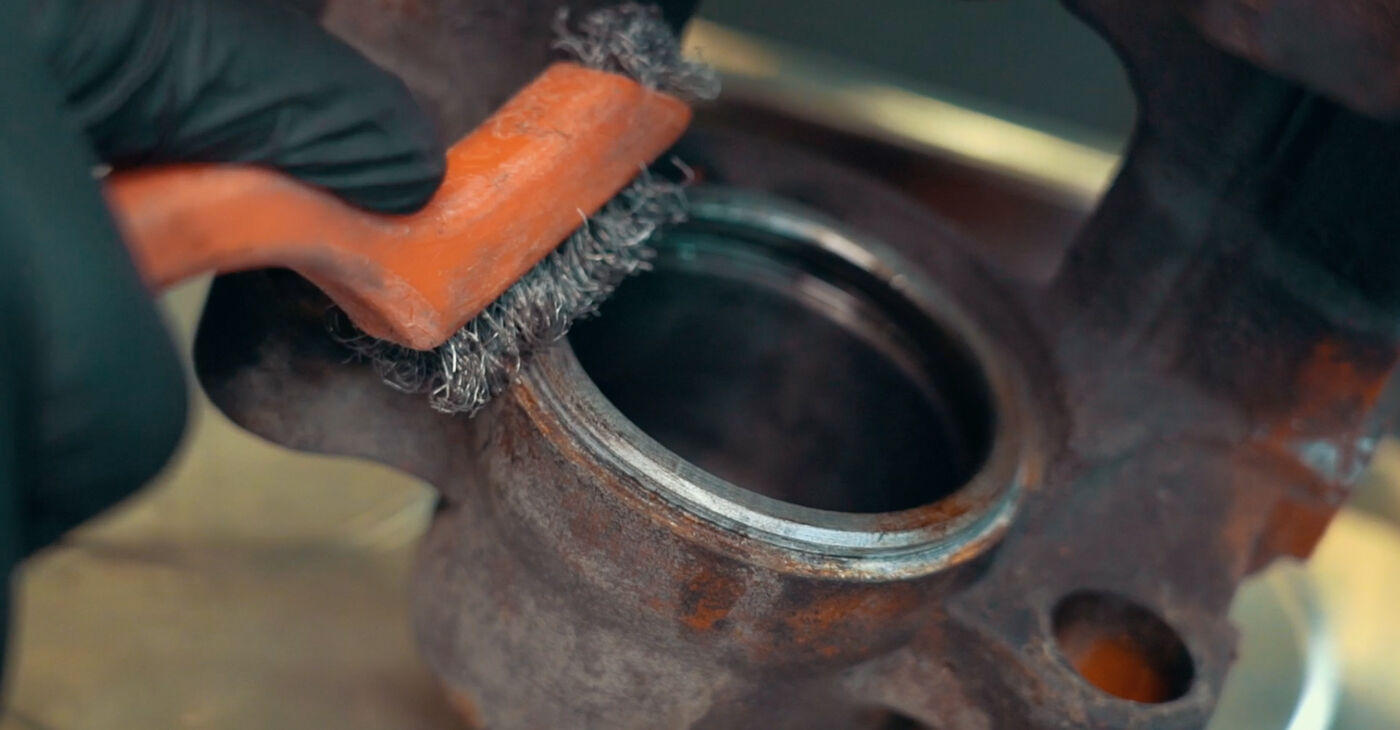 Clean the brake caliper body and all mounting seats
 - 26.
 If the dust boot is fitted inside the component, clean its mounting seat thoroughlyImportant!Some pistons have a factory-applied anti-corrosion coating and are usually a uniform dark colourThe working surface of the piston must be smooth and free of corrosion and damage
 - 27.
 If there are any defects, replace the piston
 - 28.
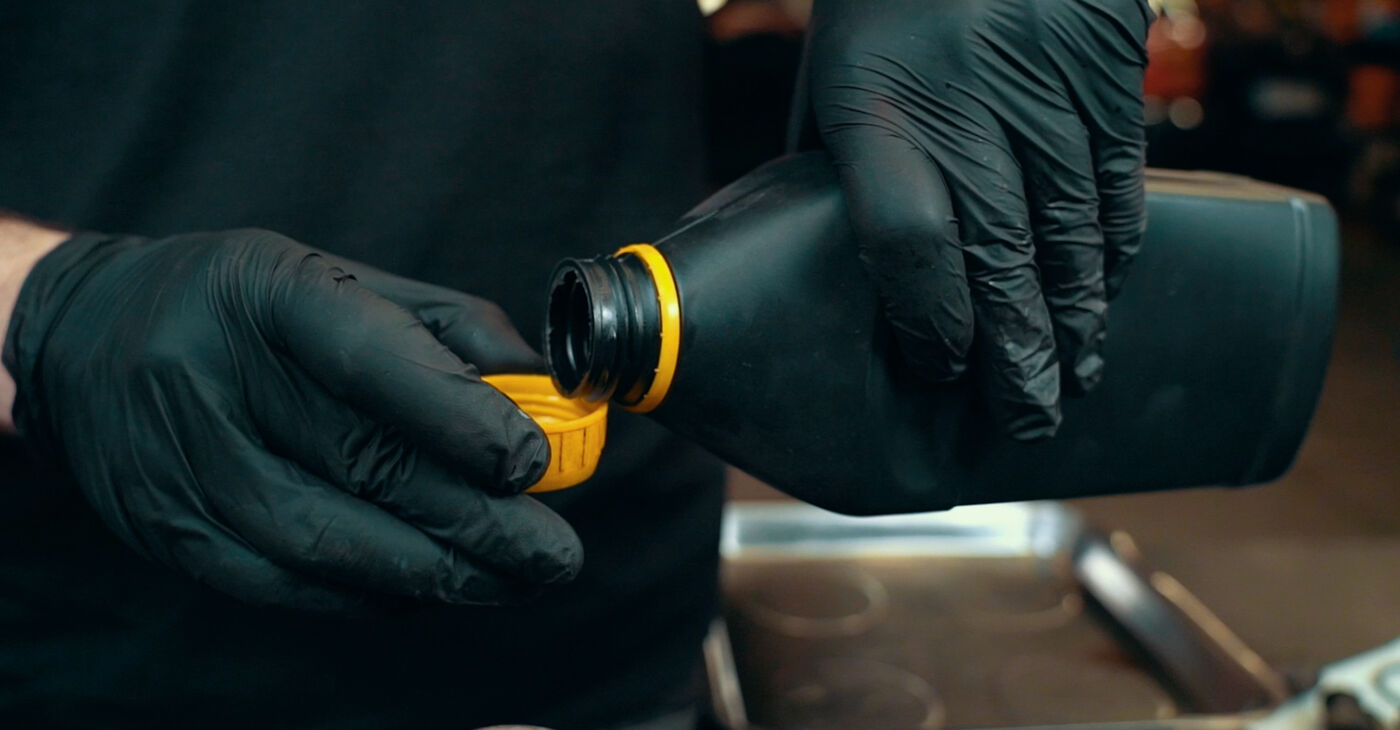 Before reassembling, prepare a small amount of new brake fluid
 - 29.
 If the dust boot is located on the outside of the caliper housing, first put it on the piston
 - 30.
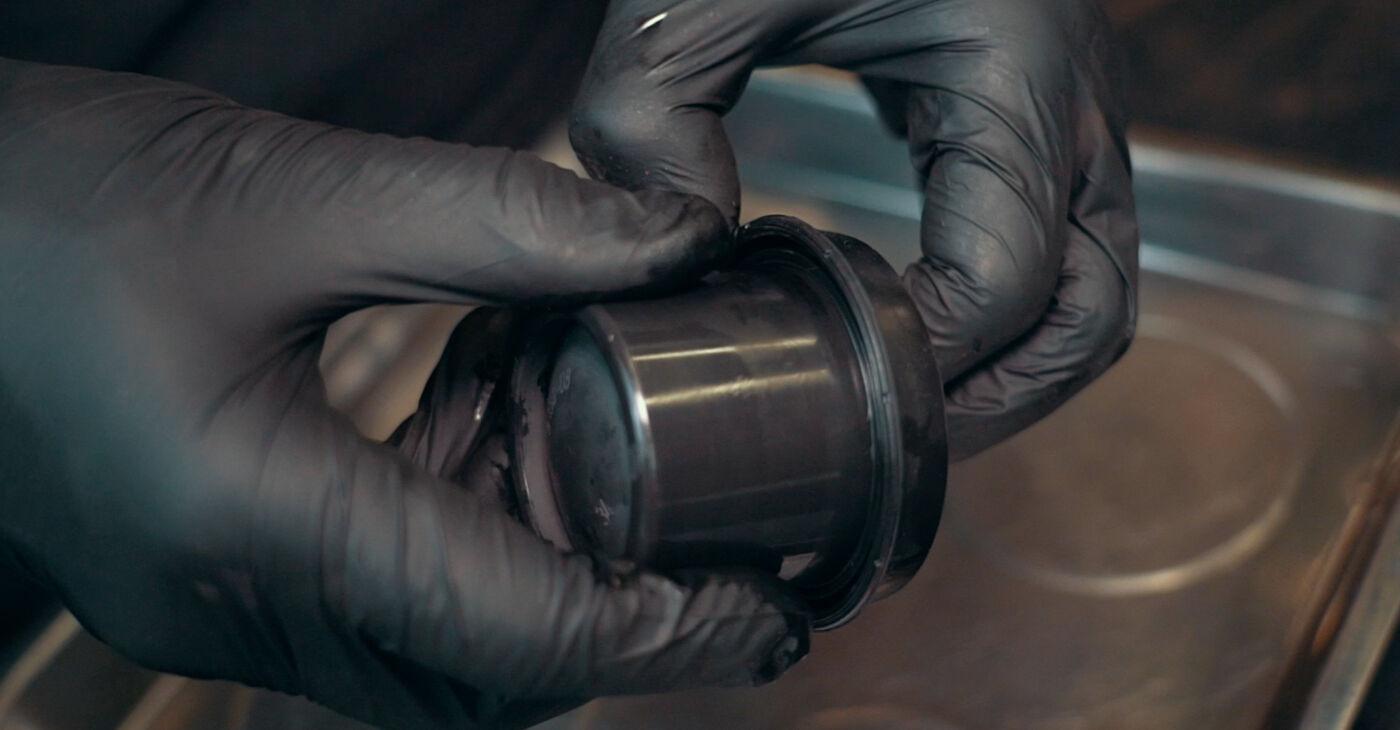
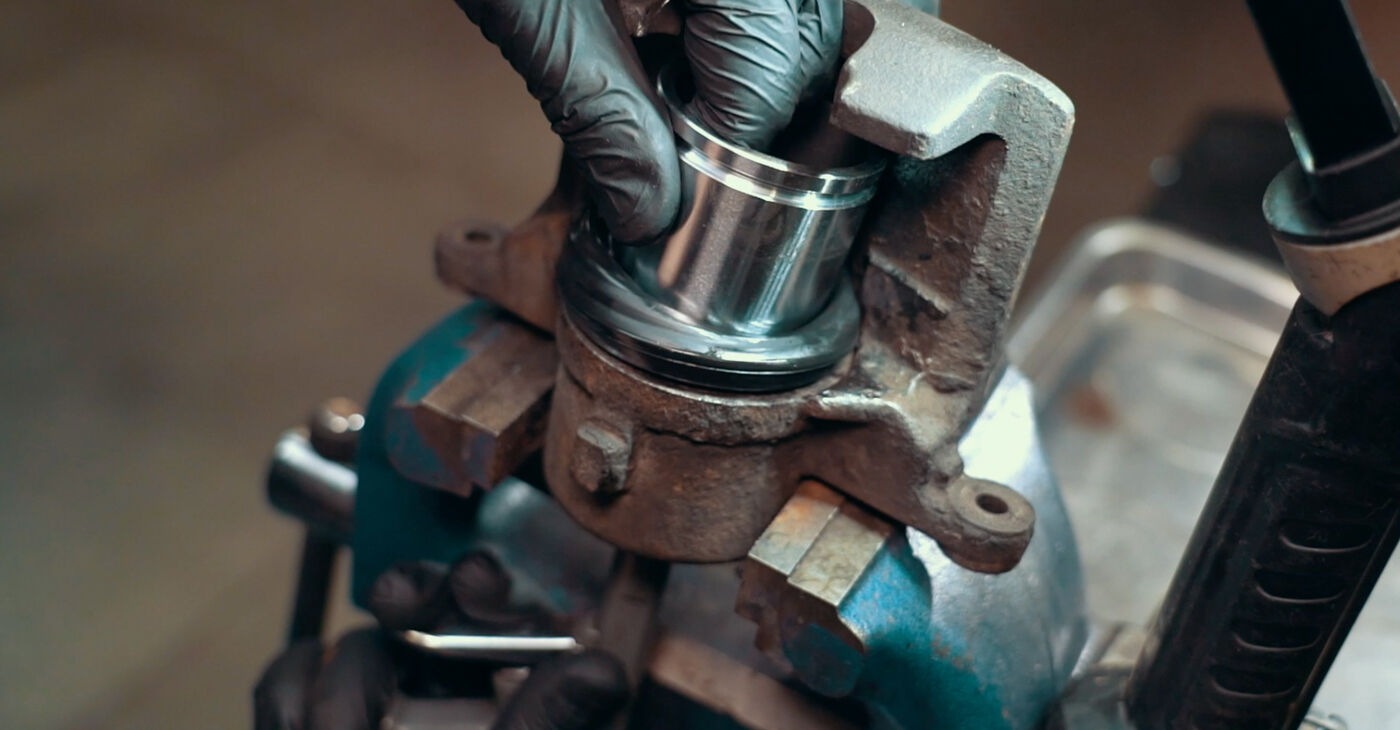
 Then insert the piston into the caliper housing and install the dust boot
 - 31.
 If the dust boot is mounted on the inside, install it first
 - 32.
 Next, install the pistonCaution!Proceed with caution so as not to damage the parts
 - 33.
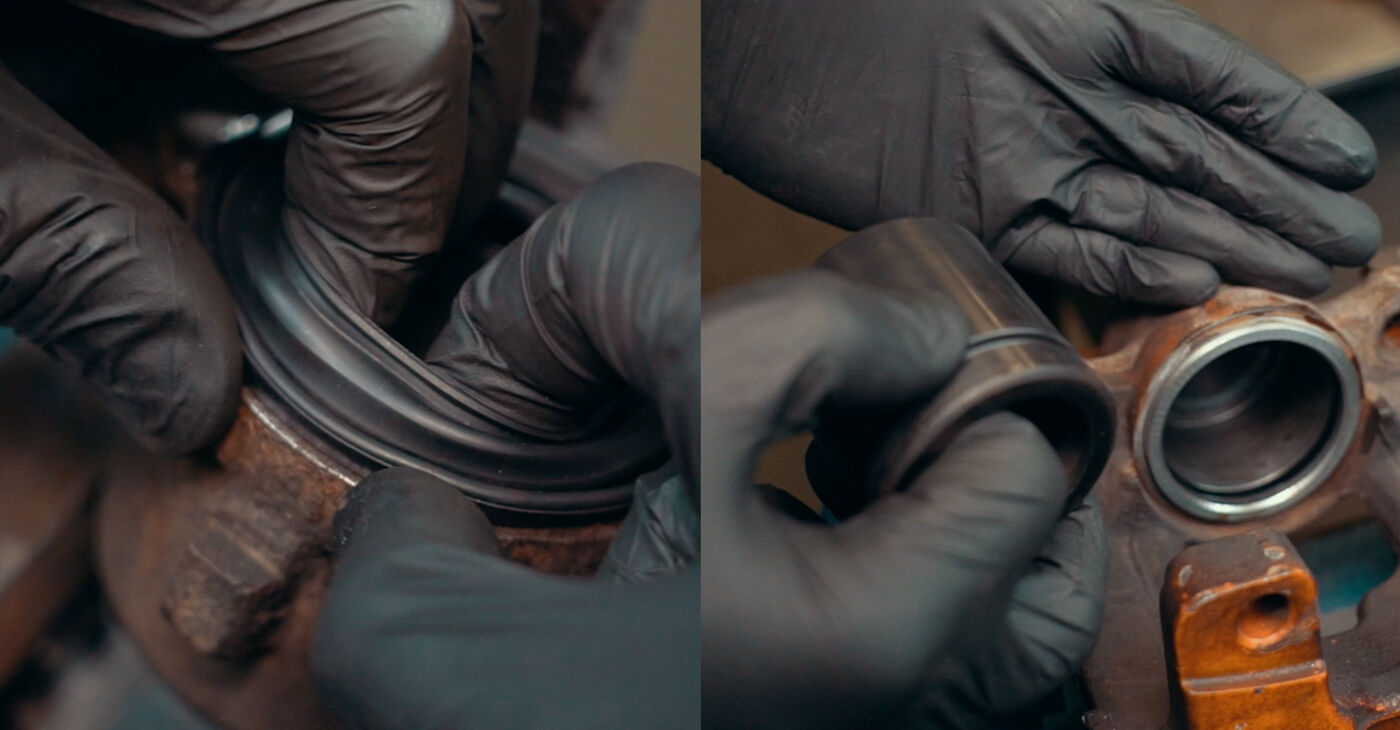
 Install the dust boot and make sure it is fitted tightly into the mounting groovesImportant!Do not use any lubricant when installing the dust boot as this might make mounting more difficultLubrication will be required during the piston installation step
 - 34.
 Lubricate the piston and fit the dust cover on it
 - 35.
 Apply some lubricant on the sealPlease note!The process of installing the dust boot on the piston can be quite complicated, and in some cases you may need an assistantSpread the dust boot evenly while inserting the piston into the caliper housing
 - 36.
 If you don't have an assistant, use compressed air
Was this manual helpful?
Please rate this manual on a scale from 1 to 5. If you have any questions, feel free to ask us.
Users voted – 0
Unlock your car maintenance assistant!
Track expenses, manage logs, schedule replacements, and more.
Popular Brake System maintenance tutorials
 Free download PDF
 1.64 MB
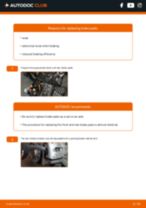 Free download PDF2.84 MB
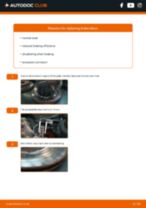 Free download PDF2.92 MB
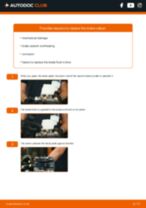 Free download PDF2.91 MB
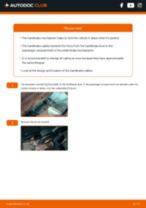 Free download PDF1.51 MB
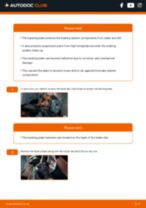 Free download PDF983.04 KB
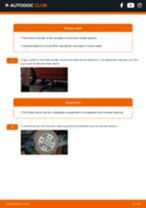 Free download PDF1.96 MB
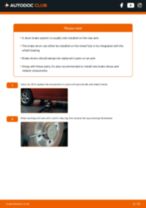 Free download PDF1.95 MB
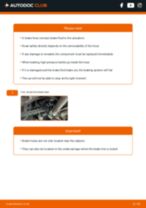 Free download PDF2.39 MB
Top auto repair manuals
 Free download PDF1.51 MB
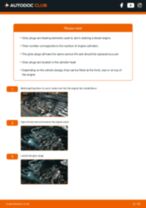 Free download PDF1.62 MB
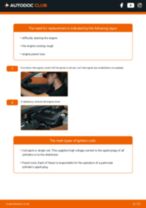 Free download PDF1.98 MB
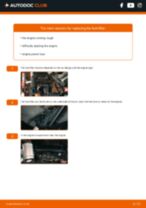 Free download PDF2 MB
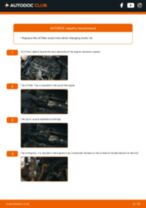 Free download PDF2.82 MB
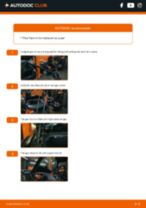 Free download PDF1.21 MB
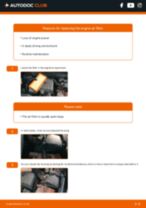 Free download PDF1.5 MB
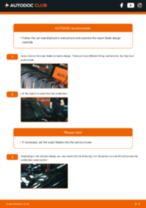 Free download PDF1.37 MB
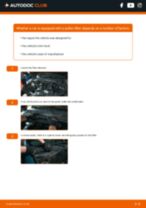 Free download PDF1.19 MB


Time to replace parts? Get even better deals in our Shop app.

SCAN ME
What item number to replace piston seal?
Only text later on refers to lubricate piston seal.
Could someone follow these instructions and fail to replace piston seal located in piston housing.
Is the piston seal manufactured with a taper on the inside diameter?
If so in which direction does the taper face? Font or rear of the piston housing for correct fittment.
Please could you inform me of your findings.
Regards Trevor.
When replacing the piston, it is recommended to replace the sealing ring as well. In this case, the ring has a square cross-section, so you can install it on either side. You can find more precise information in the repair manual for your particular car.