Disclaimer

How to change inner tie rod on a car – replacement tutorial
downloads:
887
Views:
4984
How to change a tie rod axle joint [AUTODOC TUTORIAL]
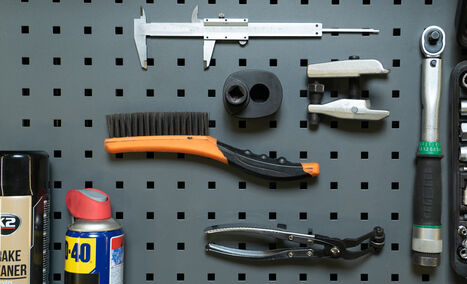
a set of suitable tools
a torque wrench
a ball joint puller
a measuring tool
a pipe wrench
a universal cleaner and a brush
WD-40 spray
сlic-R collar pliers
an inner tie rod end wrench

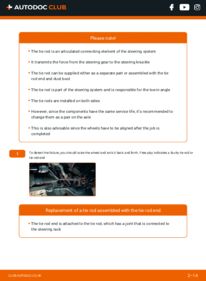
Please note!
- The tie rod is an articulated connecting element of the steering system
- It transmits the force from the steering gear to the steering knuckle
- The tie rod can be supplied either as a separate part or assembled with the tie rod end and dust boot
- The tie rod is part of the steering system and is responsible for the toe-in angle
- The tie rods are installed on both sides
- However, since the components have the same service life, it’s recommended to change them as a pair on the axle
- This is also advisable since the wheels have to be aligned after the job is completed
- 1.
 To detect the failure, you should raise the wheel and rock it back and forth. Free play indicates a faulty tie rod or tie rod endReplacement of a tie rod assembled with the tie rod endThe tie rod end is attached to the tie rod, which has a joint that is connected to the steering rack
 - 2.
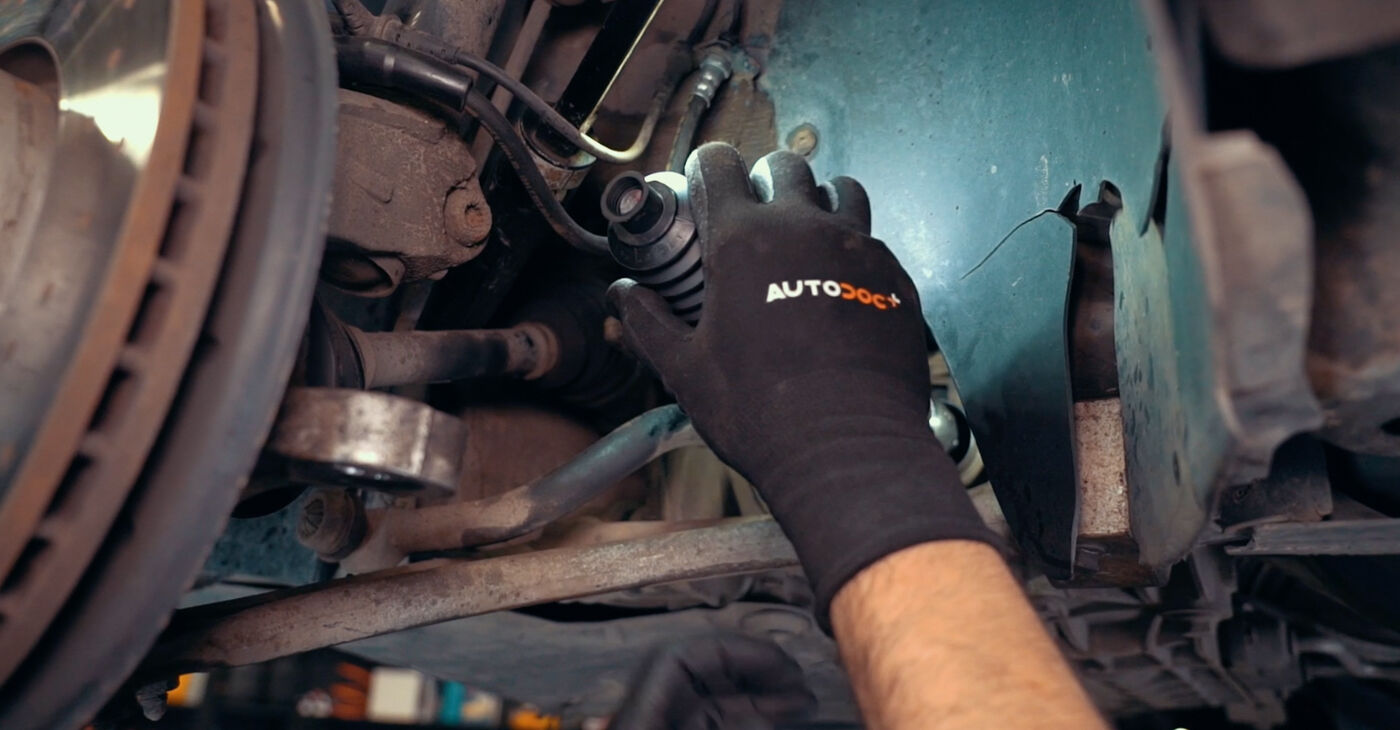
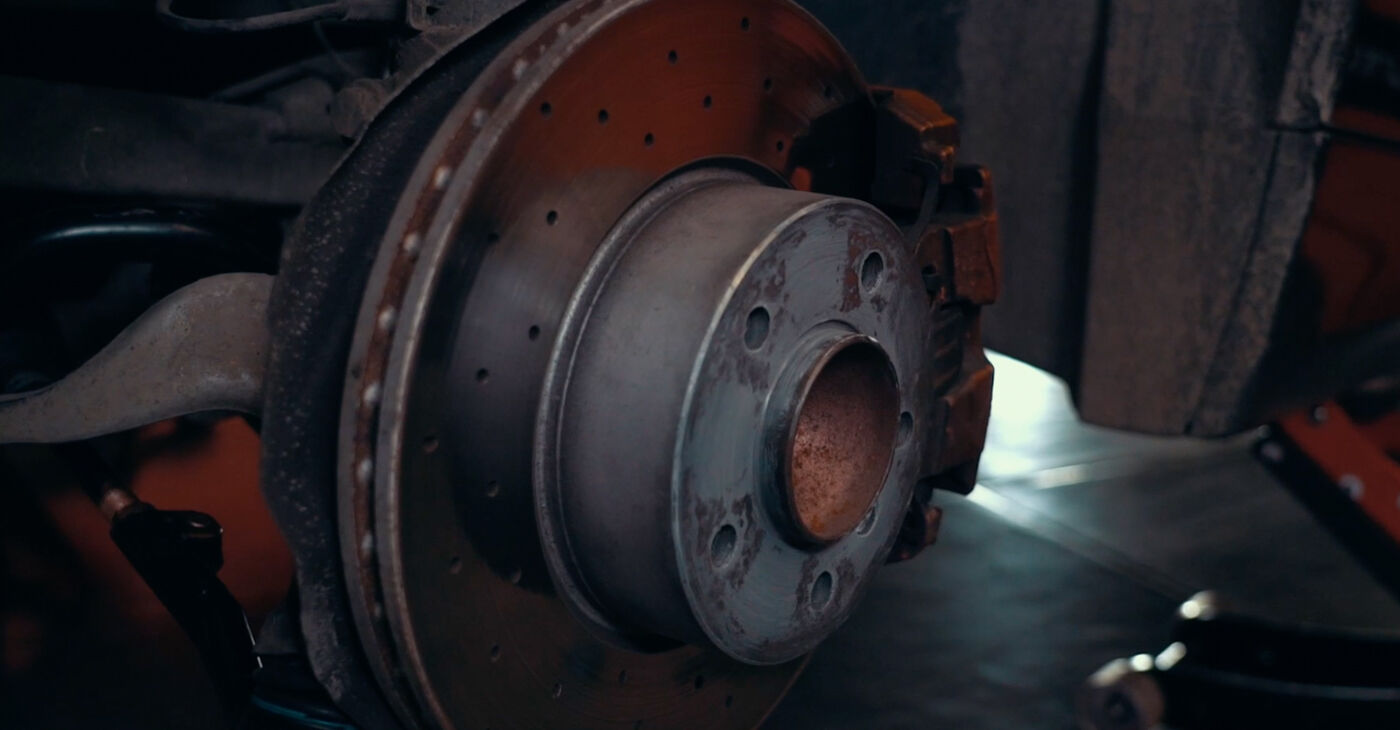
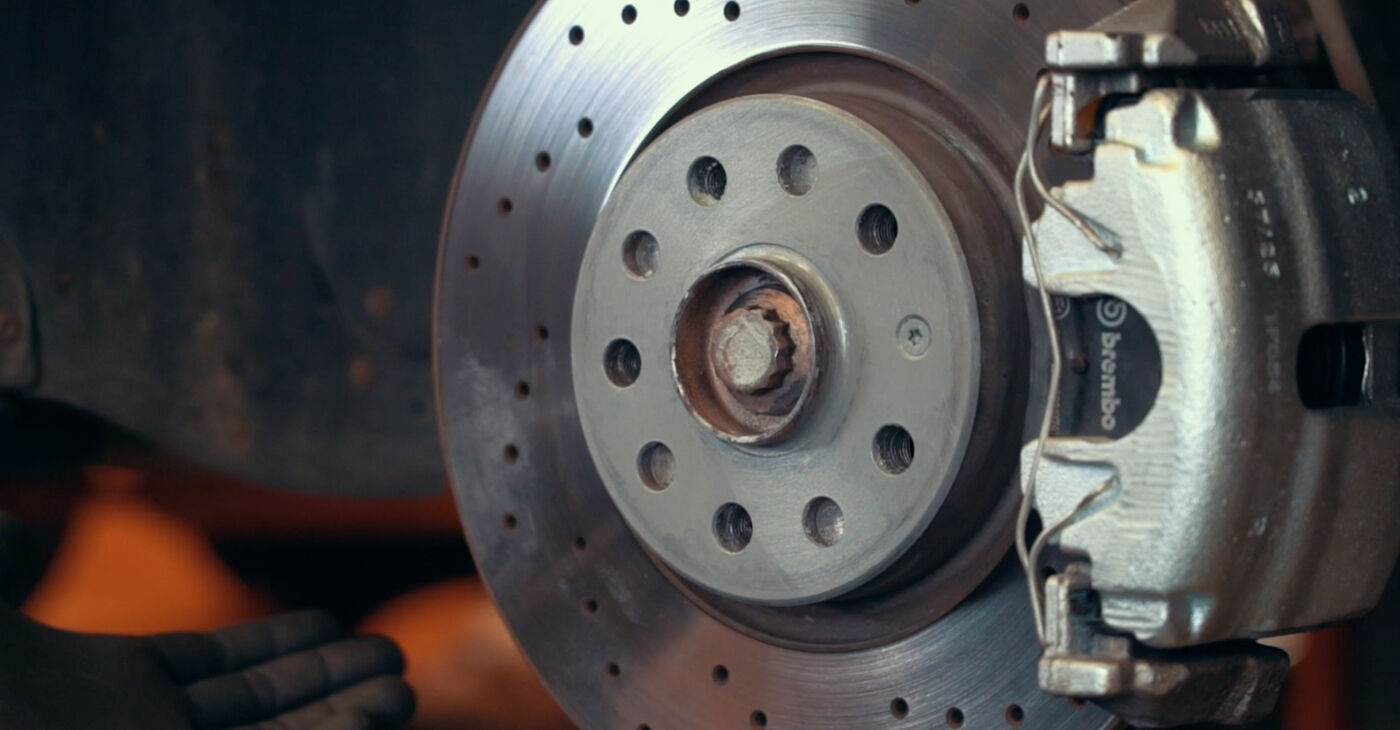
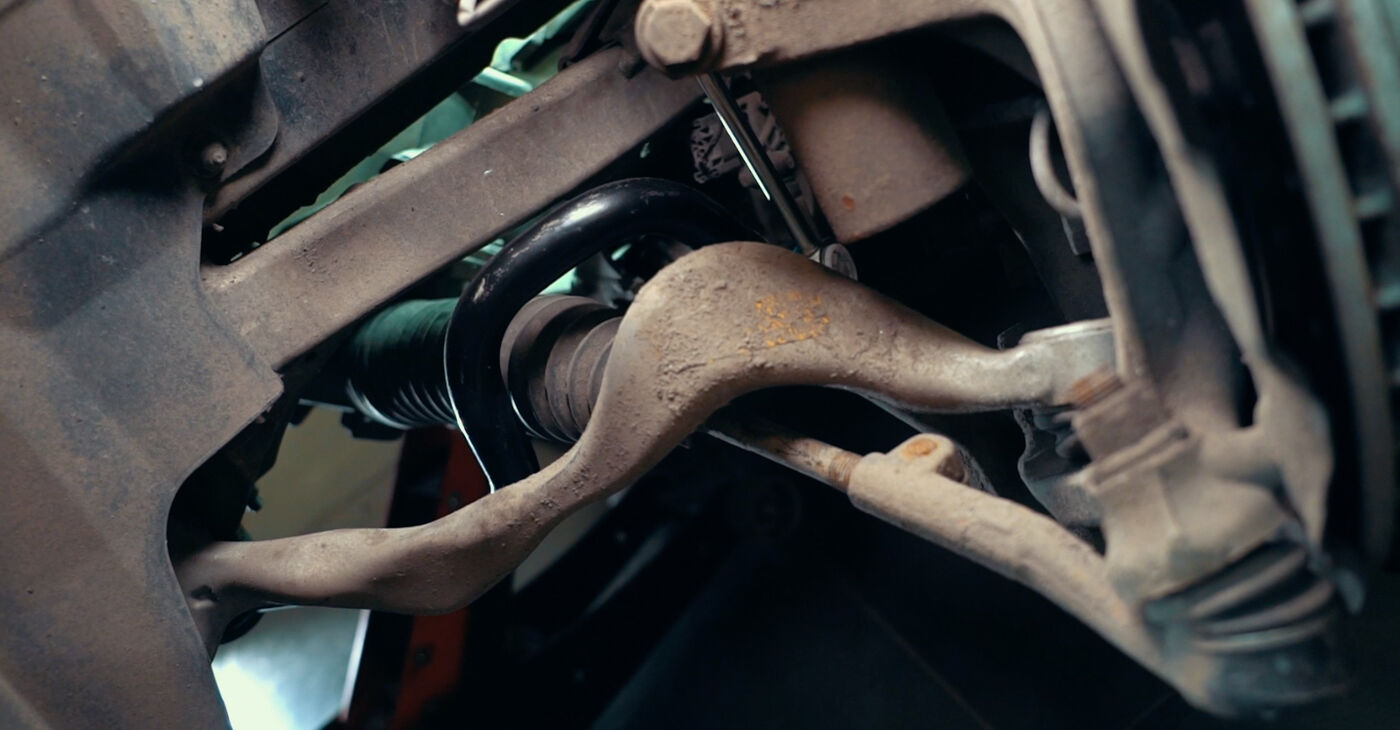 To access the tie rod, remove the wheel and turn the steering wheel as far as it will go
 - 3.
 Also prepare a jack or a car liftBe careful!When using a jack, make sure to use jack stands and wheel chocks
 - 4.
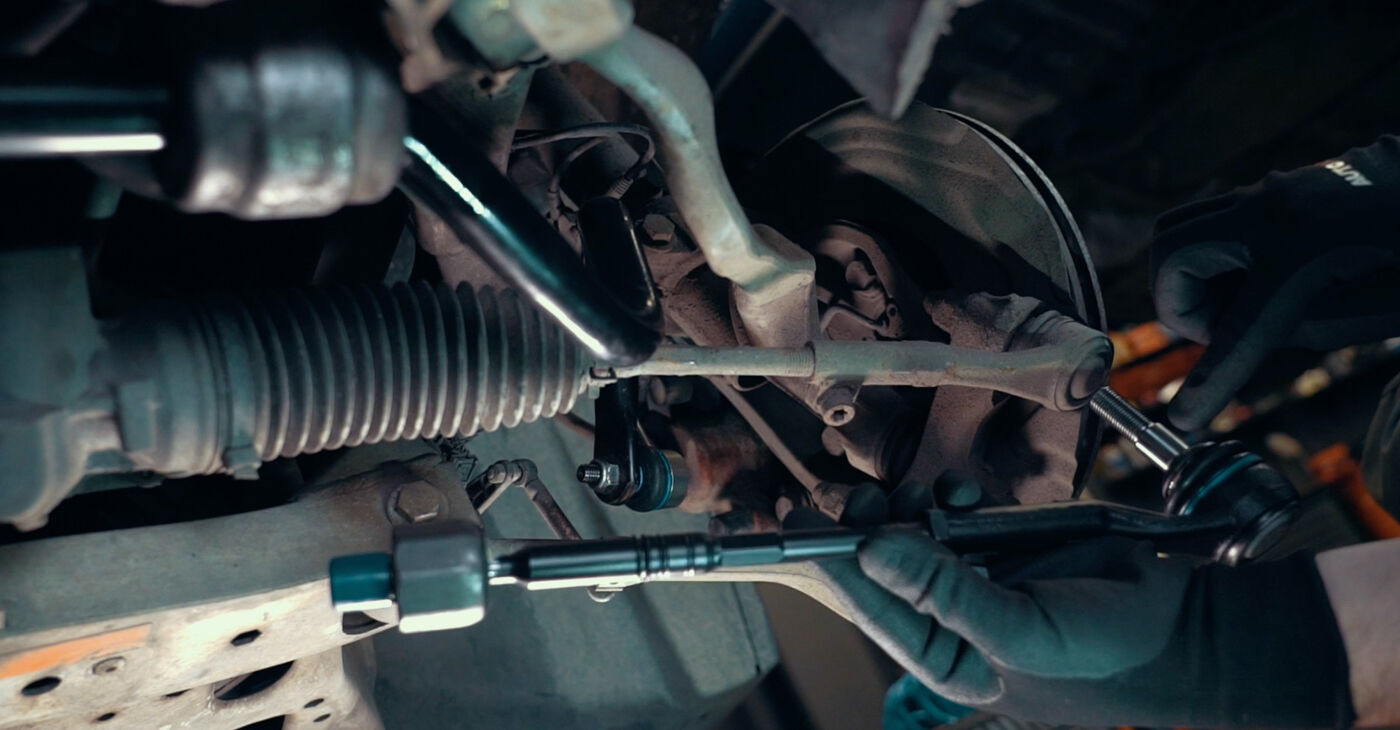
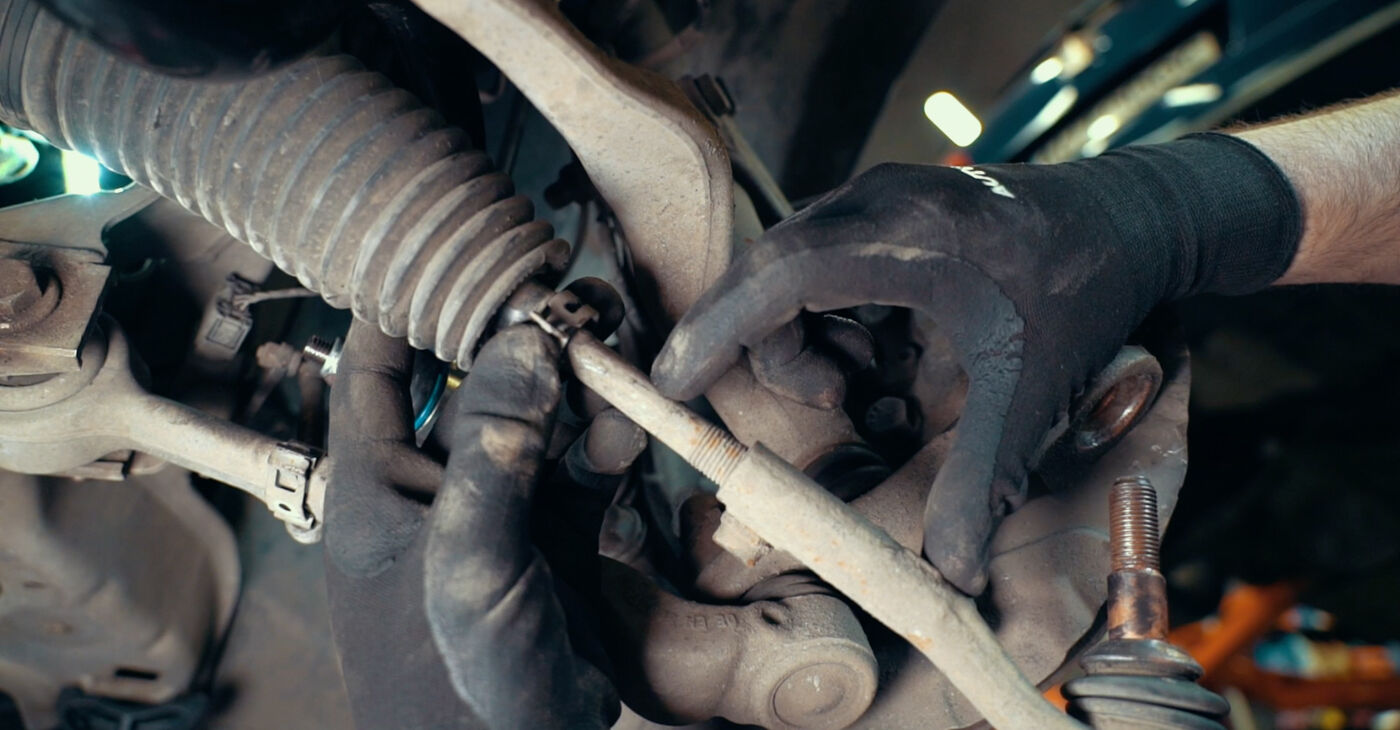
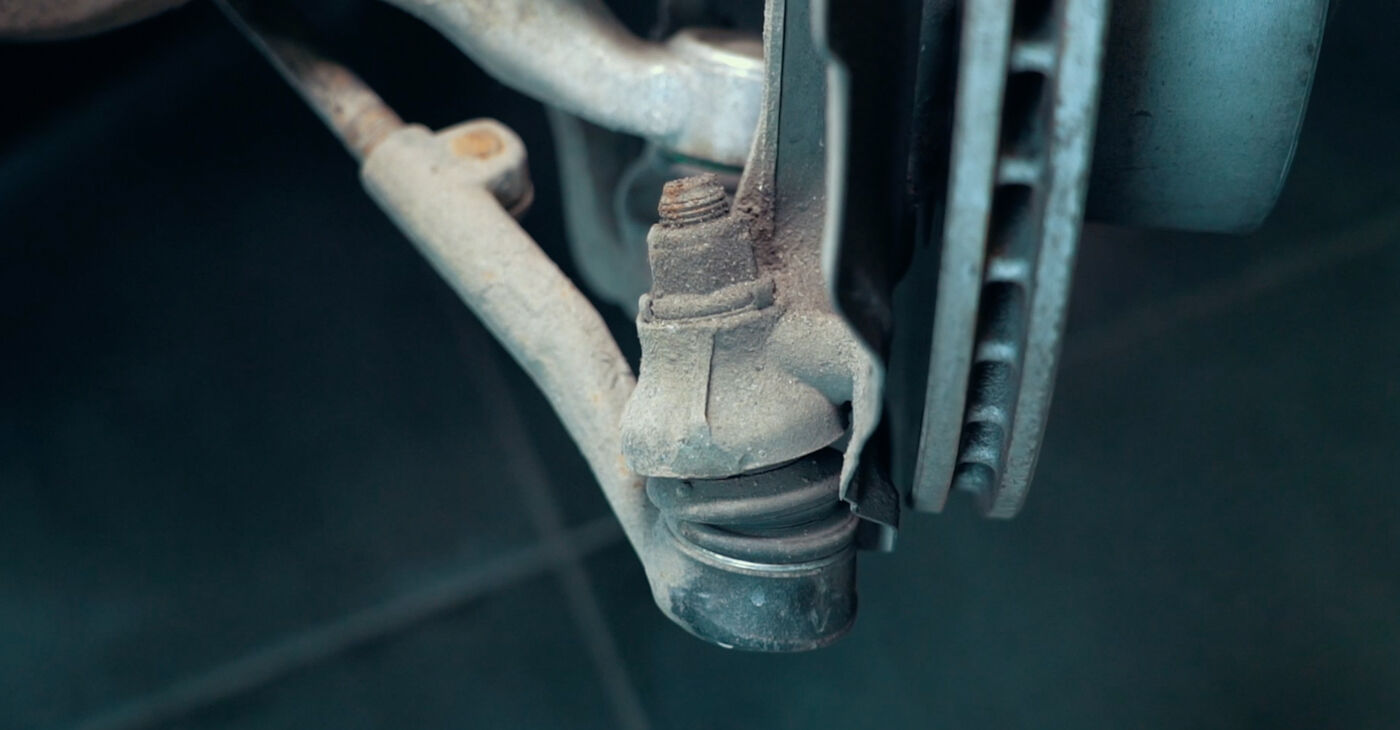 Detach the tie rod end from the steering knuckle and then remove the tie rod itself
 - 5.
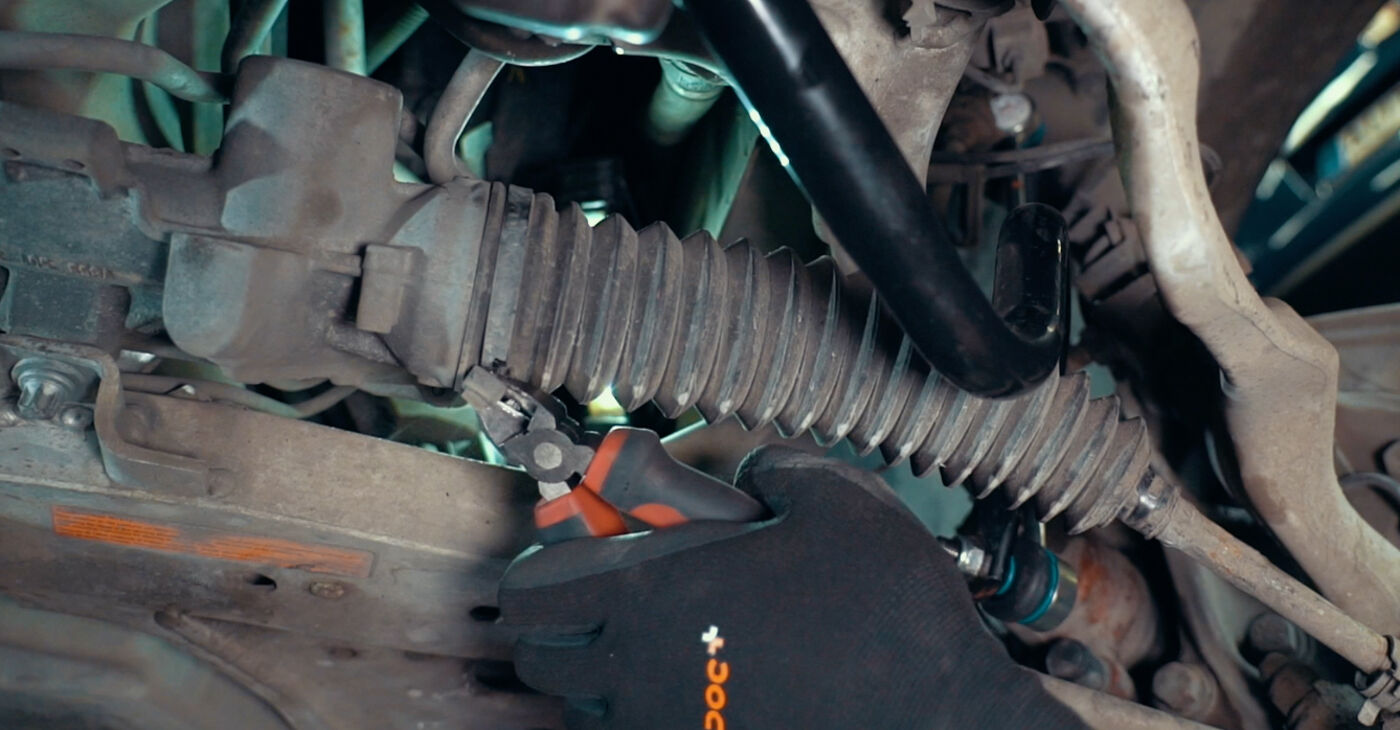
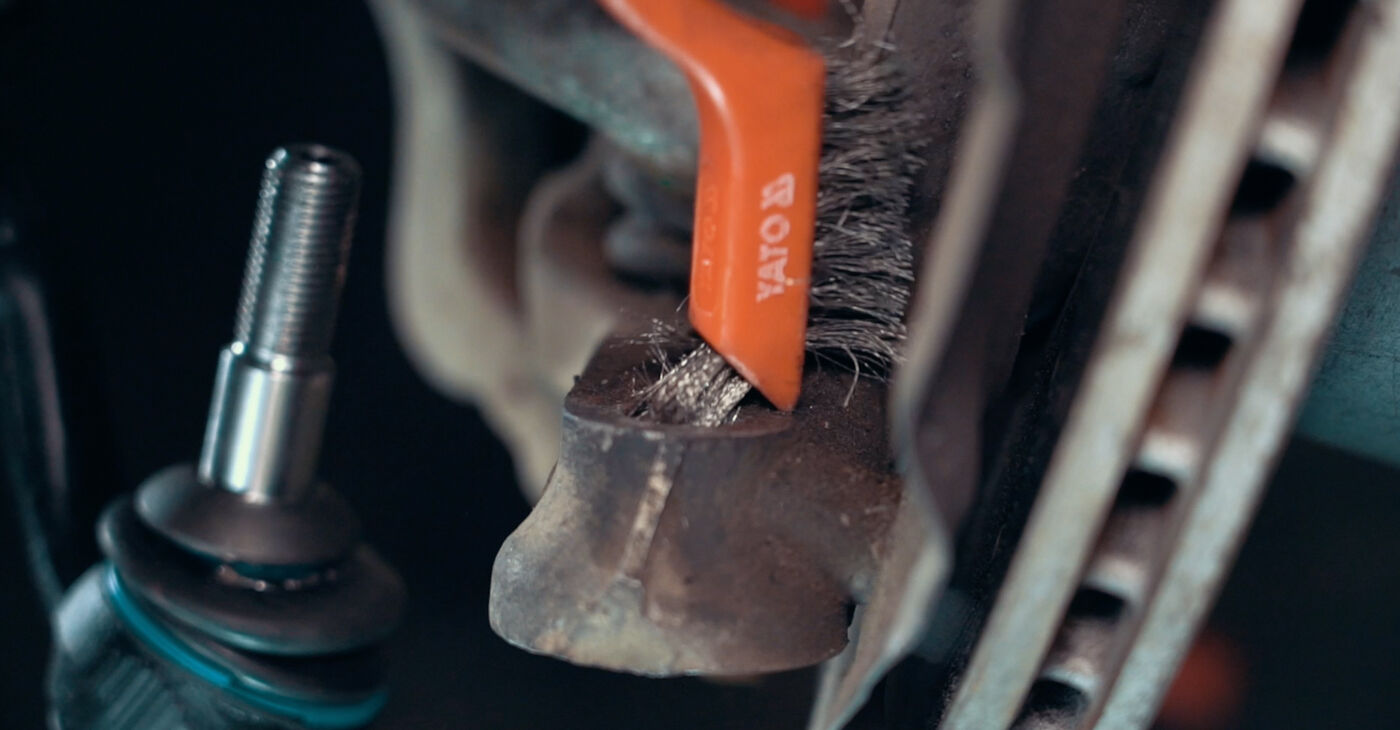
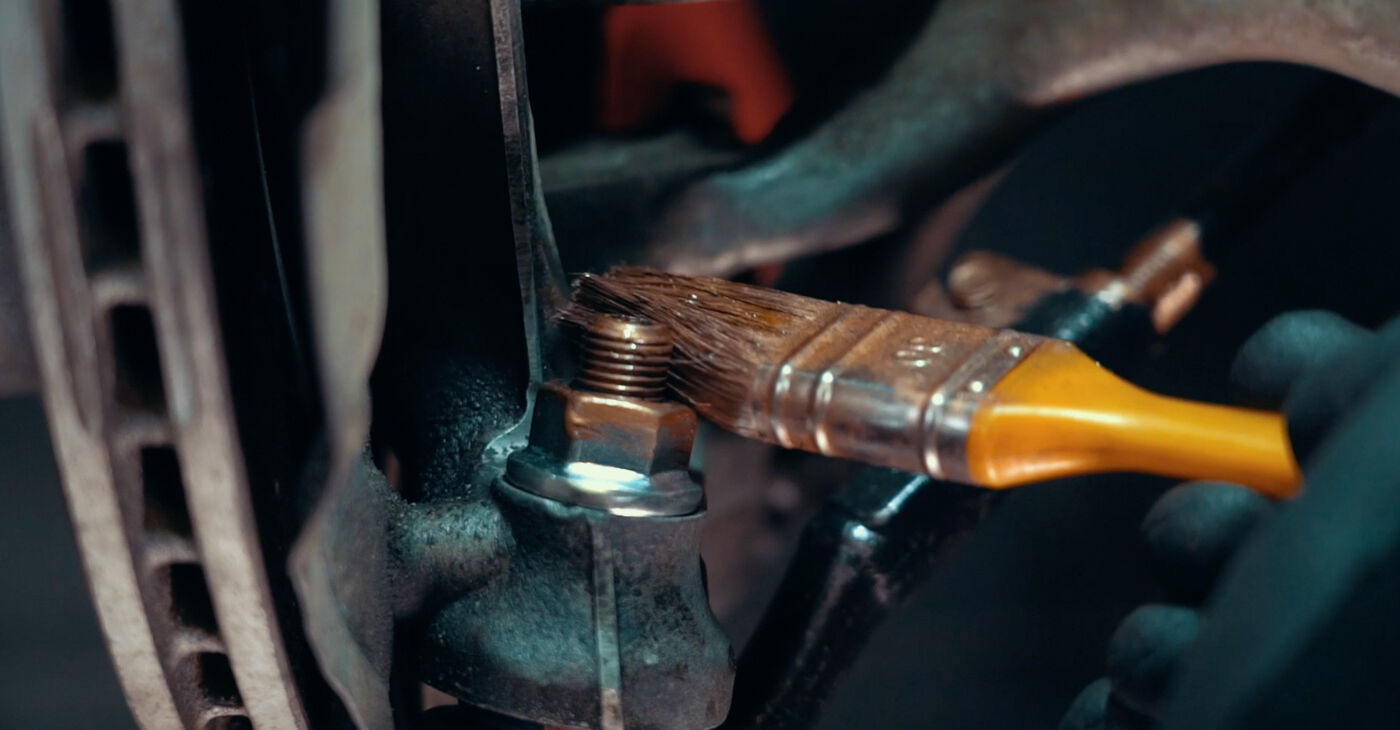
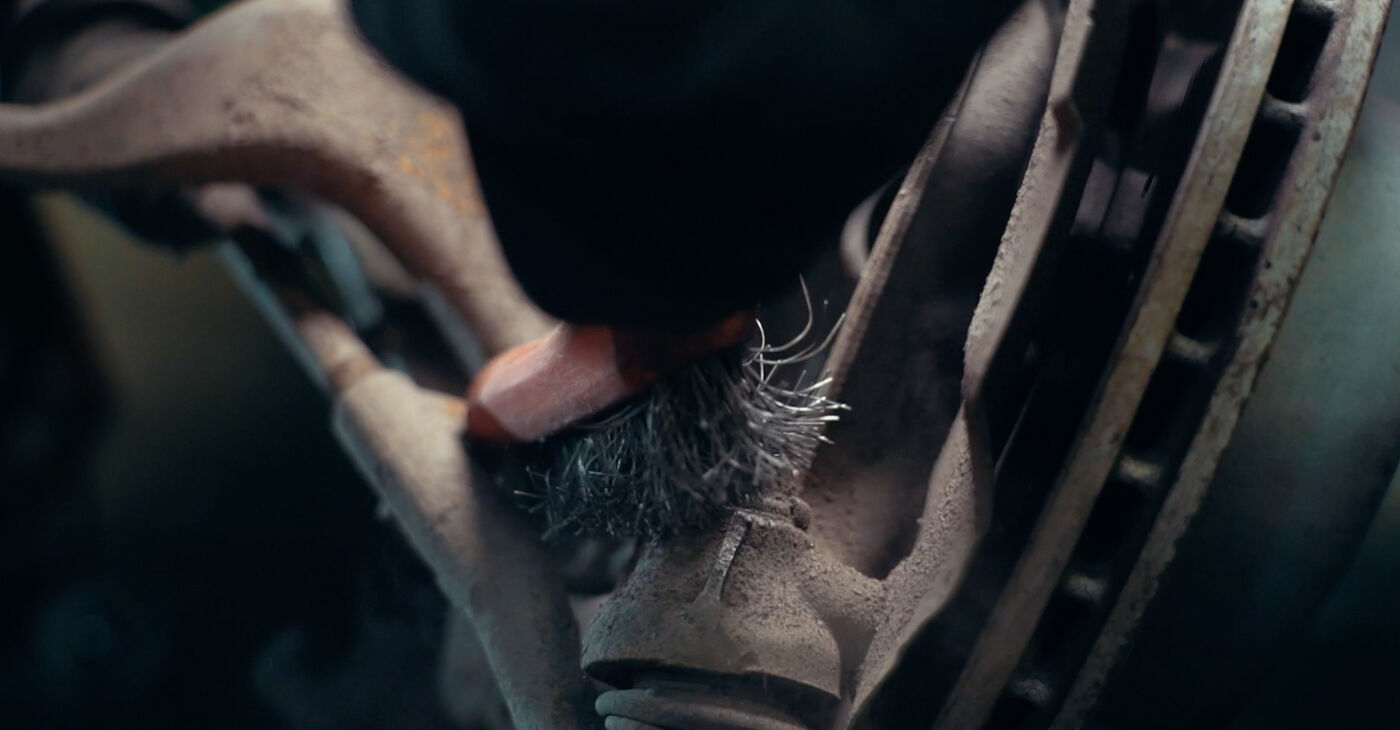 Clean the fastener that connects the part to the steering knuckle
 - 6.
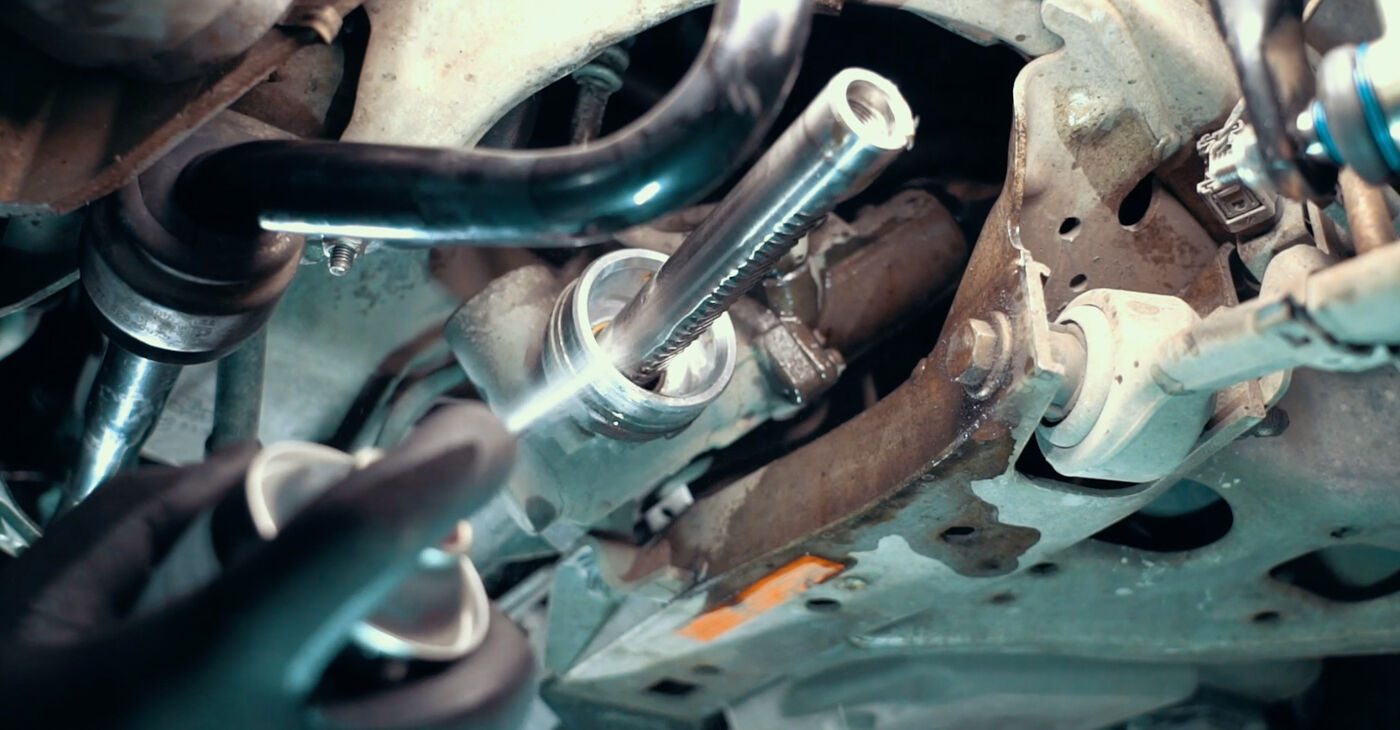
 Remove the tie rod end. Use a special puller if necessary
 - 7.
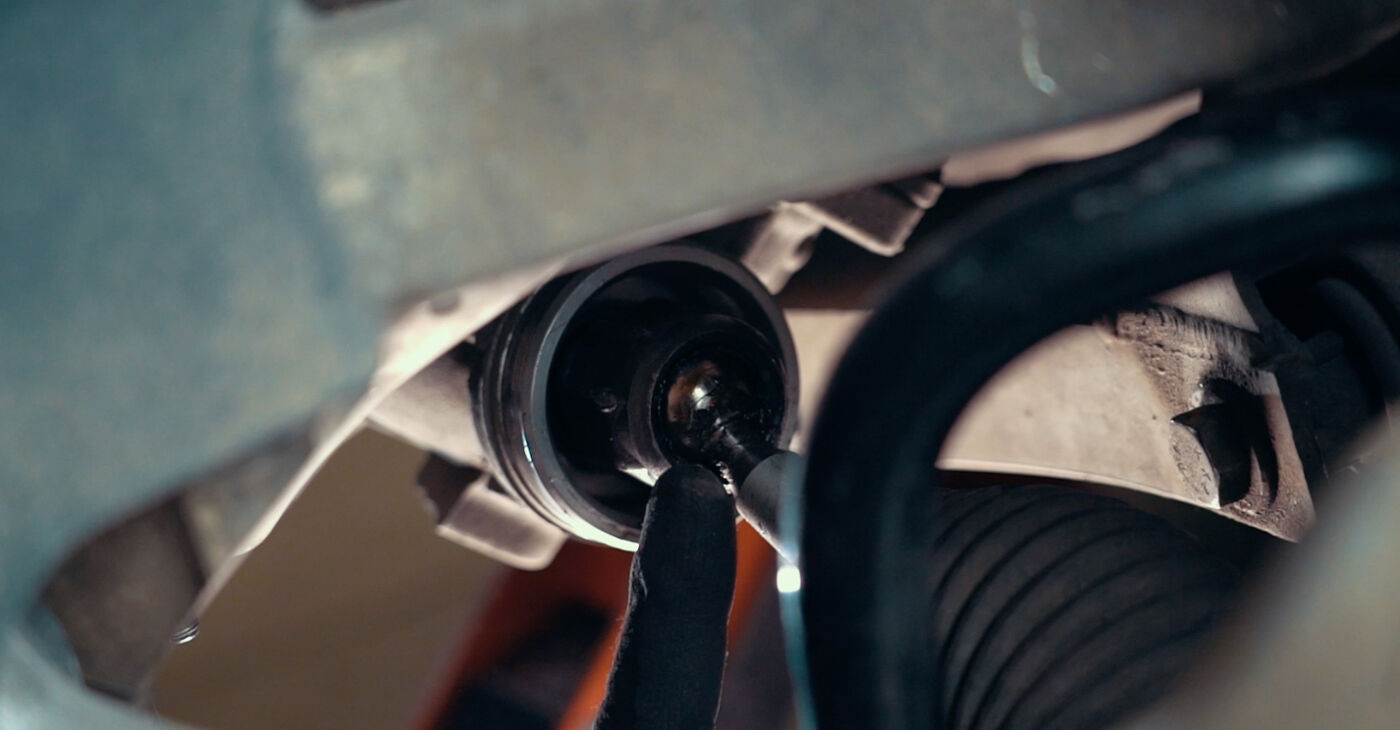
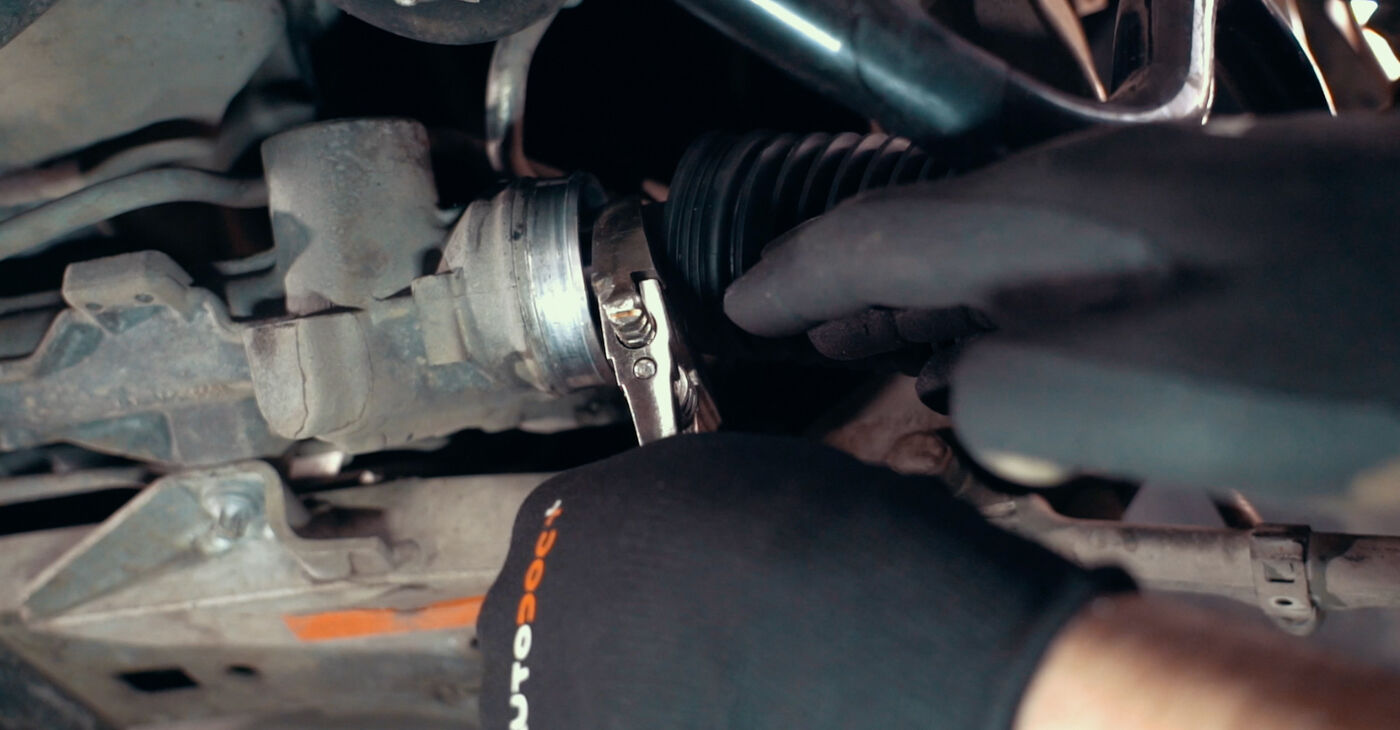
 To access the fastener on the steering rack shaft, remove the boot clamps and the bootImportant!The tie rod axle joint, which is attached to the steering rack shaft, is non-adjustableWheel alignment is performed by adjusting the connection between the tie rod and the tie rod end
 - 8.
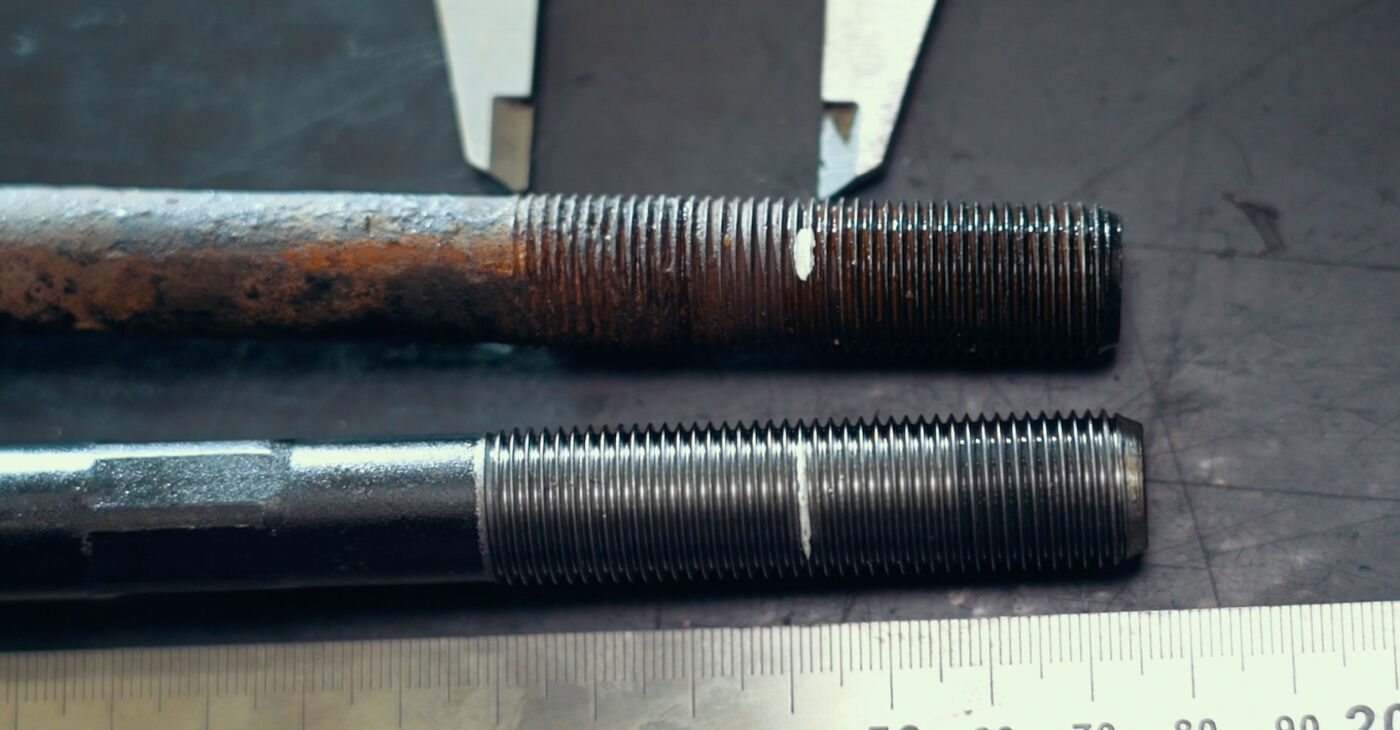
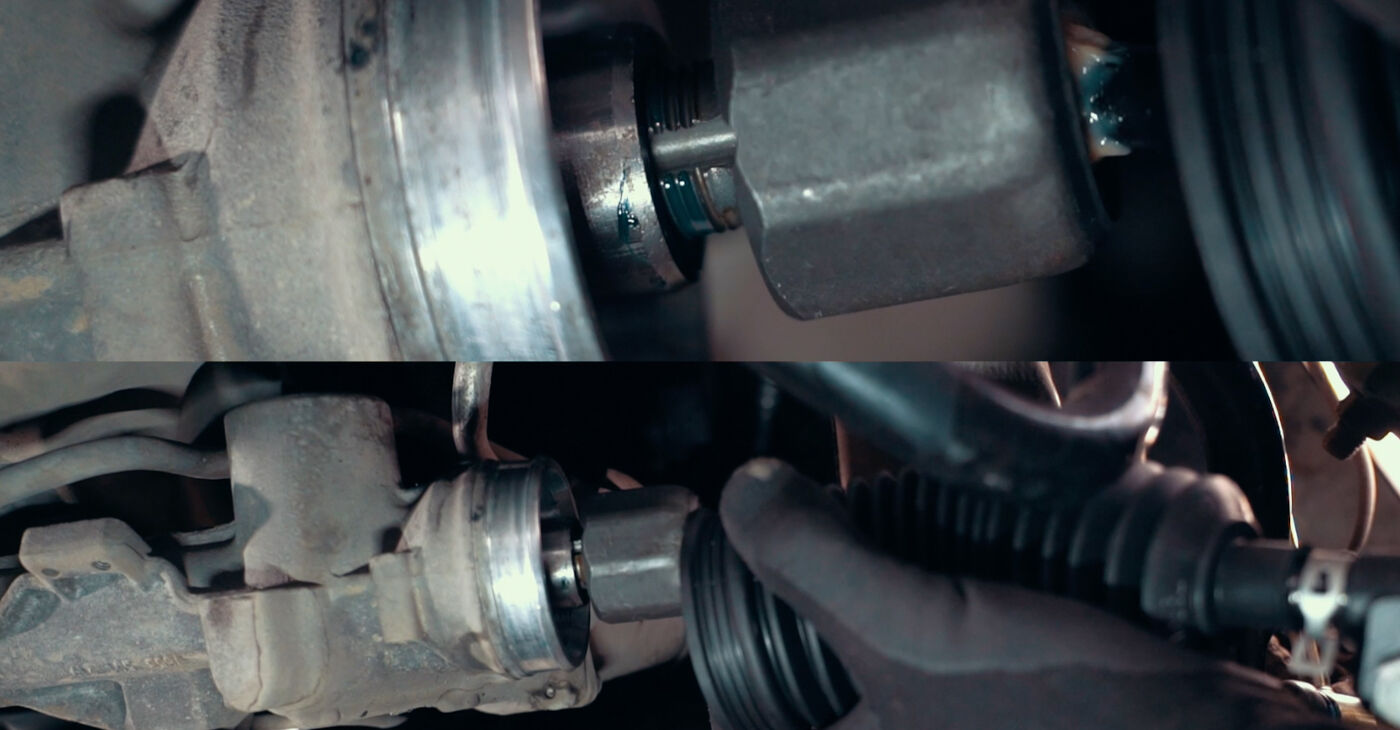
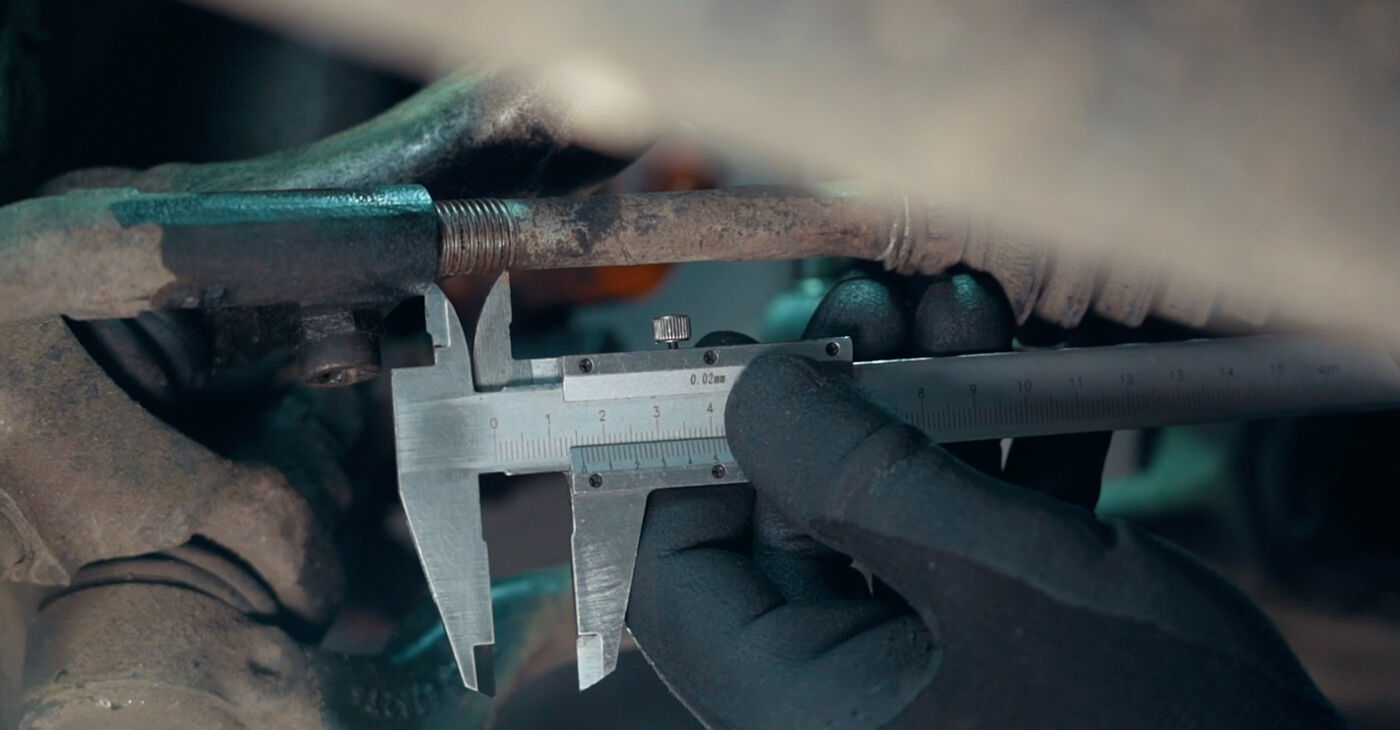
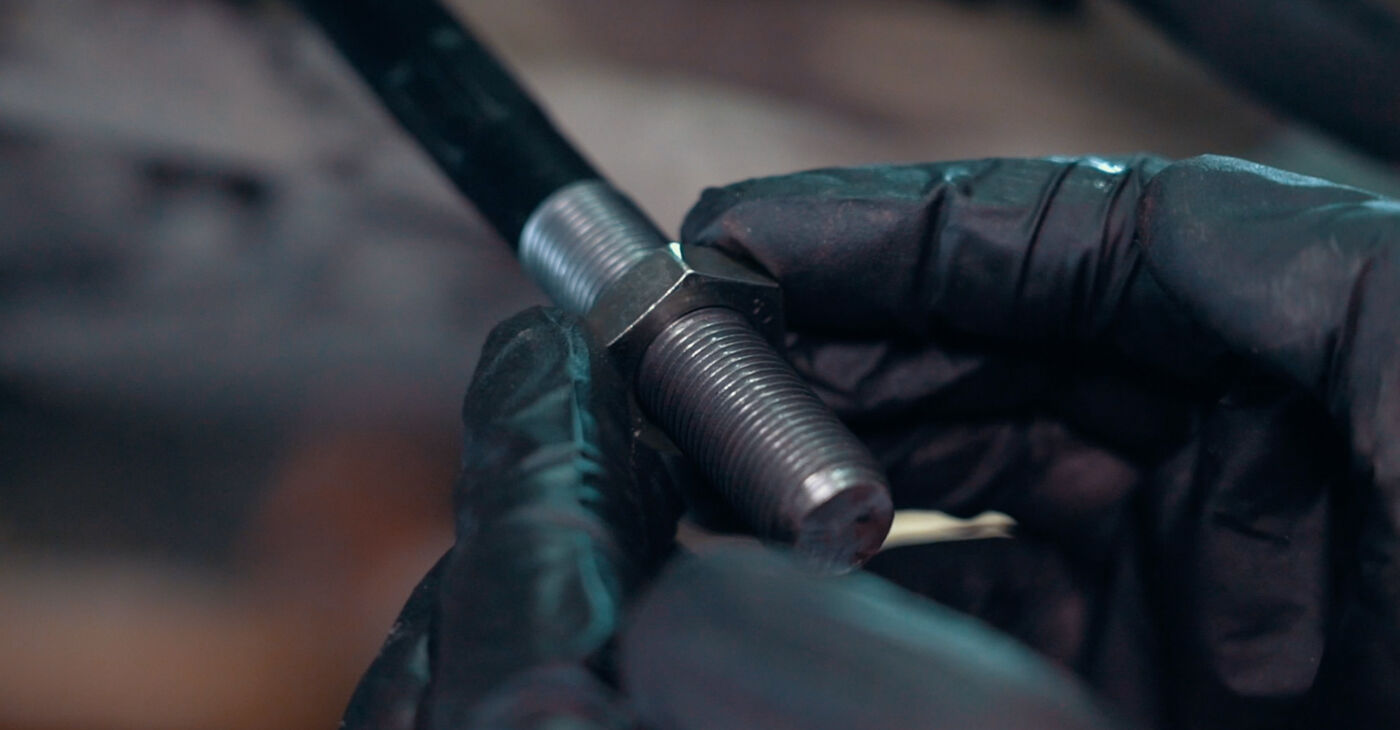
 Do not unscrew this connection right away; first measure the distance from the beginning of the threaded portion on the tie rod to the tie rod end
 - 9.
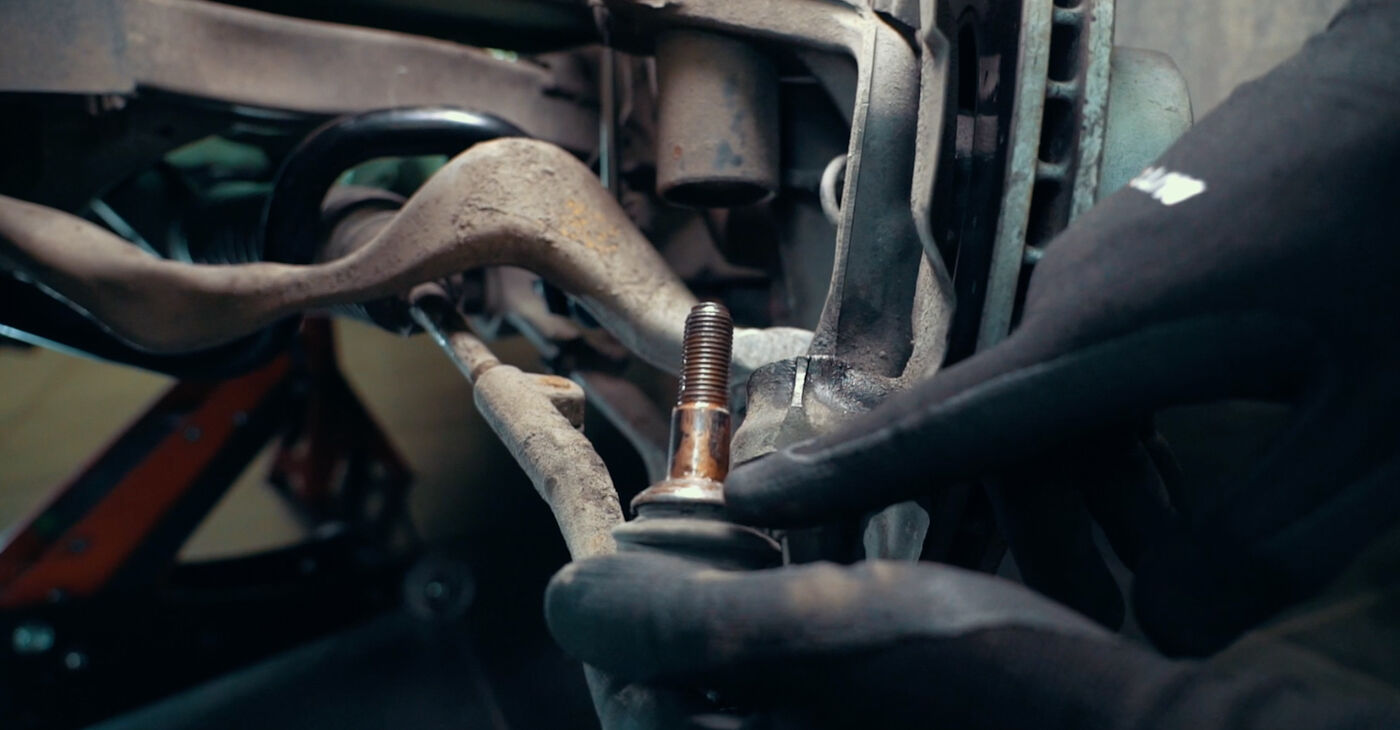
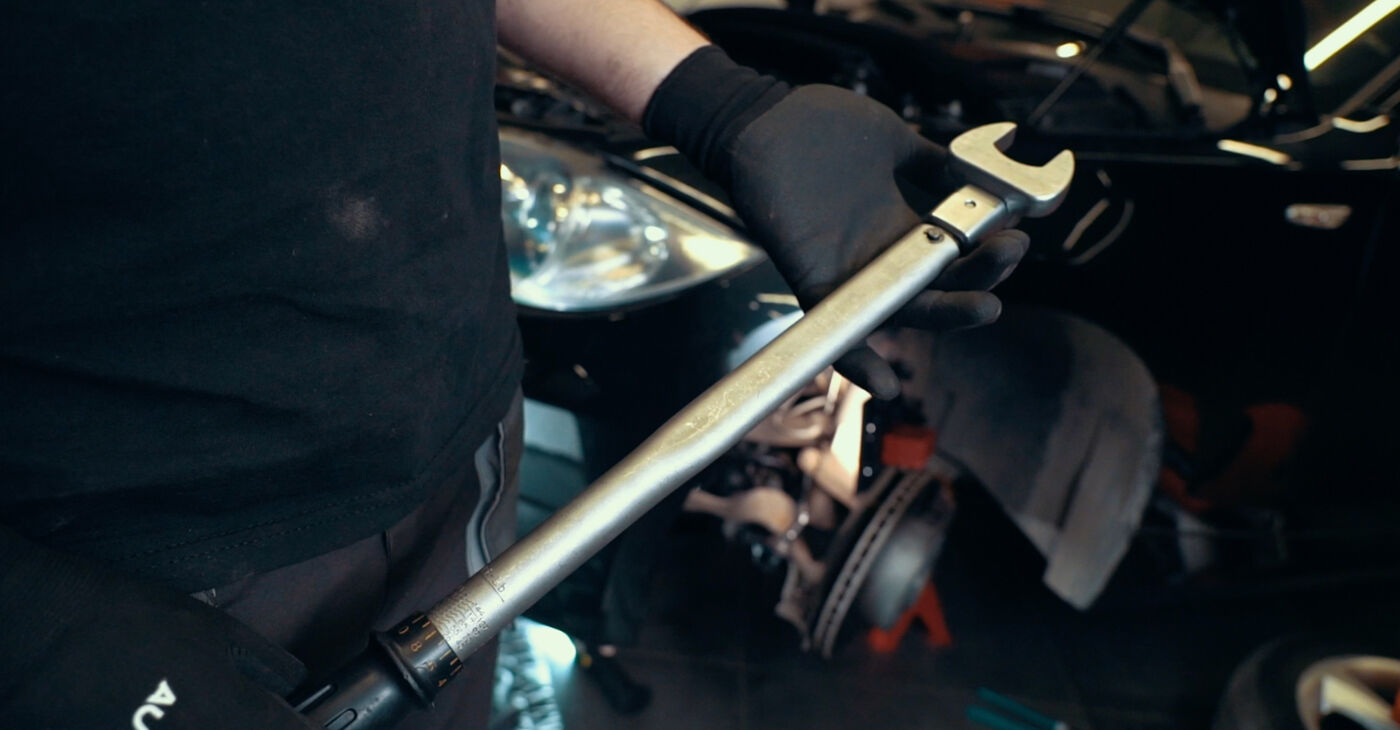
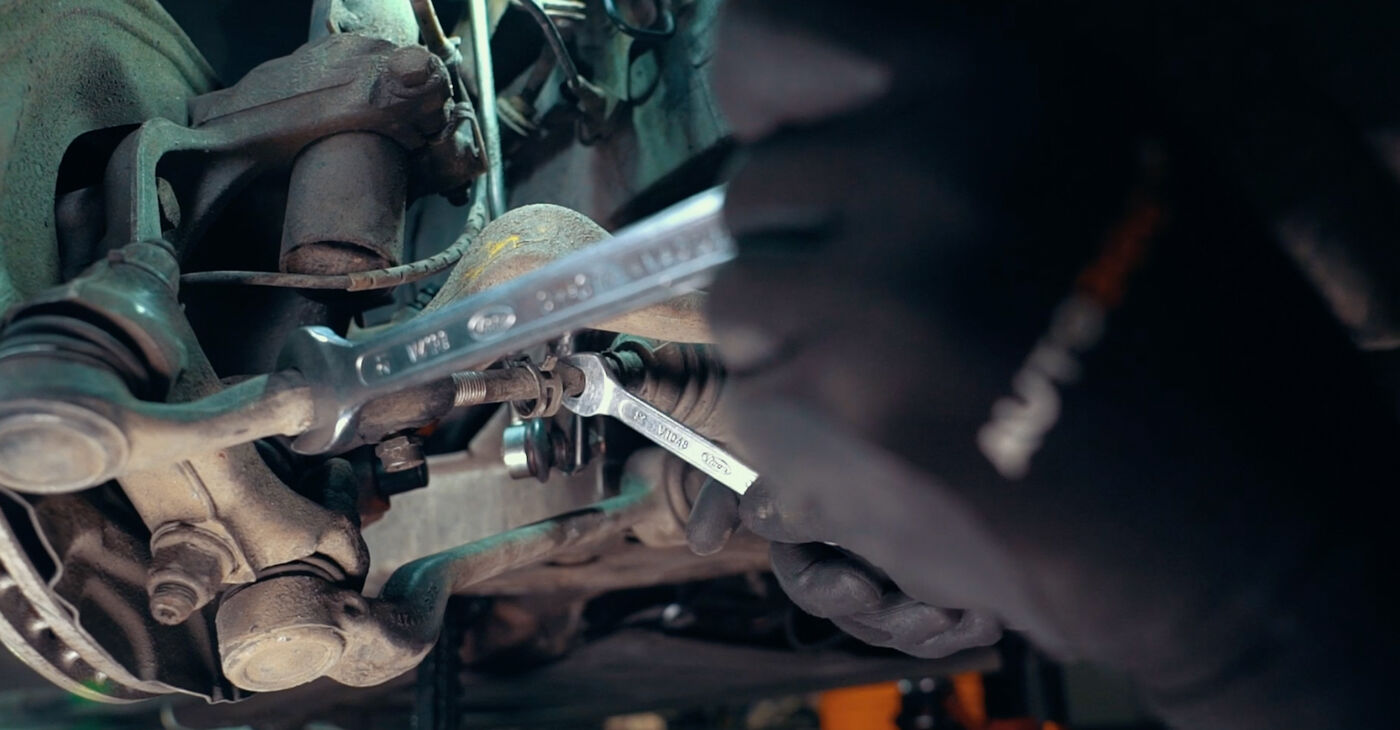
 Before unscrewing the tie rod from the steering rack shaft, return the steering wheel to its original positionPlease note!This reduces the load placed on the steering rack shaft while unscrewing the tie rodSome steering rack shafts have a place on them where they can be secured to minimise the risk of damaging themIn some cases you may need a pipe wrench, which ensures wide and reliable grip, or a special wrench to unscrew the tie rod
 - 10.
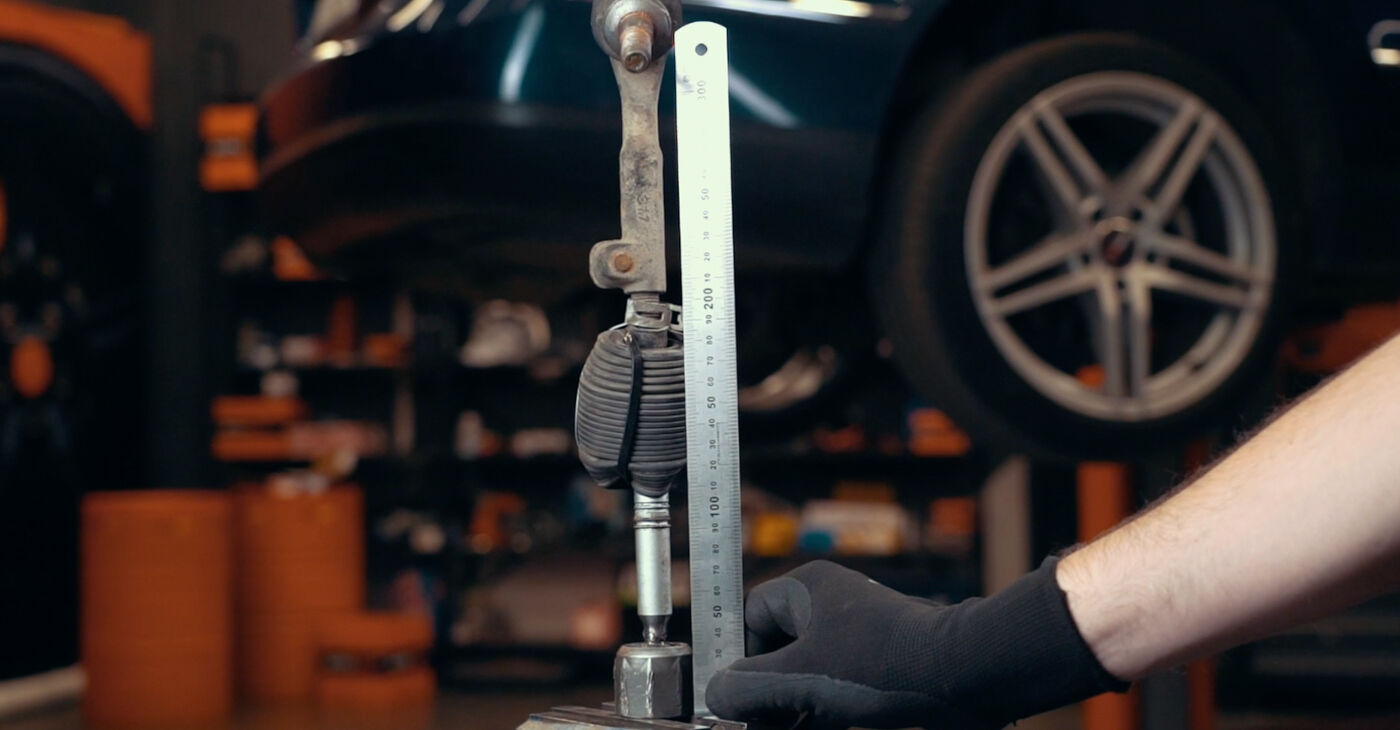 Measure the tie rod length from the point where the axle joint rests on the steering rack to the centre of the tie rod end’s ball jointImportant!The length of the new tie rod end might not be the same as that of the old oneThis distance can be compensated for by screwing in the threaded portion
 - 11.
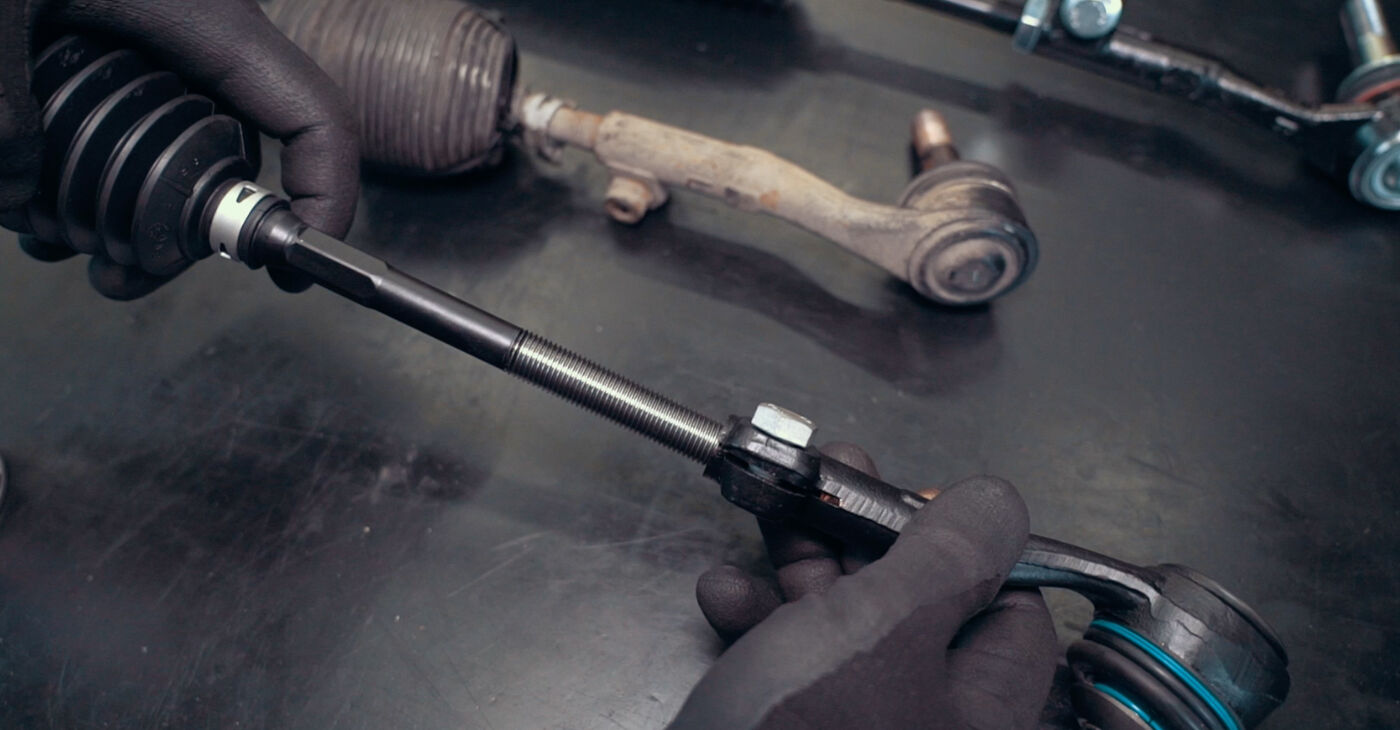
 When assembling the tie rod with the tie rod end, install a new dust boot kit
 - 12.
 or make a mark on the threaded portion of the tie rod, mount it on the rack, and put the boot on
 - 13.
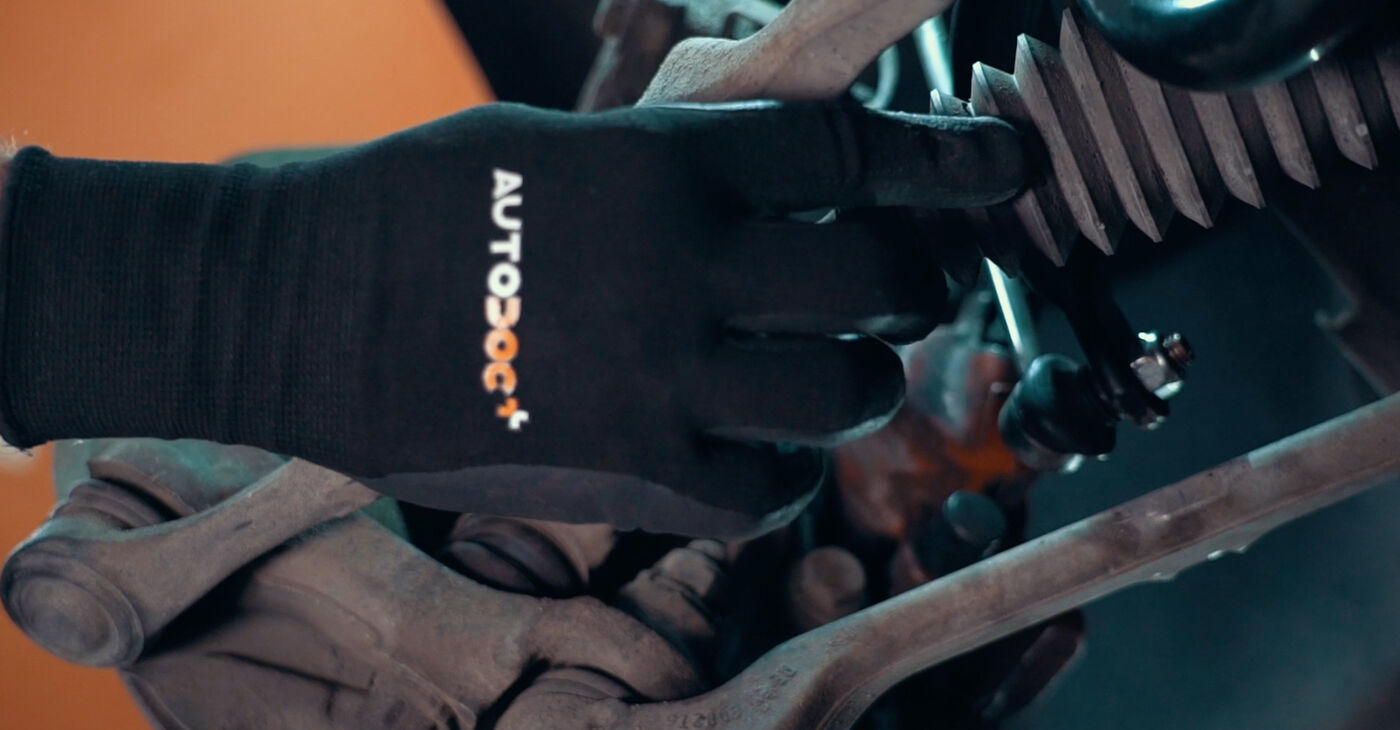
 Install the tie rod end and treat the connections with an anti-corrosion agent
 - 14.
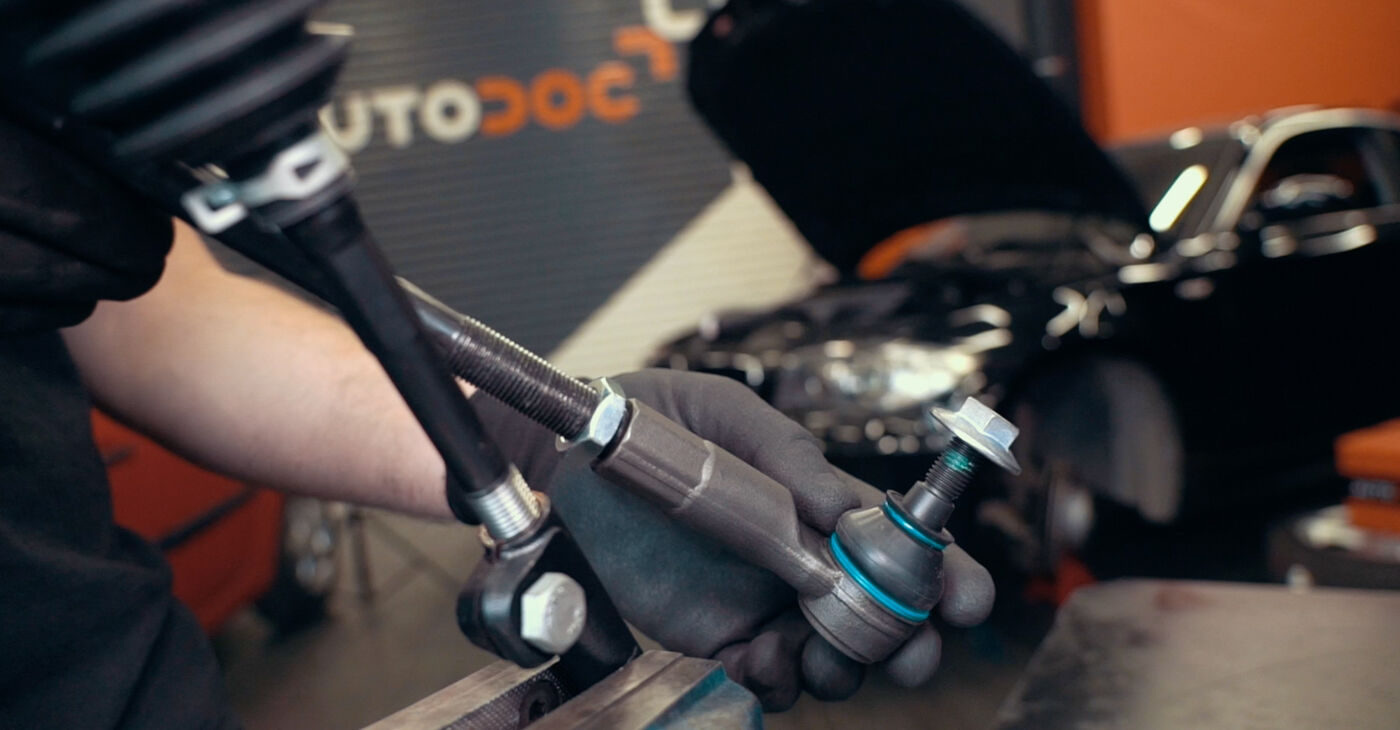 Secure the tie rod end on the tie rod with a bolt or a lock nut
 - 15.
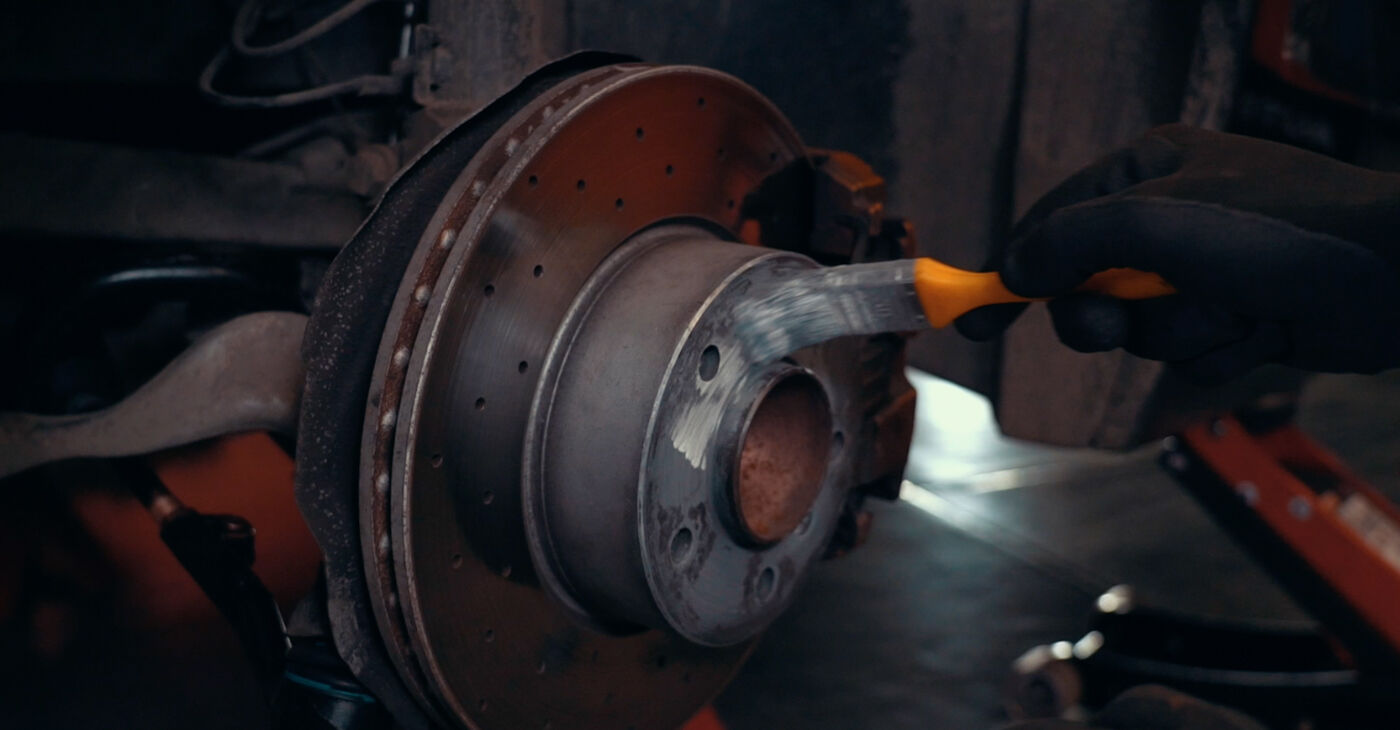
 Before installing the new component, clean the steering rack shaft of old lubricant and apply some new
 - 16.
 Apply some threadlocker to the threaded portion and screw in the new tie rod
 - 17.
 Be sure to use new fasteners


Was this manual helpful?
Please rate this manual on a scale from 1 to 5. If you have any questions, feel free to ask us.
Users voted – 0
Unlock your car maintenance assistant!
Track expenses, manage logs, schedule replacements, and more.
Popular Suspension and Arms maintenance tutorials
 Free download PDF
 1.31 MB
 Free download PDF2.41 MB
 Free download PDF593.92 KB
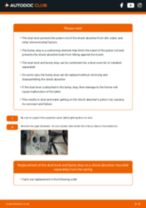 Free download PDF1.11 MB
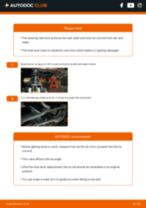 Free download PDF1.28 MB
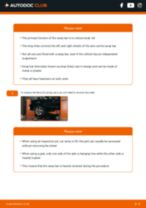 Free download PDF972.8 KB
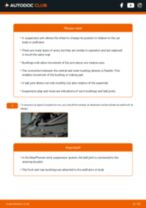 Free download PDF1.07 MB
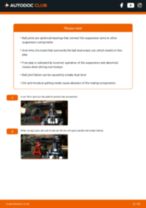 Free download PDF2.05 MB
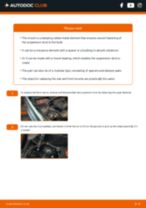 Free download PDF1.04 MB
 Free download PDF972.8 KB
Top auto repair manuals
 Free download PDF1.51 MB
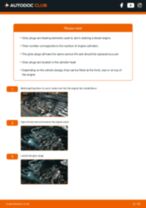 Free download PDF1.62 MB
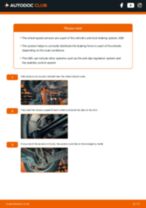 Free download PDF1.64 MB
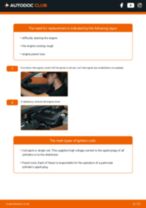 Free download PDF1.98 MB
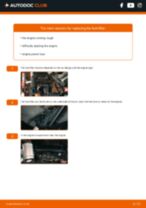 Free download PDF2 MB
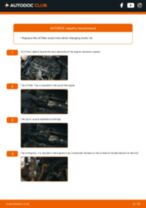 Free download PDF2.82 MB
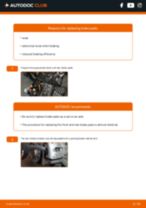 Free download PDF2.84 MB
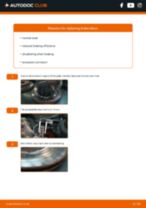 Free download PDF2.92 MB
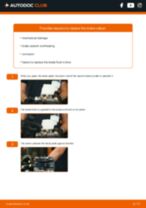 Free download PDF2.91 MB


Time to replace parts? Get even better deals in our Shop app.

SCAN ME