Disclaimer

How to change CV boot on a car – replacement tutorial
downloads:
1160
Views:
6893
CV boot replacement [AUTODOC TUTORIAL]
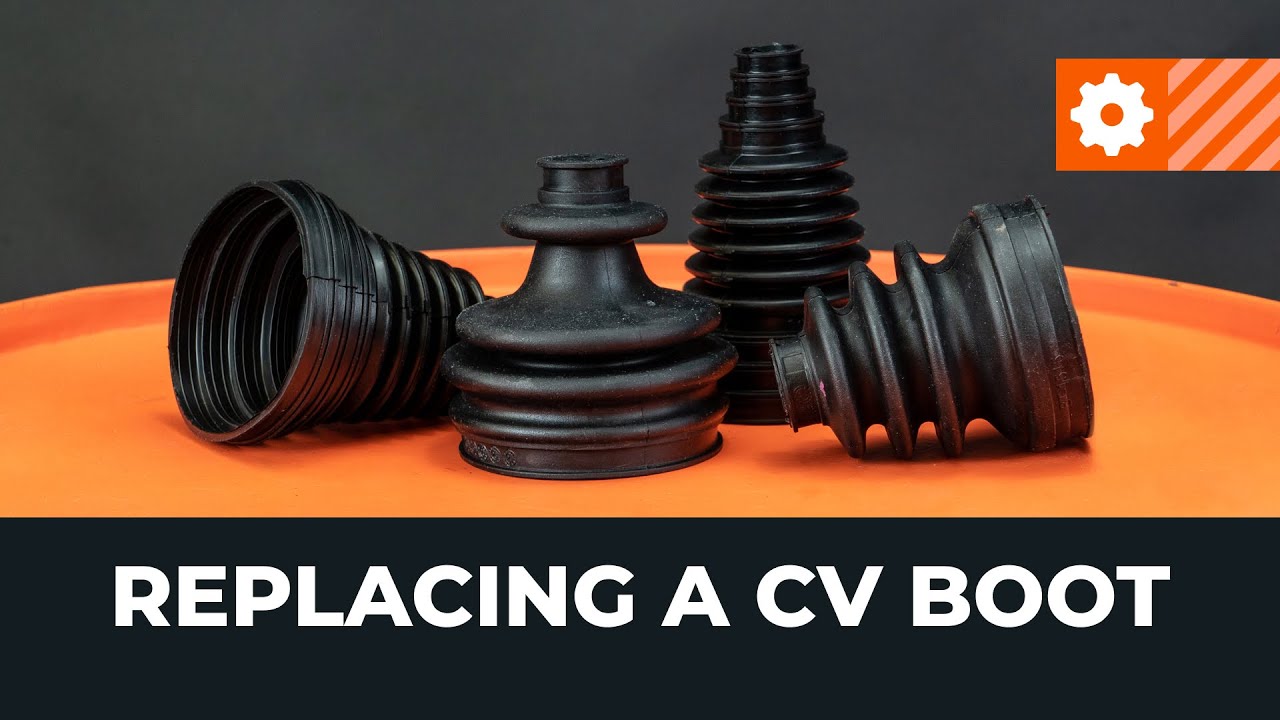
Tap wrench
Wheel impact socket
Impact socket
Circlip pliers
Jack
Line stoppers

Please note!
- CV joints are fitted on each side of the axle shaft
- The location of the components depends on the drive type: front, rear, or all-wheel drive
- CV joints are subject to considerable stress and operate in places that are not protected against dirt and moisture
- That is why they always need to be permanently lubricated and protected from adverse environmental factors
- For this purpose, the joint is sealed tight with a dust boot
- Its quality and condition directly affect the service life of the CV joint
- 1.
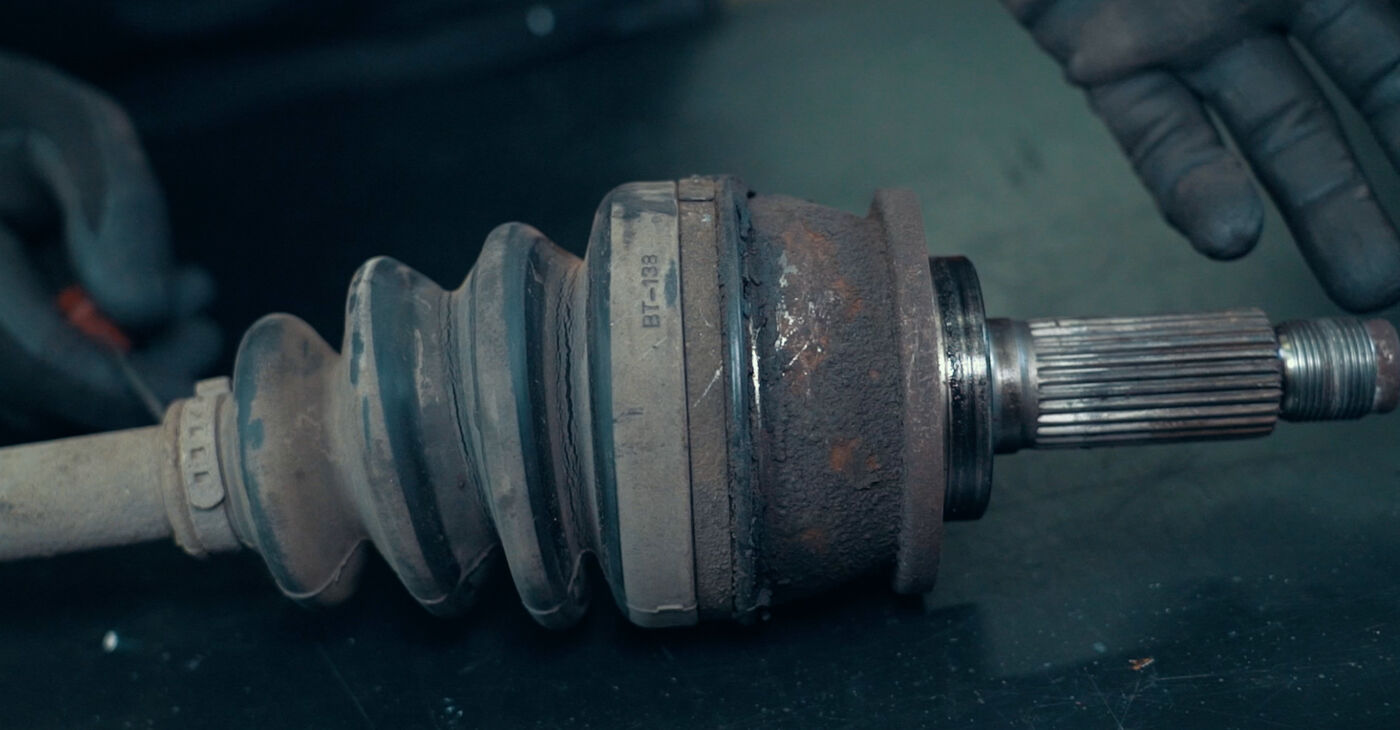
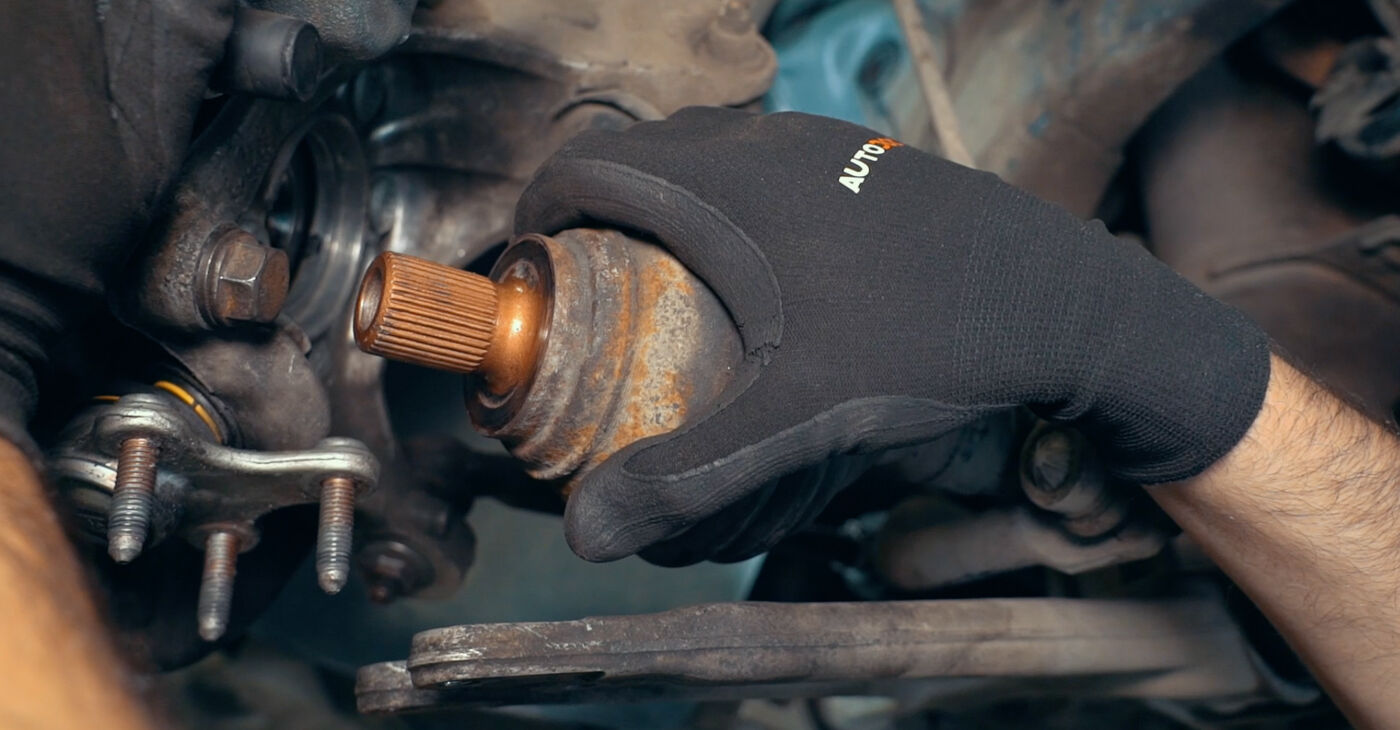 To dismount the outer CV boot, simply remove the CV joint from the wheel hub. When replacing the inner dust boot, it may be necessary to remove the complete CV axle
 - 2.
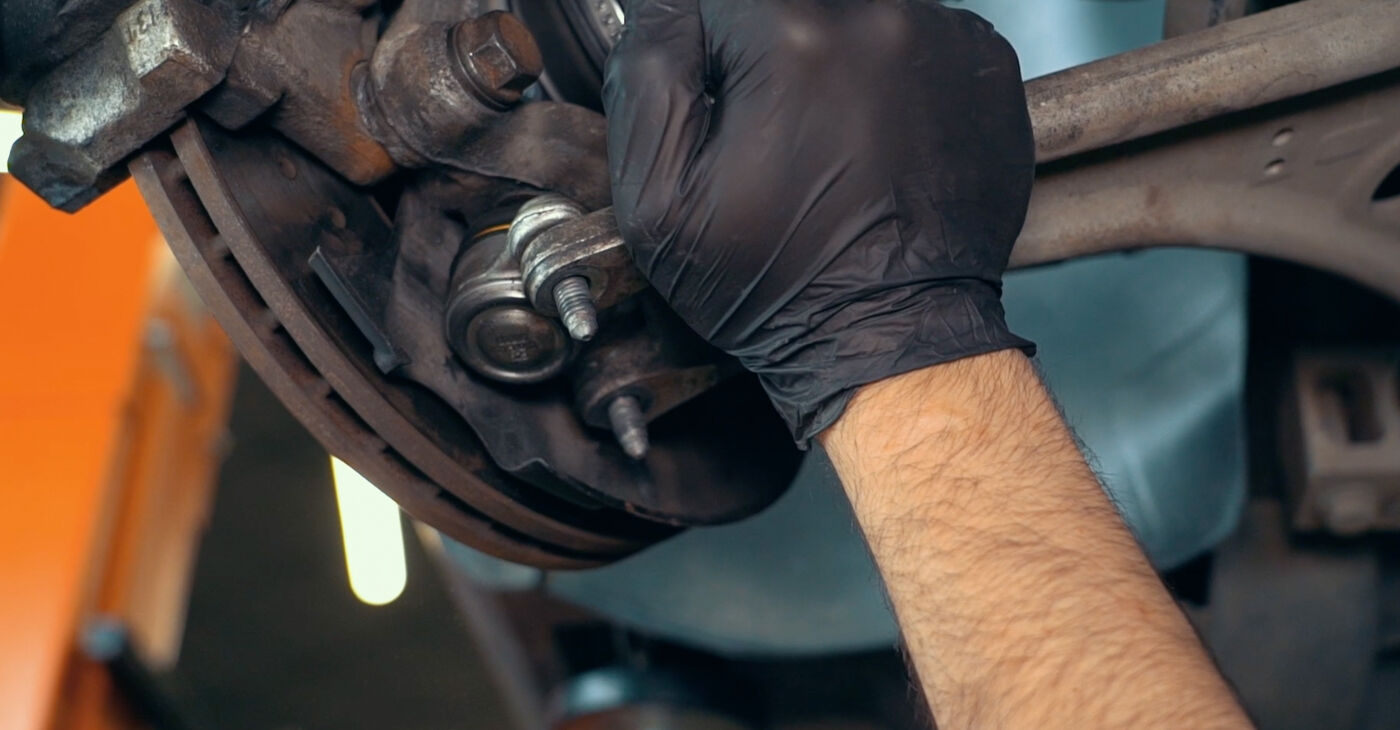
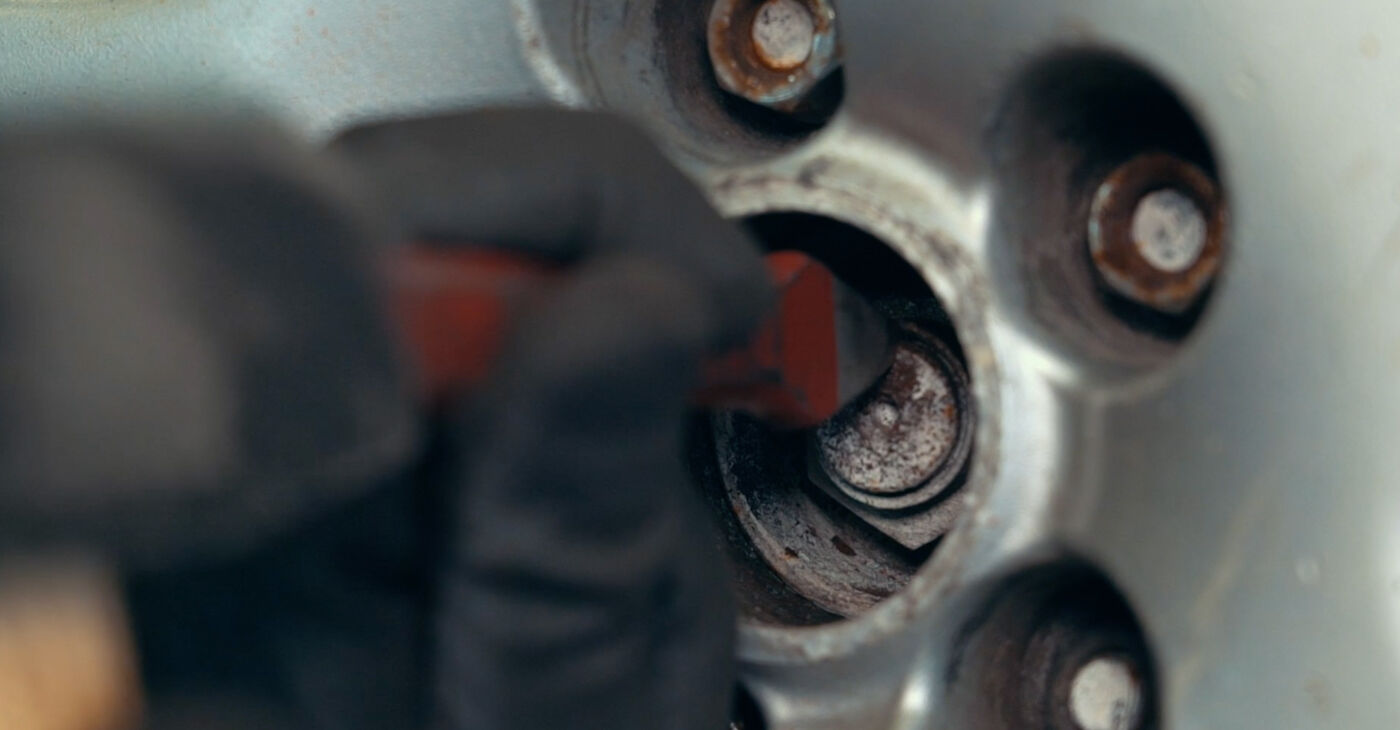 The outer CV joint is usually secured to the hub with a bolt or nut. You need to unstake the fastener or remove the cotter pin from it and unscrew itImportant!To prevent the wheel from spinning and follow safety requirements, it is best to loosen the fastener while all wheels of the car are on the ground
 - 3.
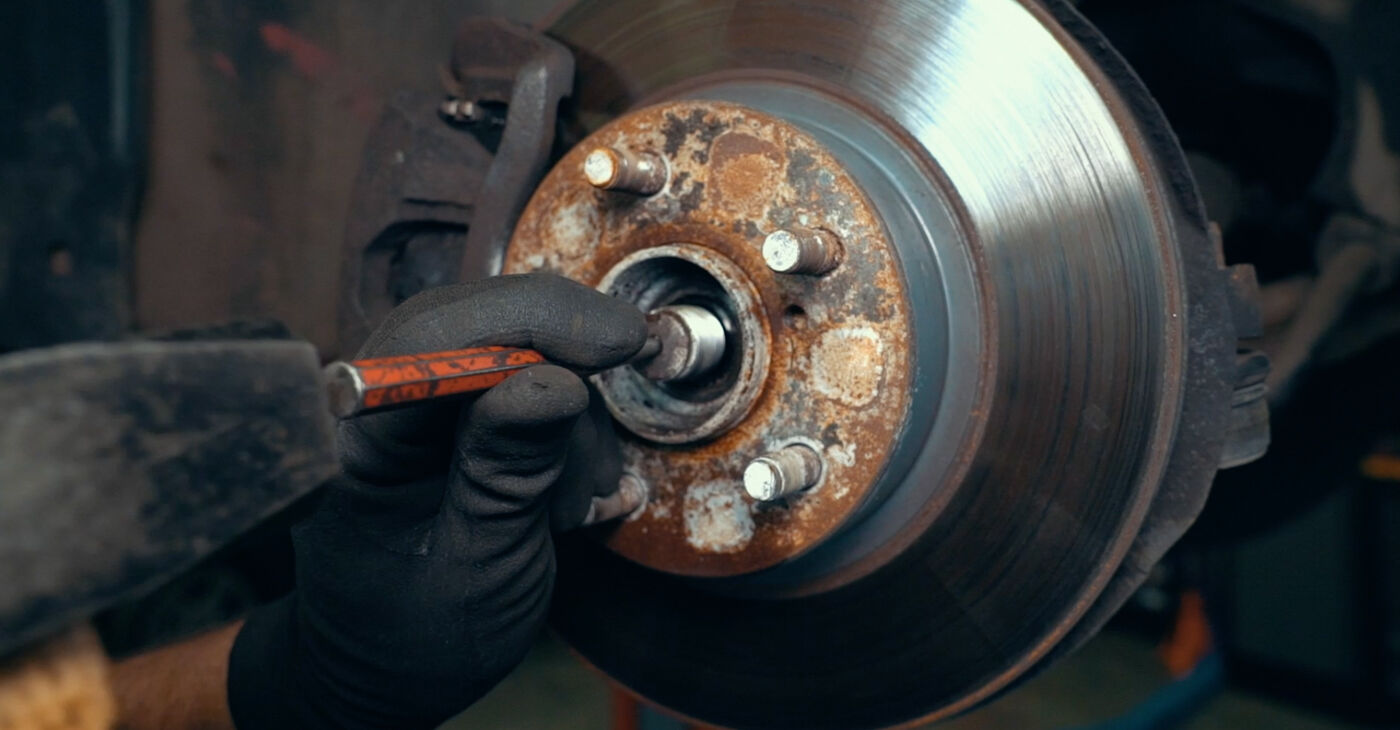
 If the CV axle shaft cannot be removed, make sure that there is enough clearance to get the CV joint out of the hub
 - 4.
 Use a punch and hammer to knock the joint outAUTODOC recommends:Only apply the punch to the centre hole of the CV joint so as not to damage the splines
 - 5.
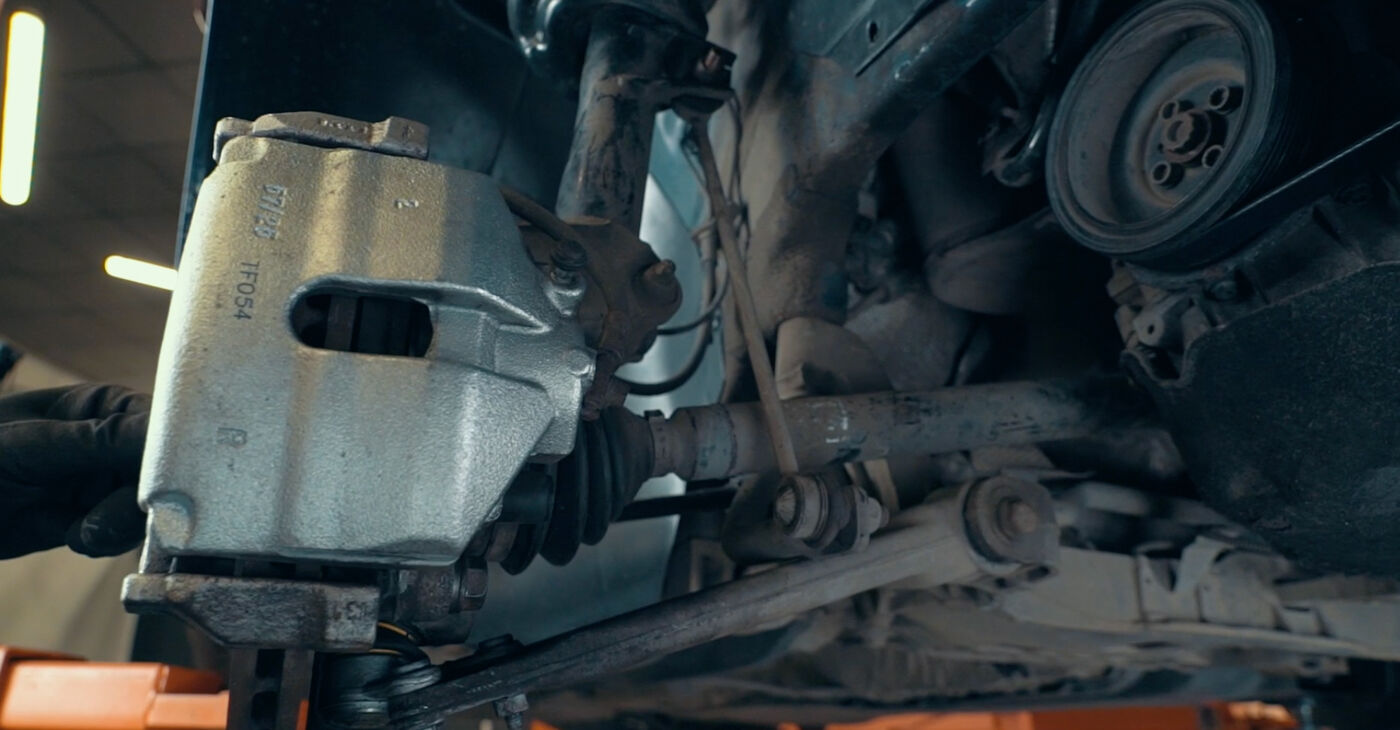
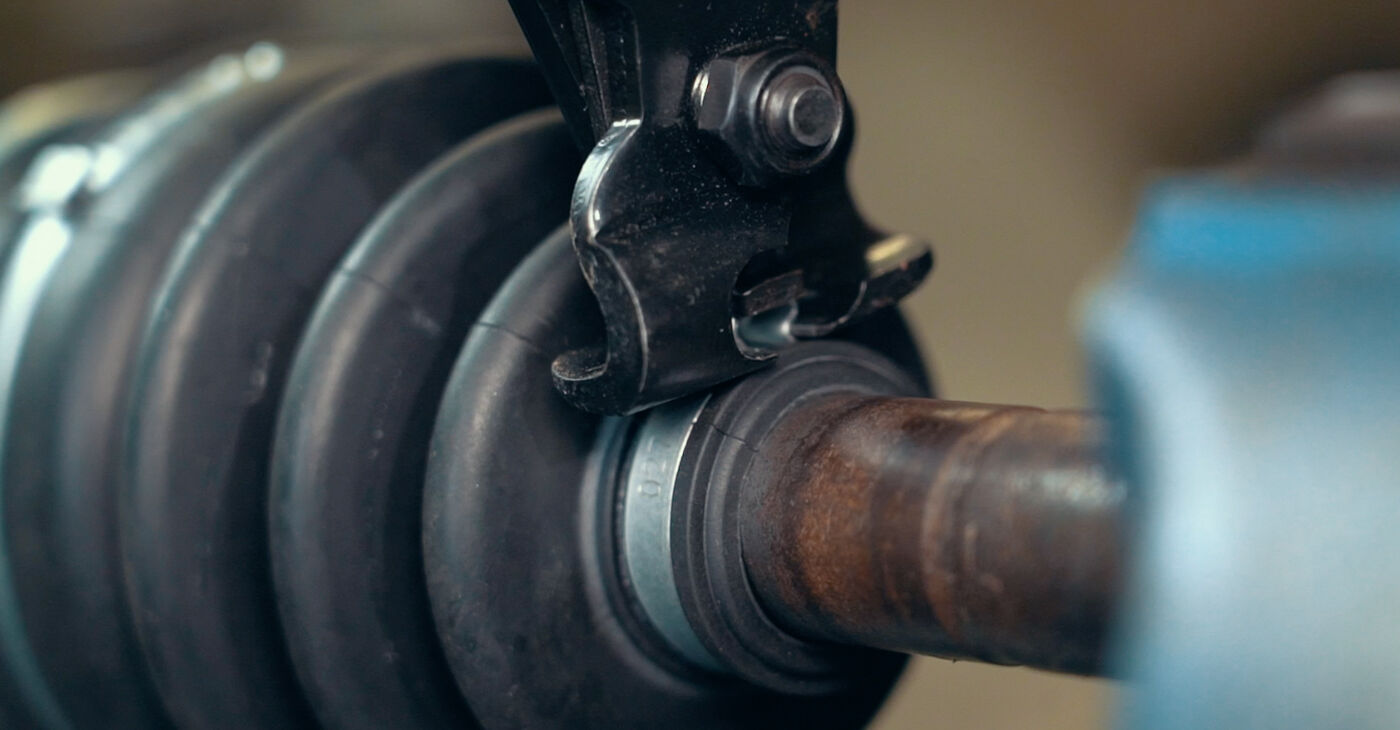
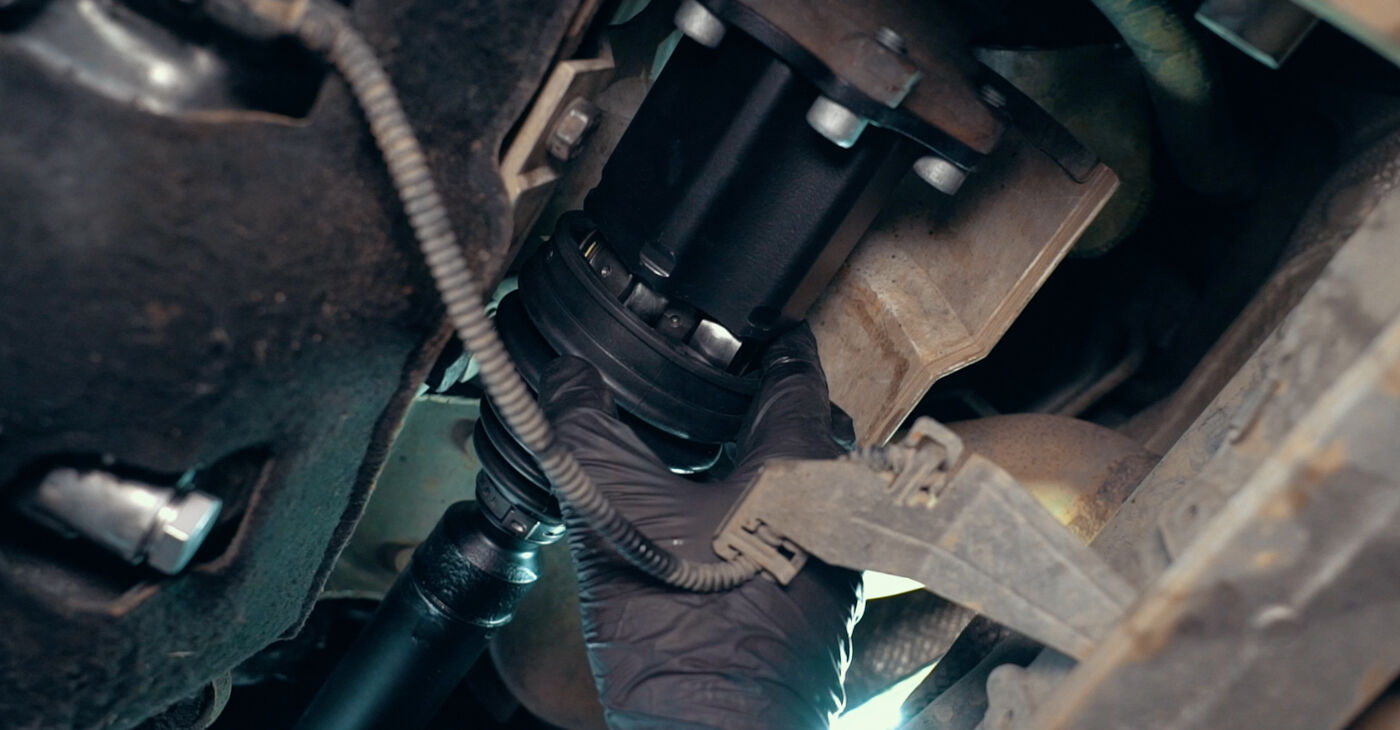
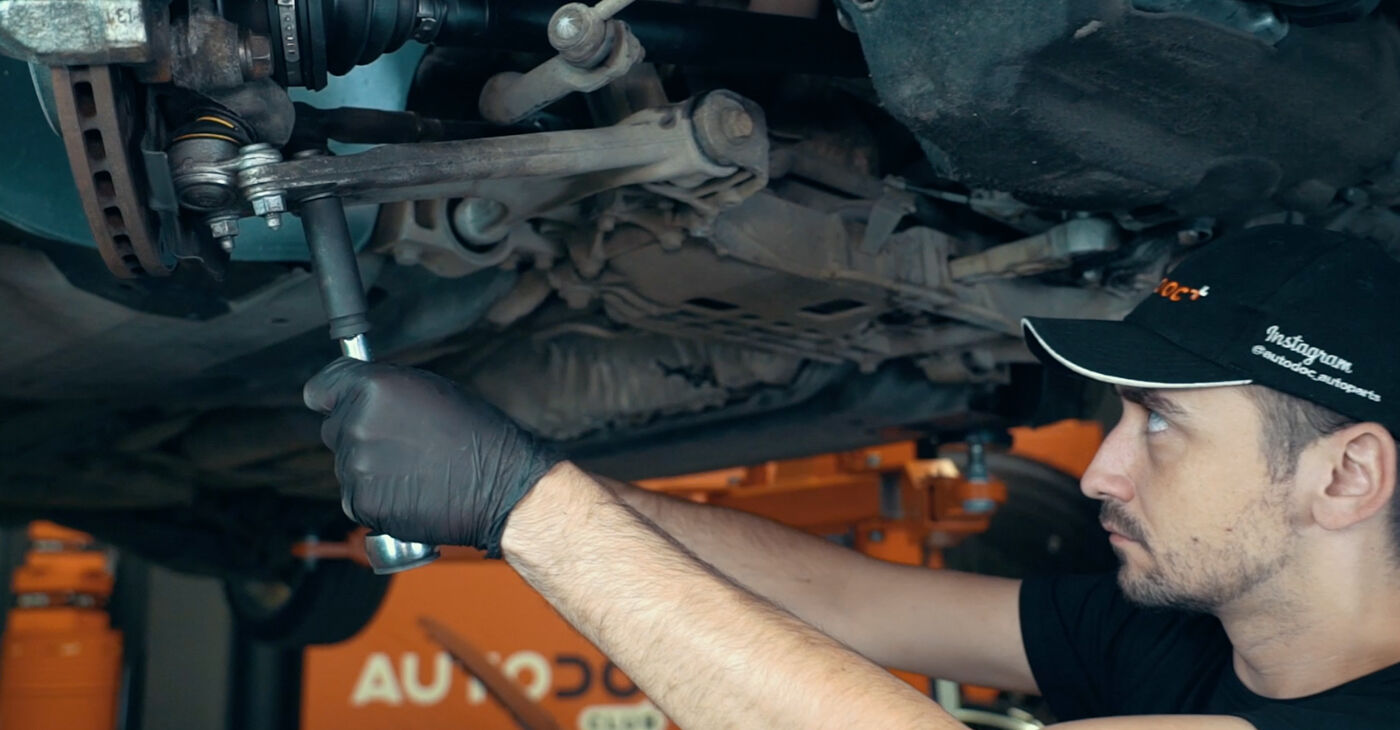
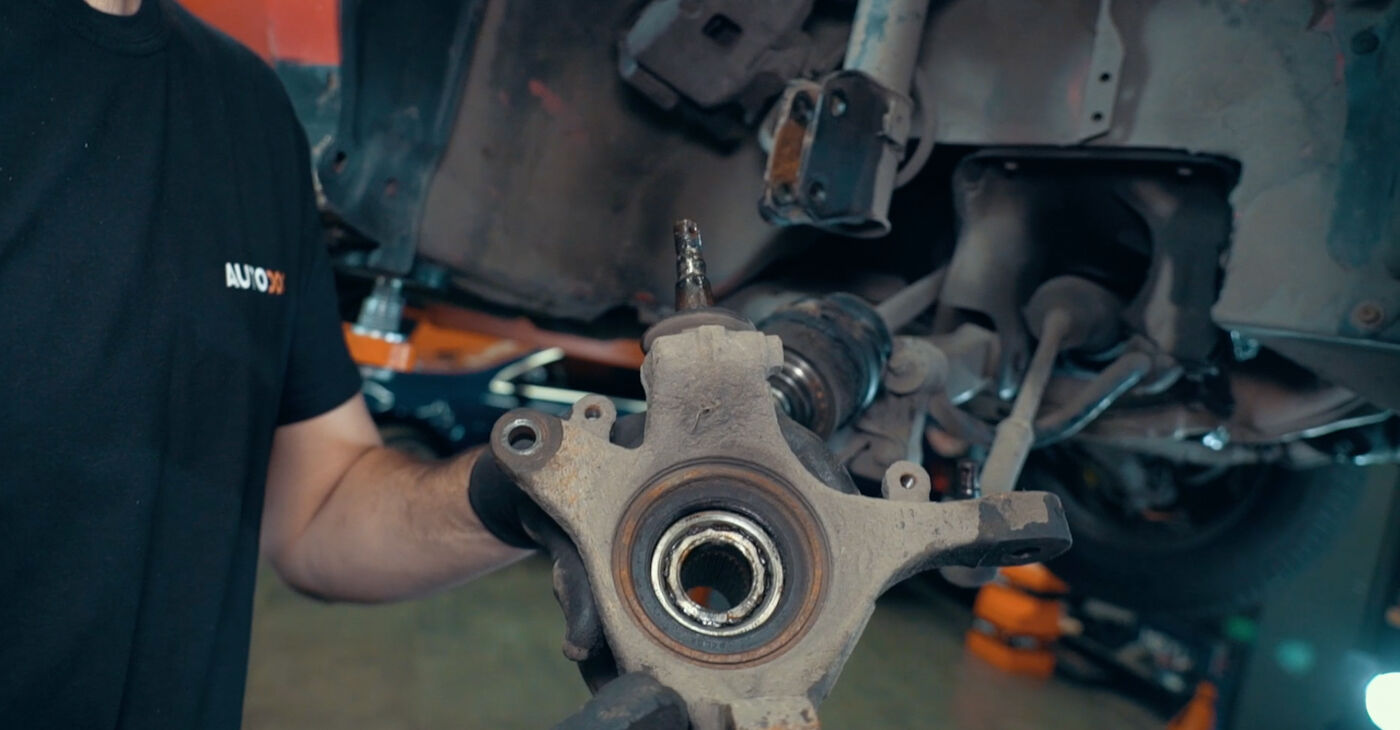 Remove the ball joint or detach the steering knuckle from the suspension strut
 - 6.
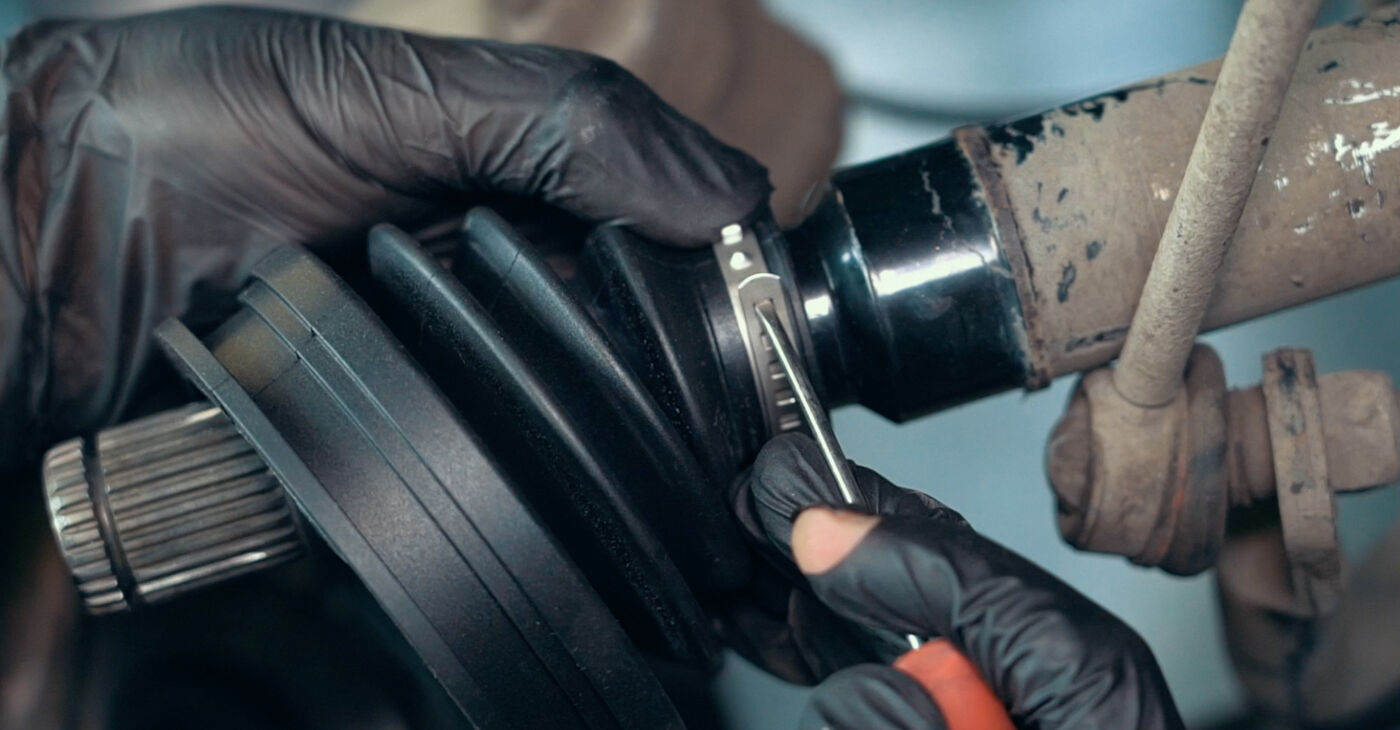
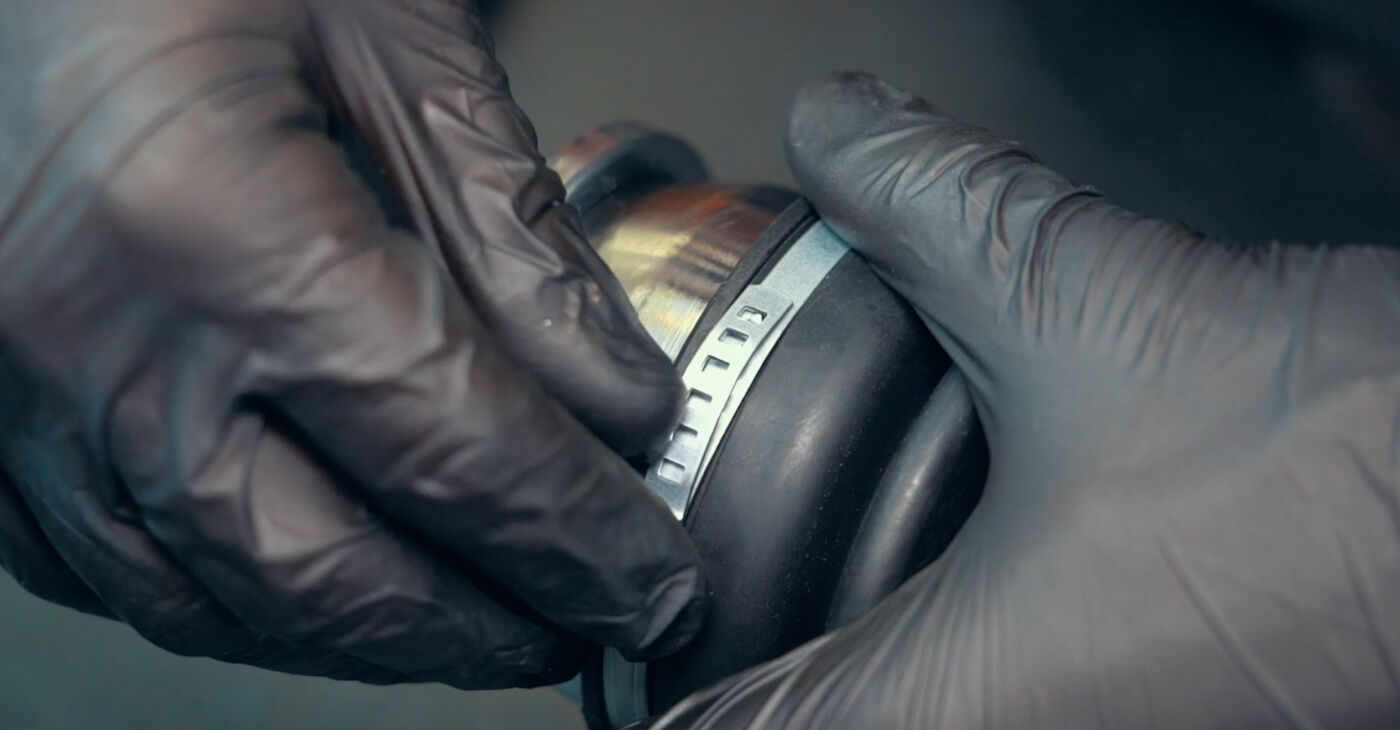
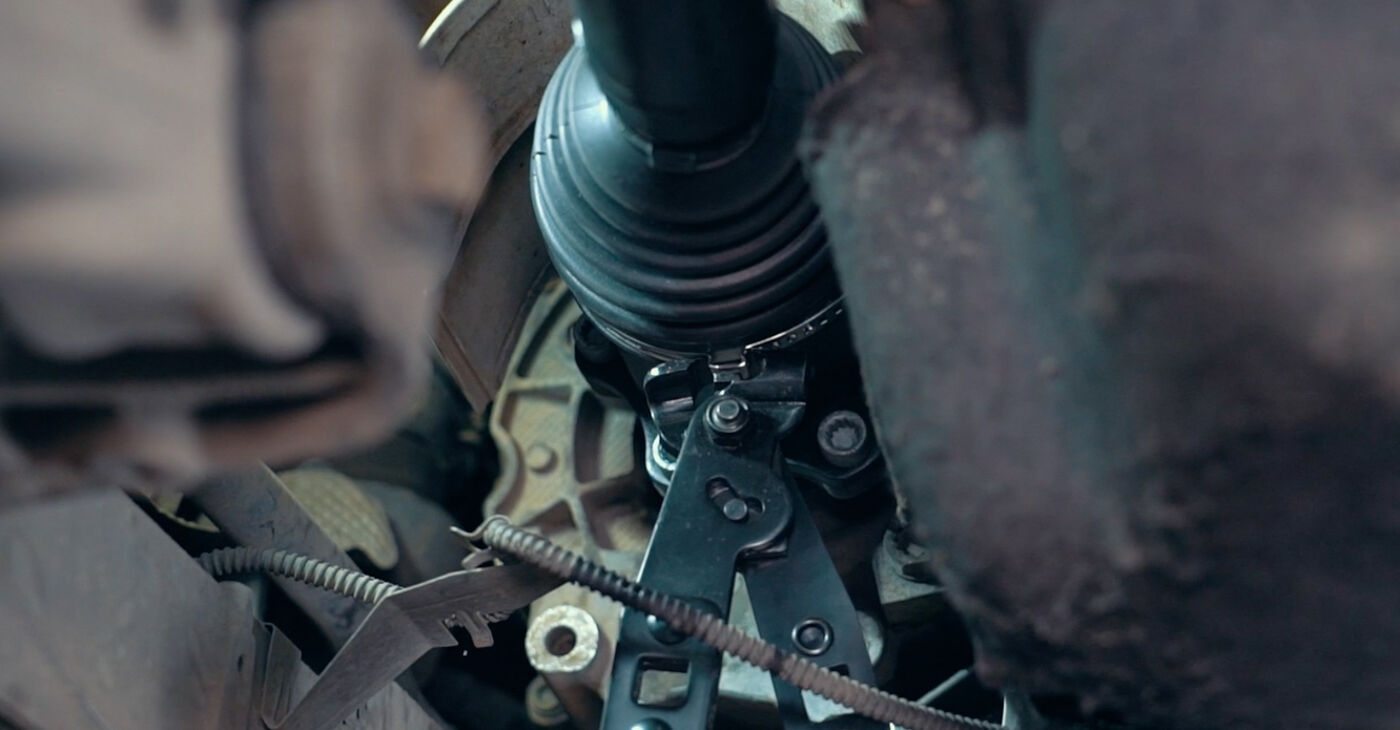
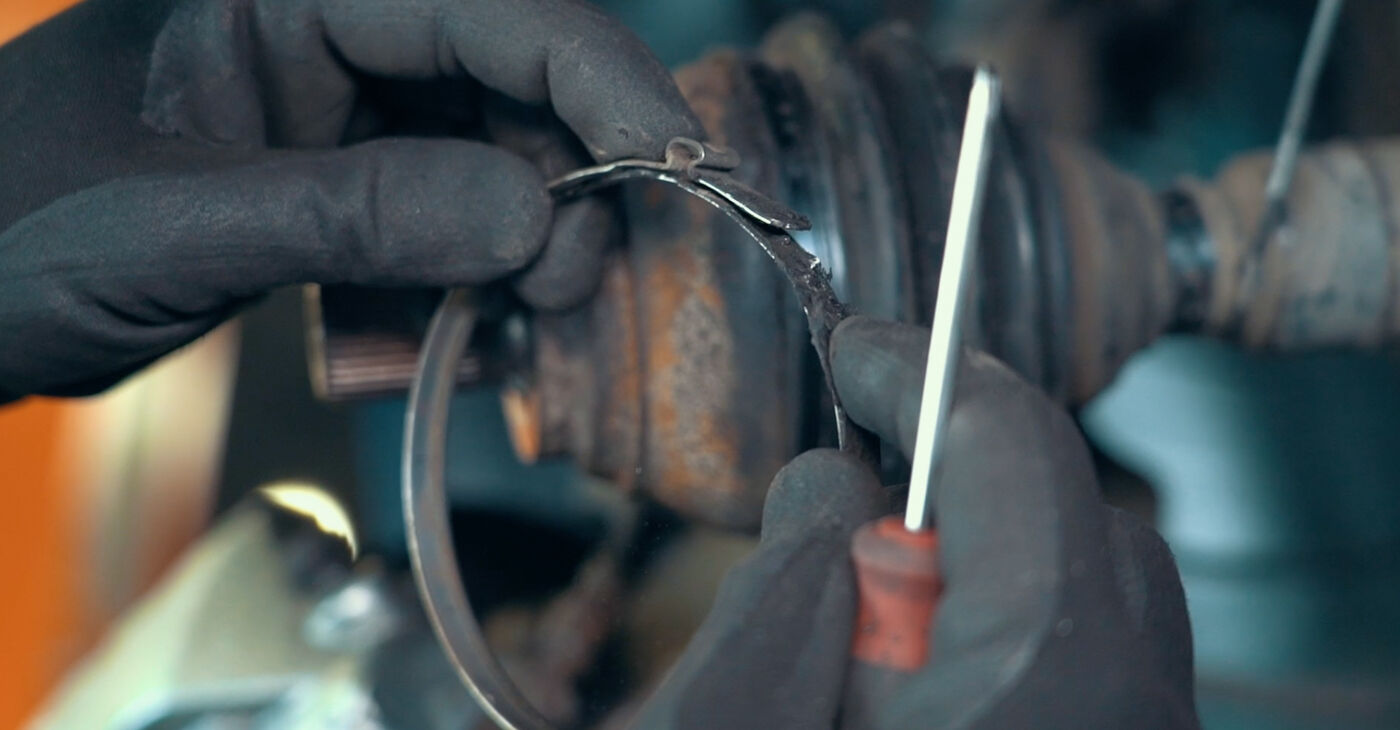 Remove the dust boot clamps
 - 7.
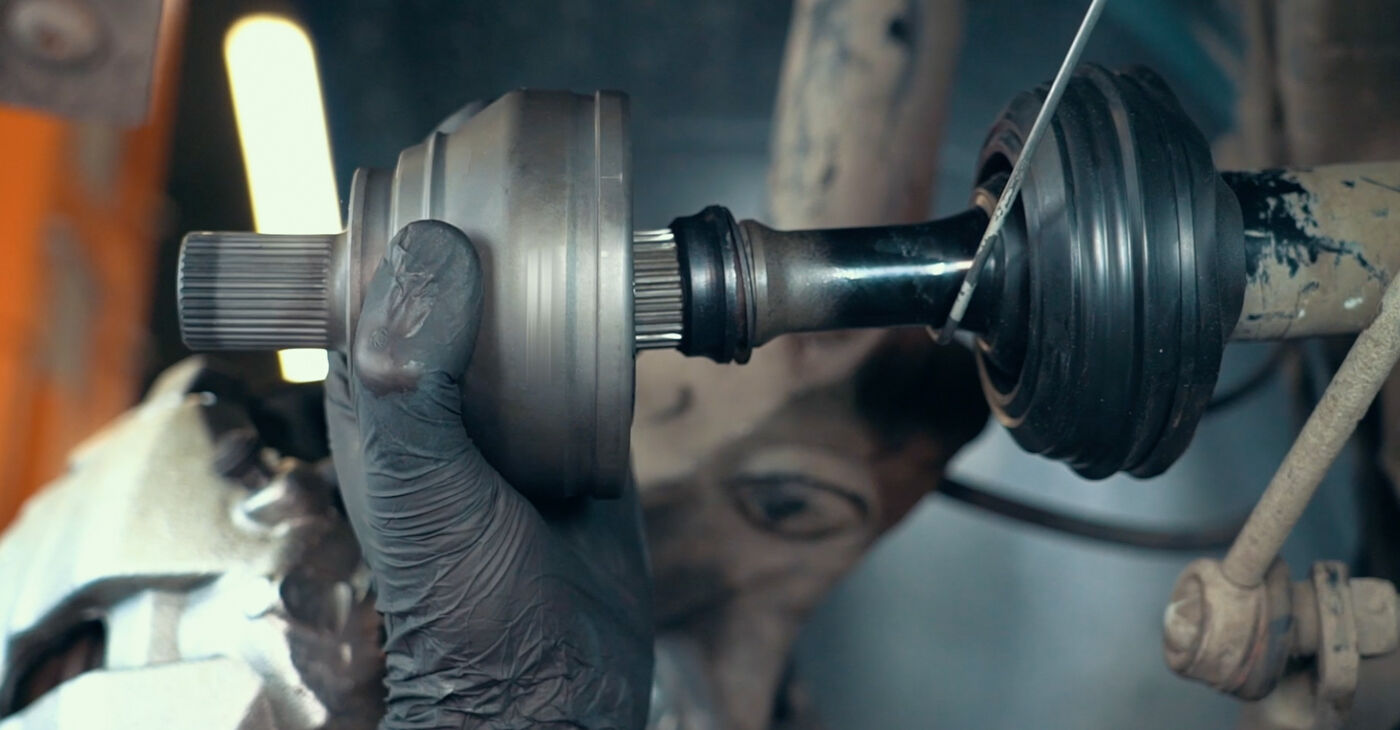
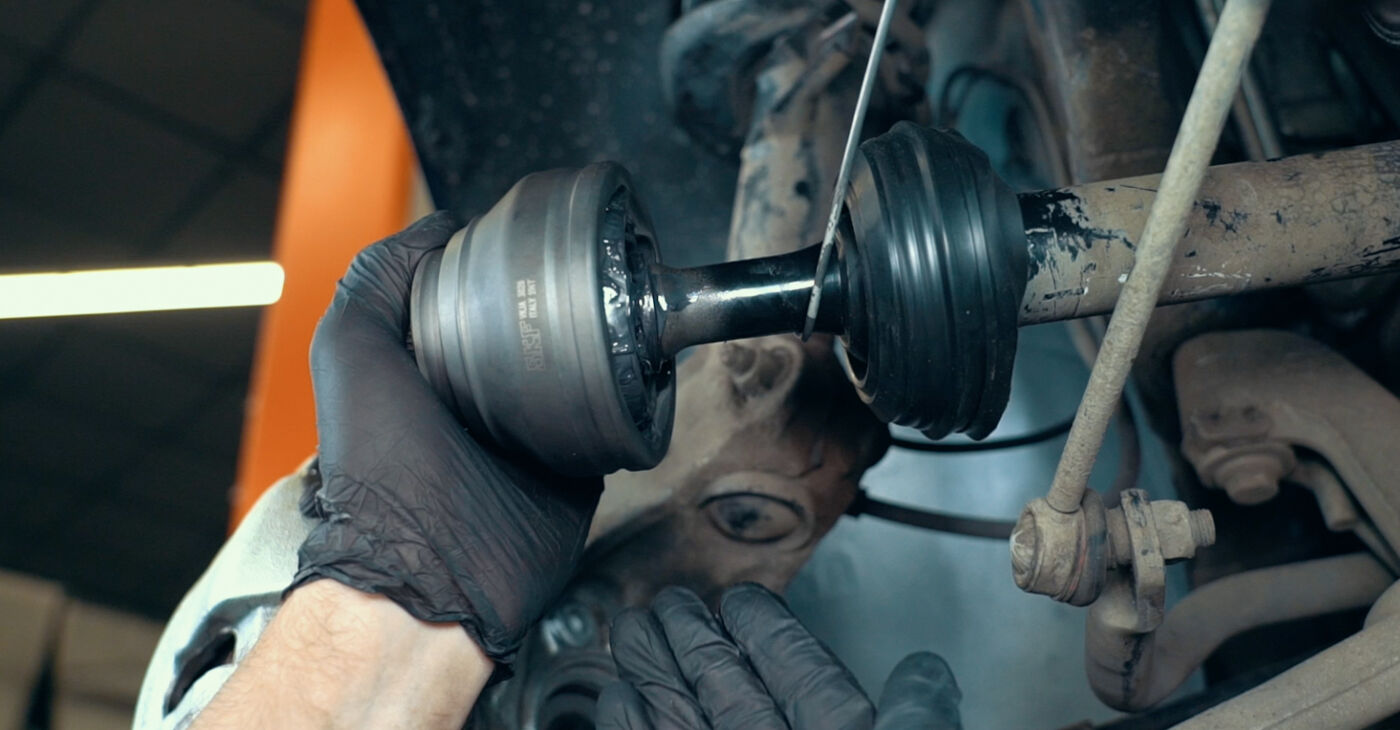
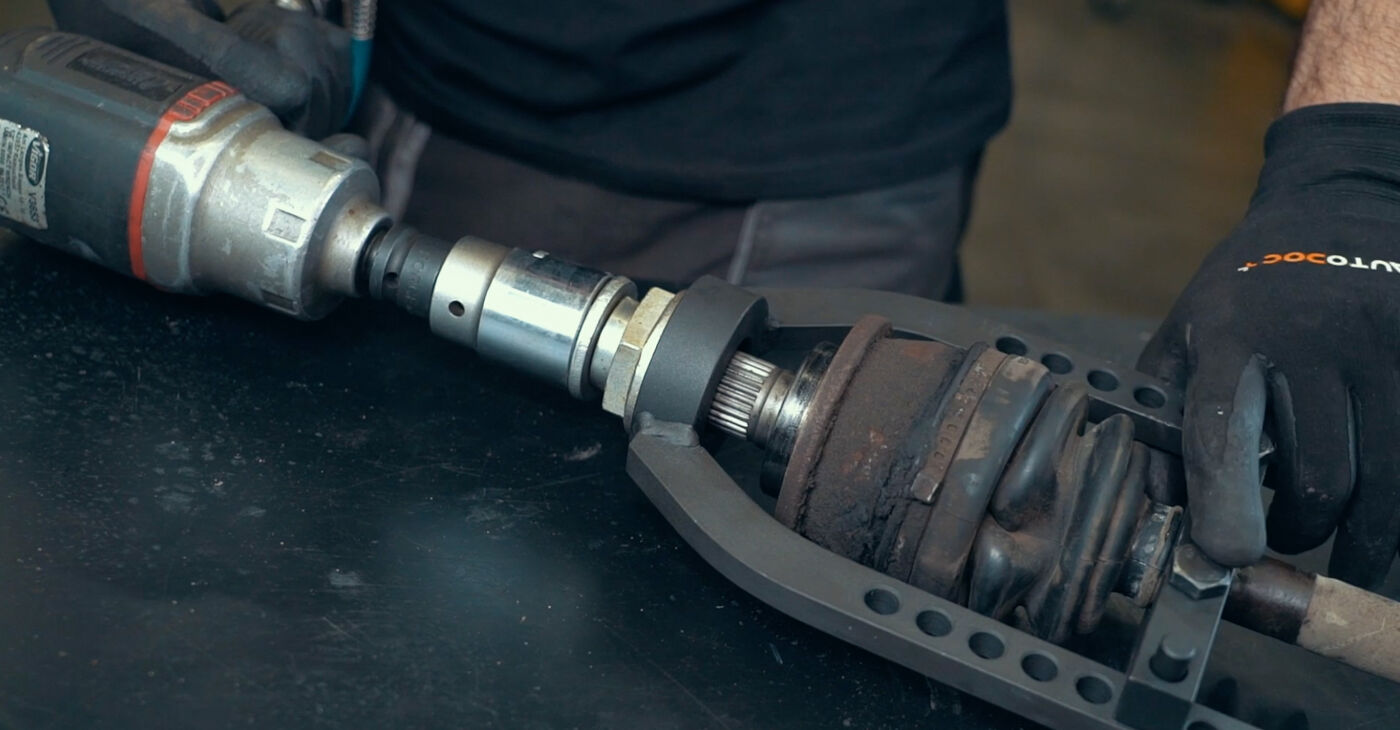
 Detach the CV joint from the axle shaftAUTODOC experts recommend:To remove a CV joint of this type, use its own fastening bolt
 - 8.
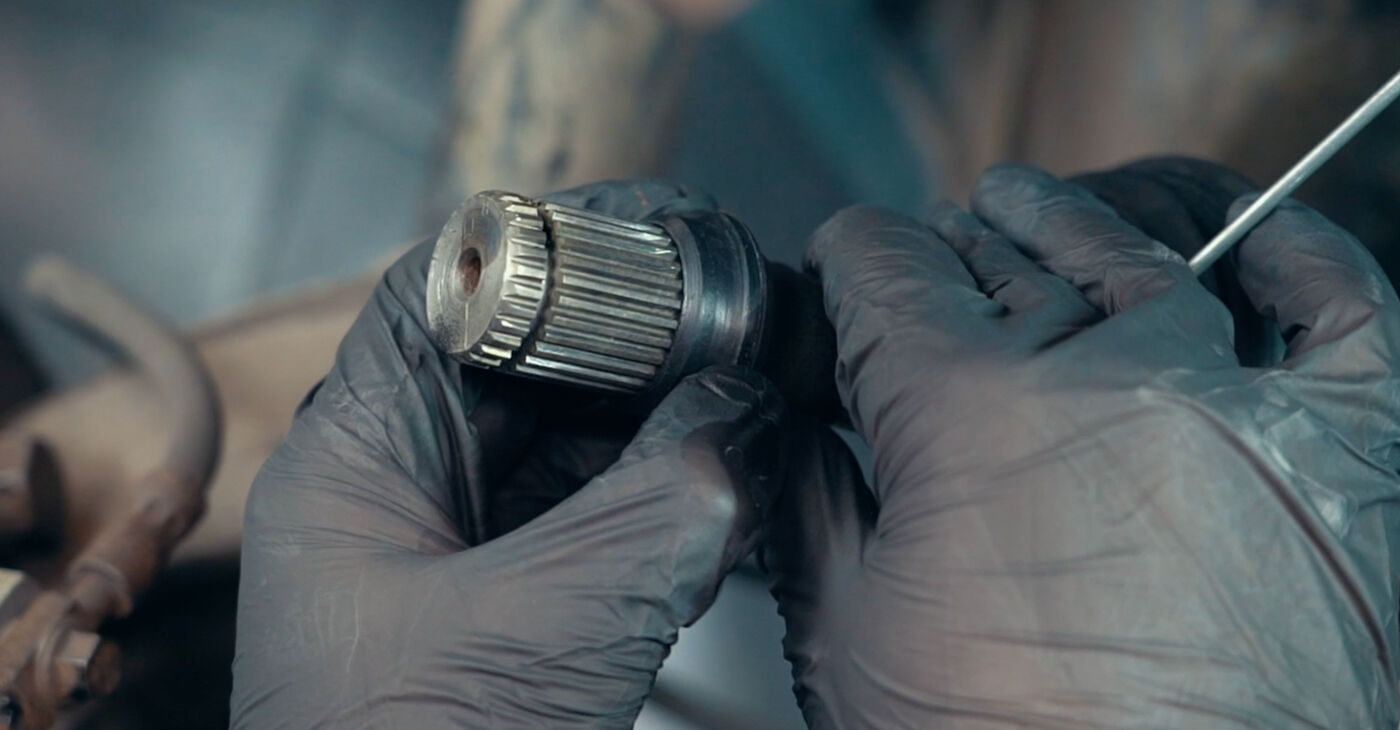
 Replace the circlip, inspect the axle shaft splines for wear
 - 9.
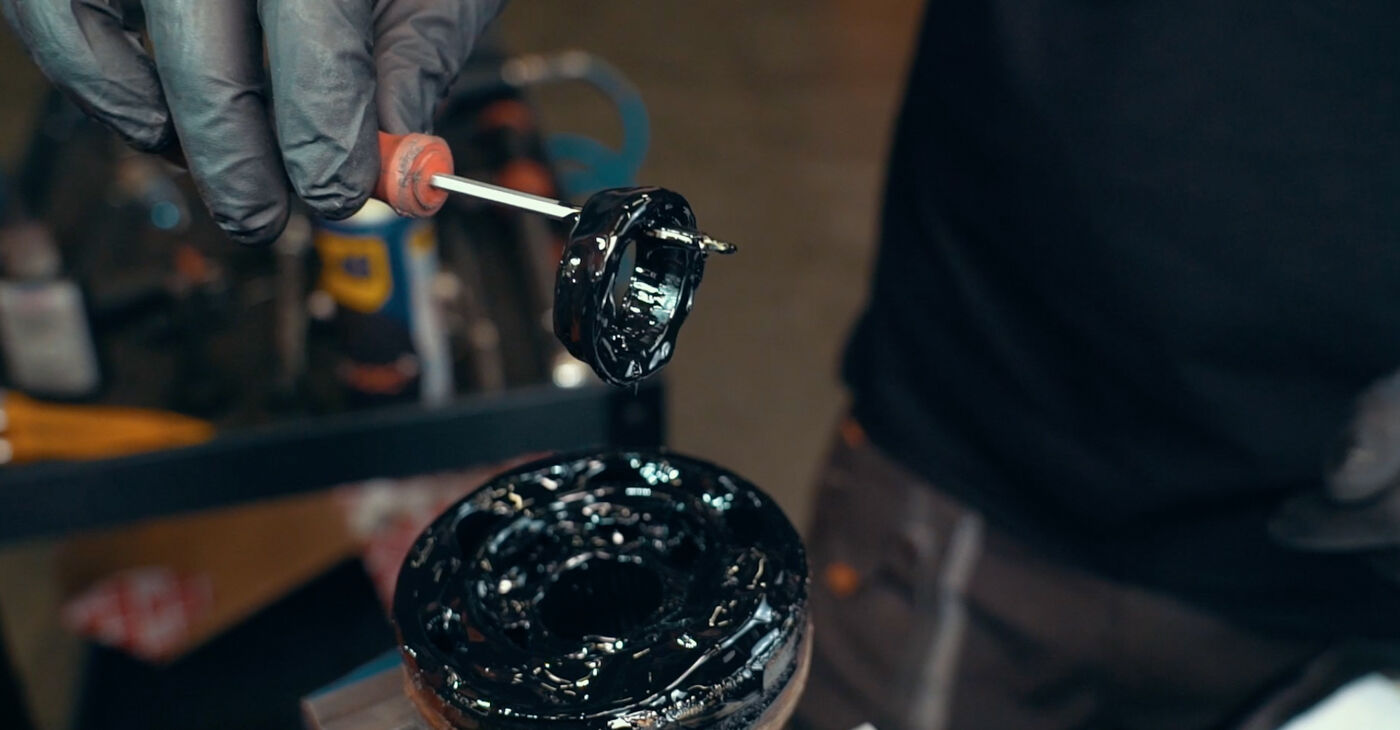
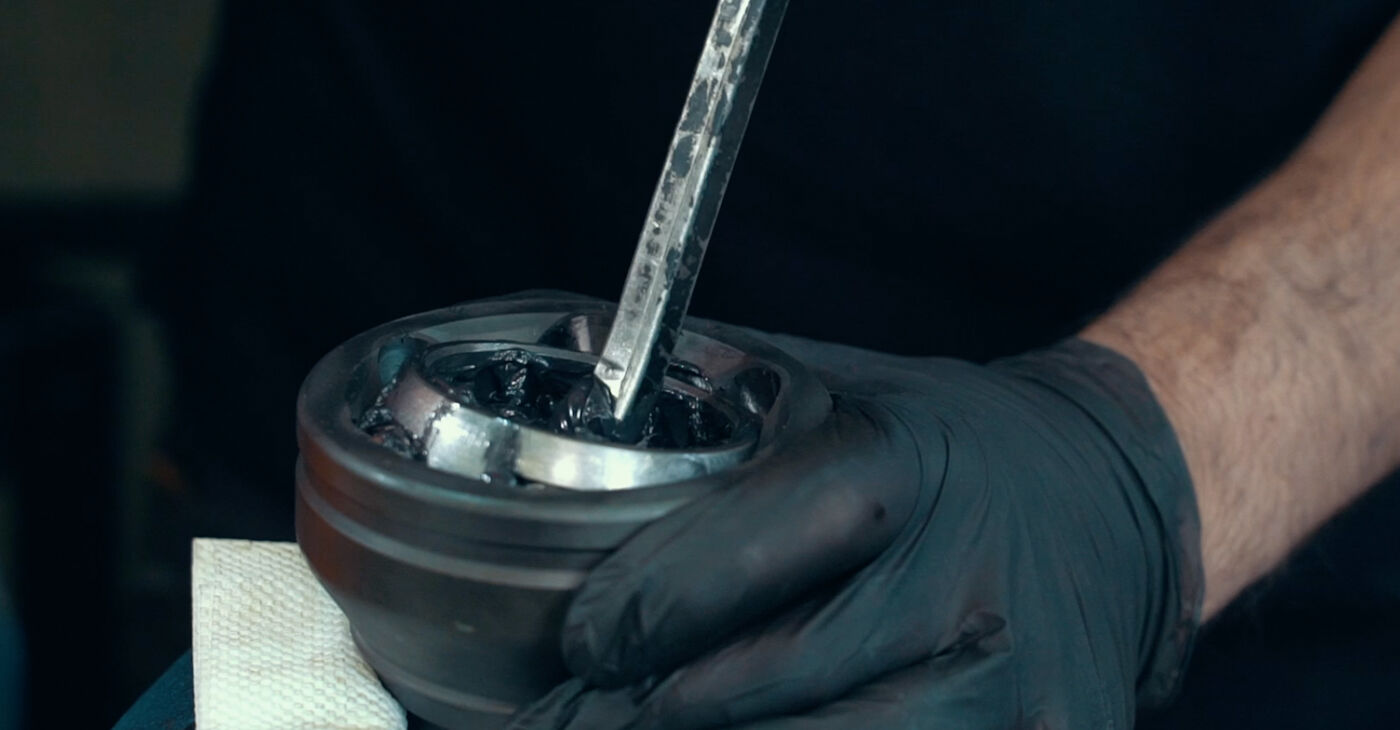
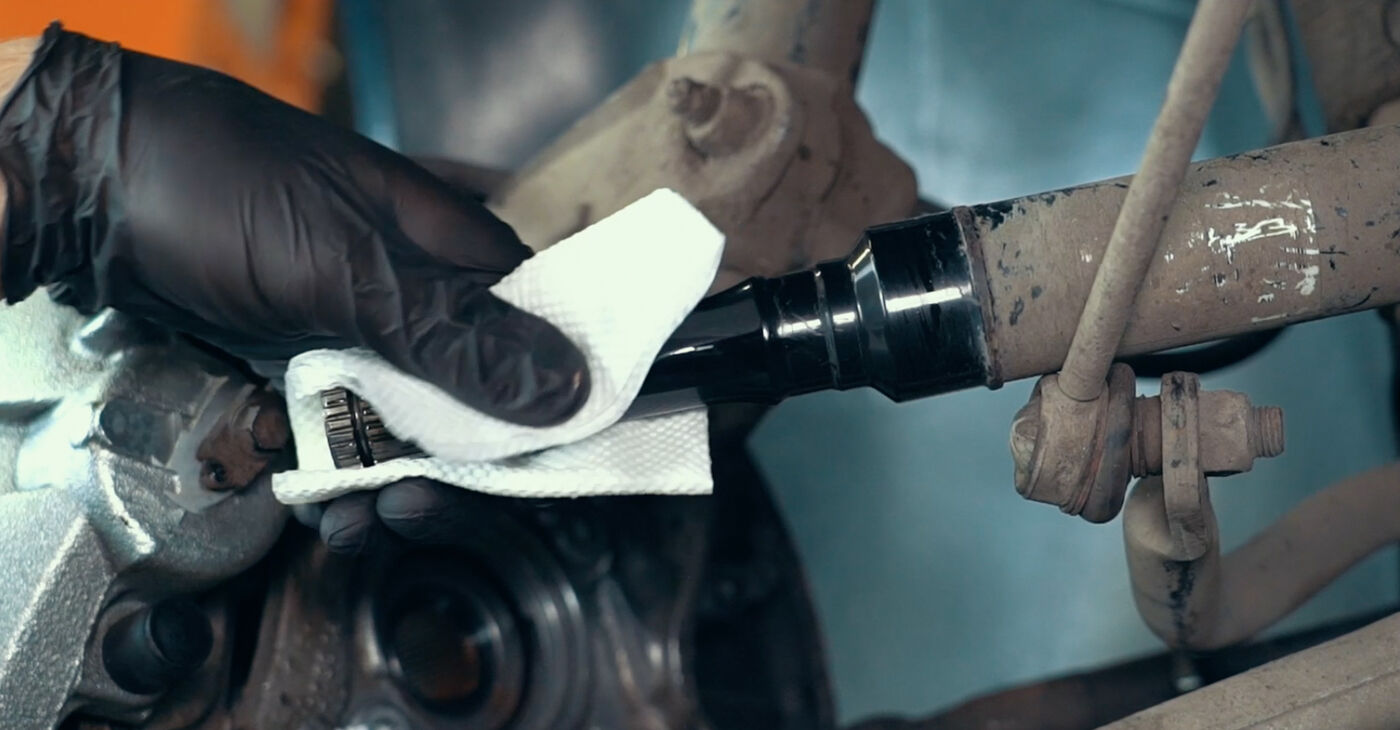
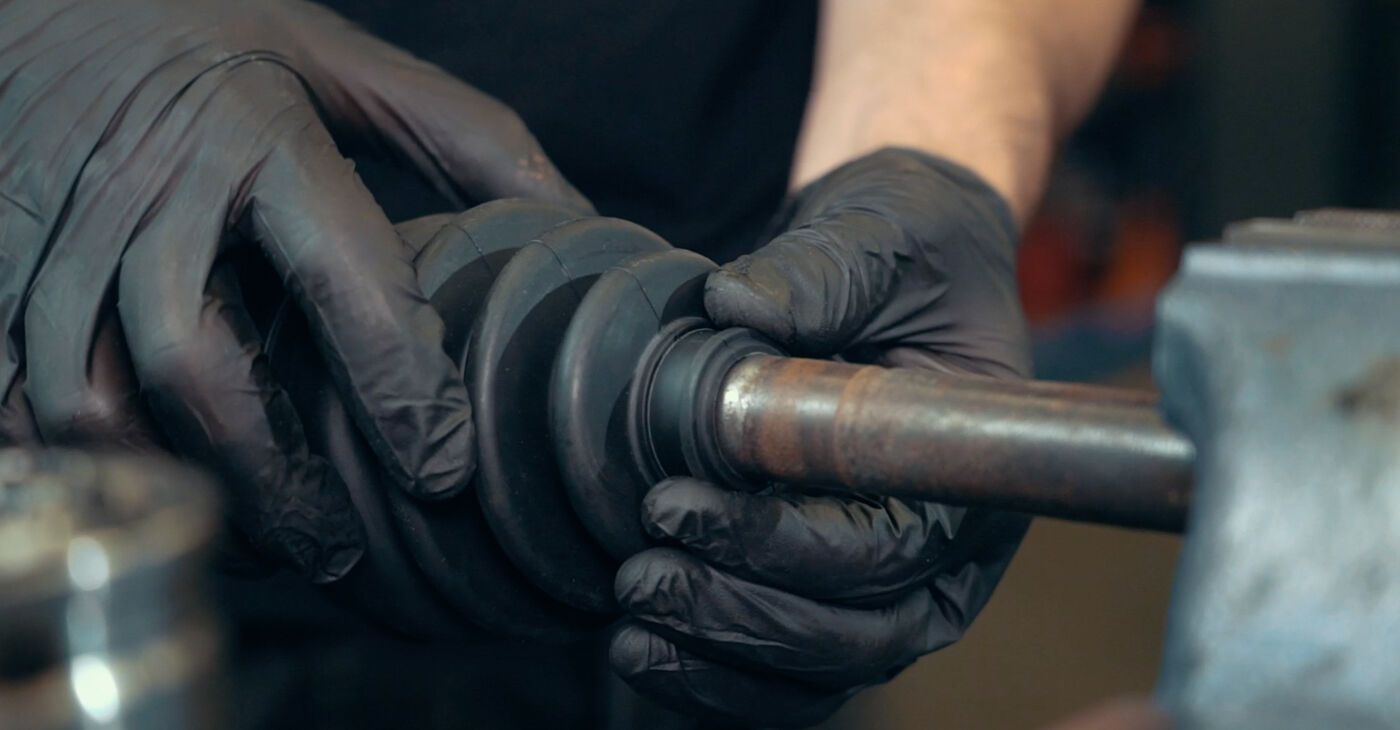
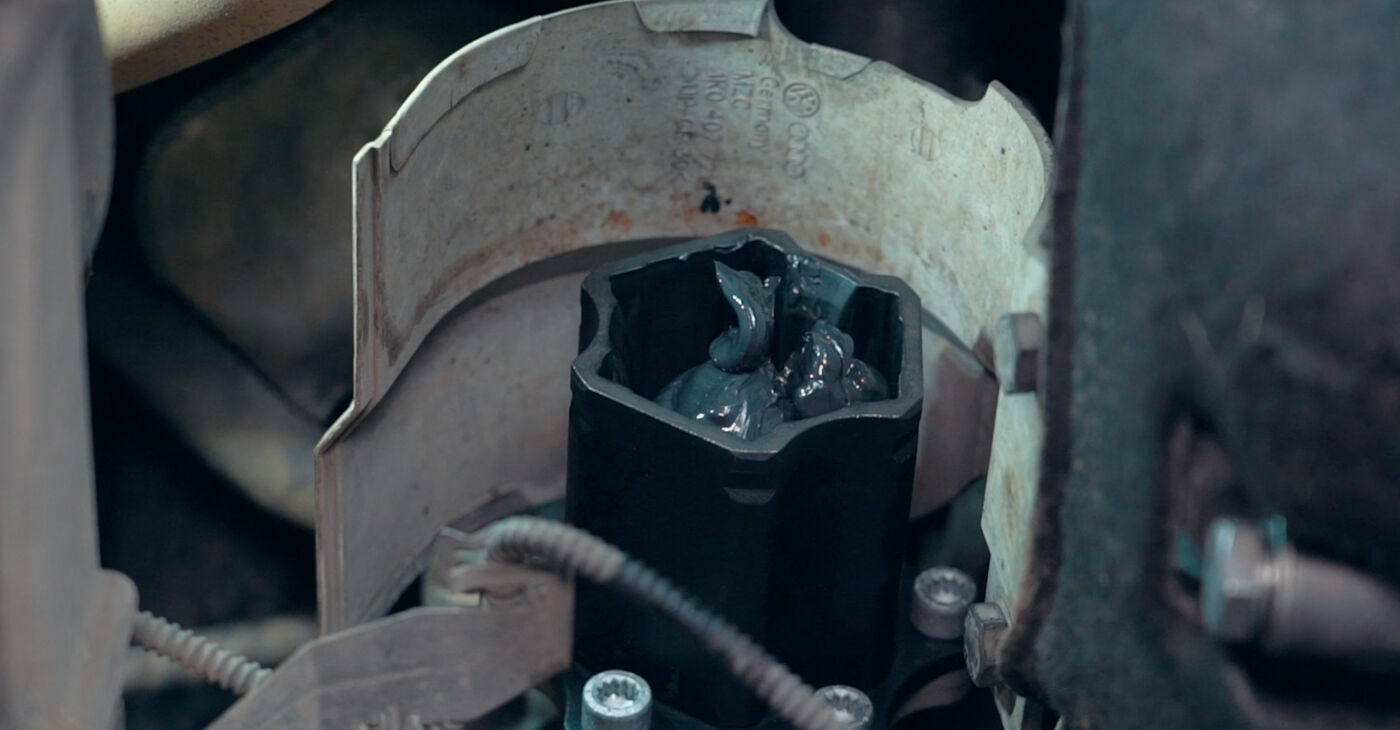
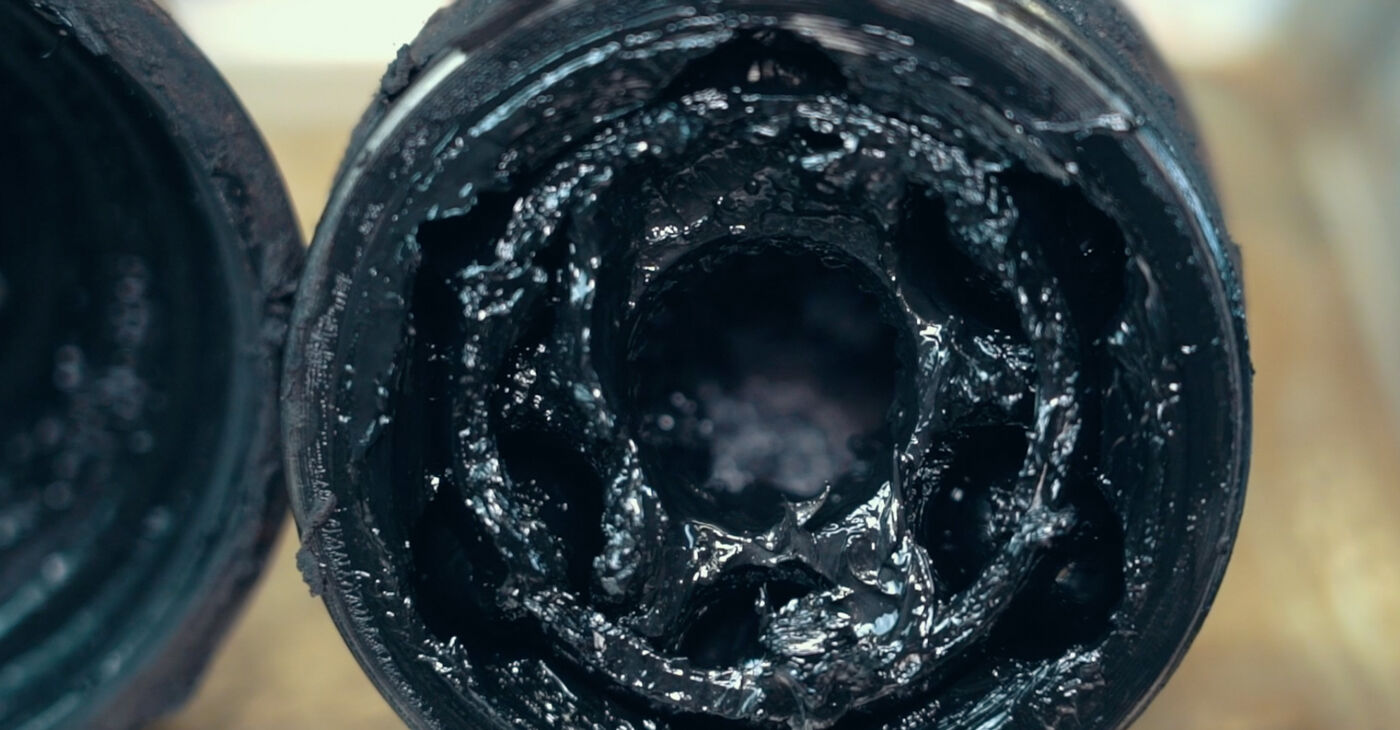 Remove the boot and clean the old grease off the CV joint
 - 10.
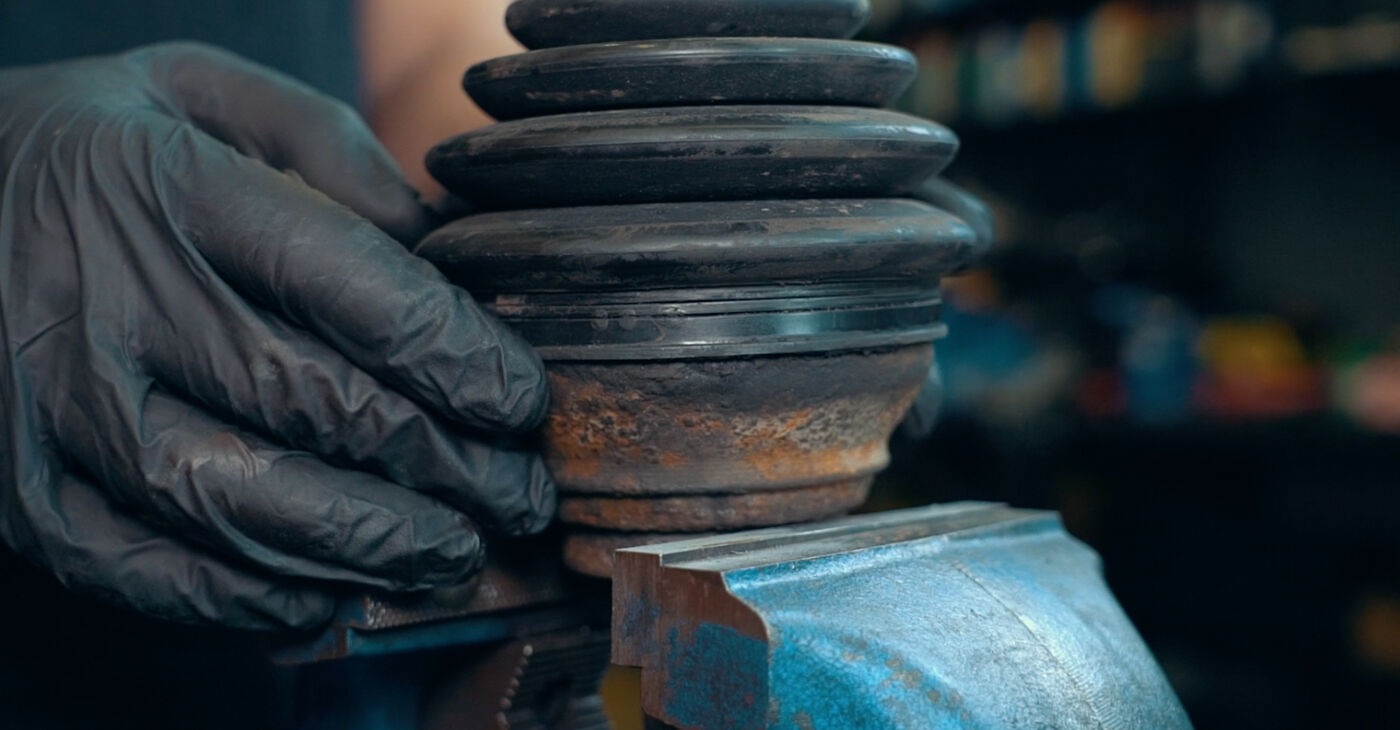 Secure the CV joint in a viceBe careful!To avoid damaging the splines, secure the part by its housing. You could also use wooden vice jaw liners
 - 11.
 Remove the boot from the CV joint by prying it off with a suitable tool. Proceed carefully as there is a large amount of grease insidePlease note!Stains of lubricant on the boot where it contacts the CV joint indicate loss of tightnessThis can be caused by corrosion on the joint’s housing where the boot is attached to it
 - 12.
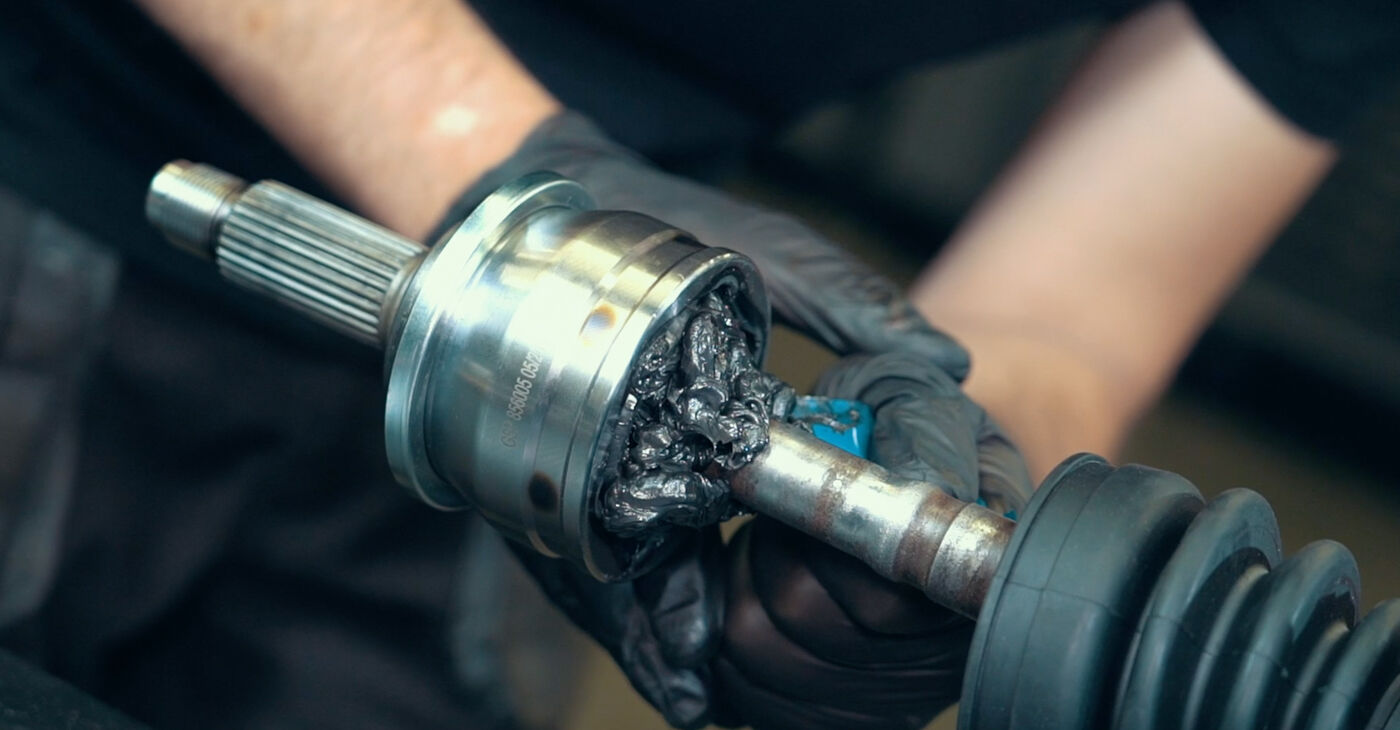
 Remove the thrust washer, the plastic bushing that limits the articulation angle, and the fastening bolt
 - 13.
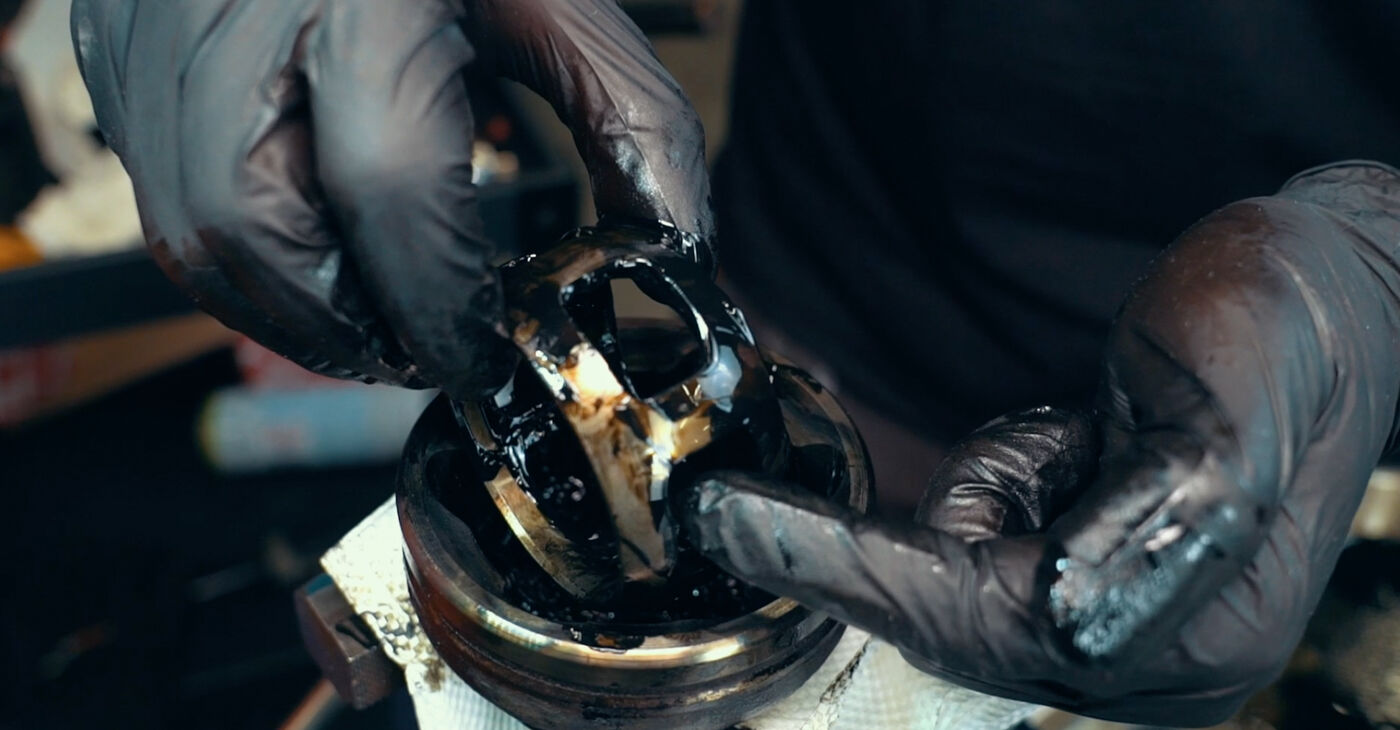
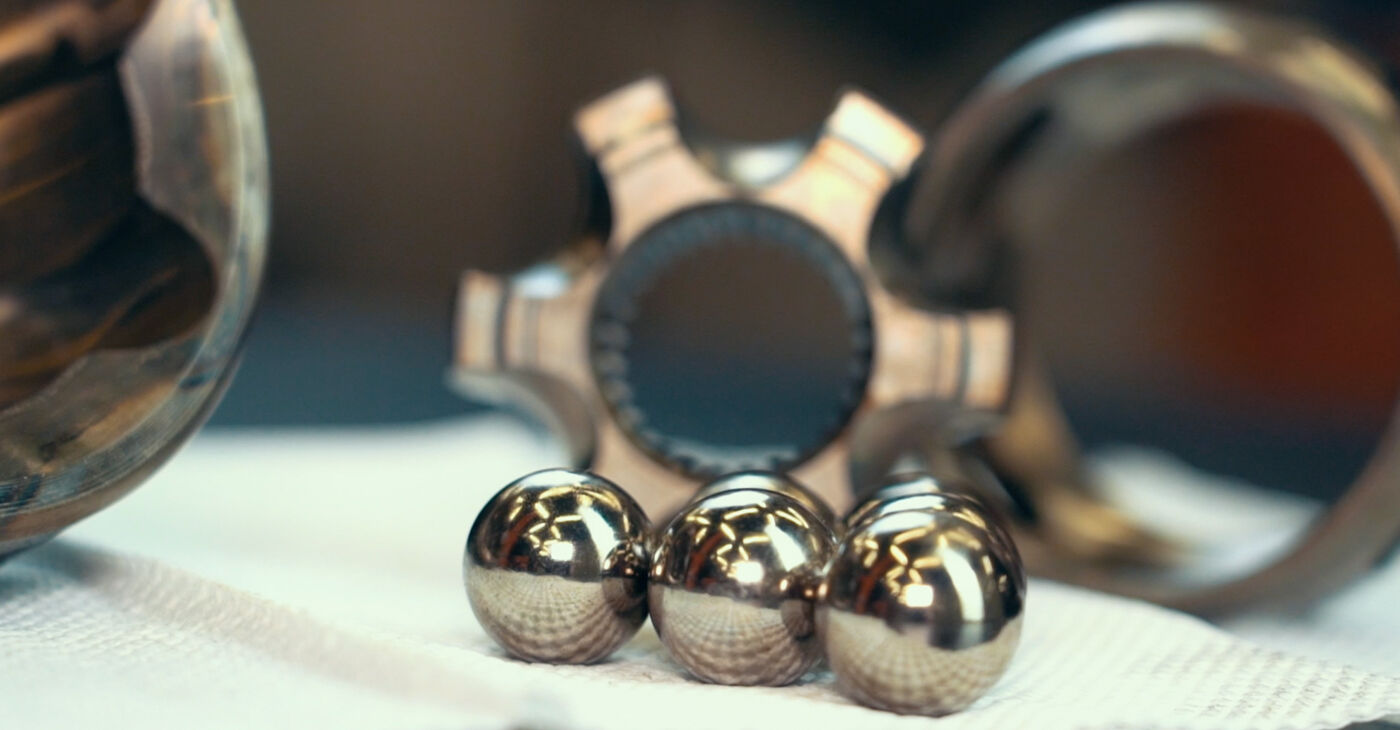
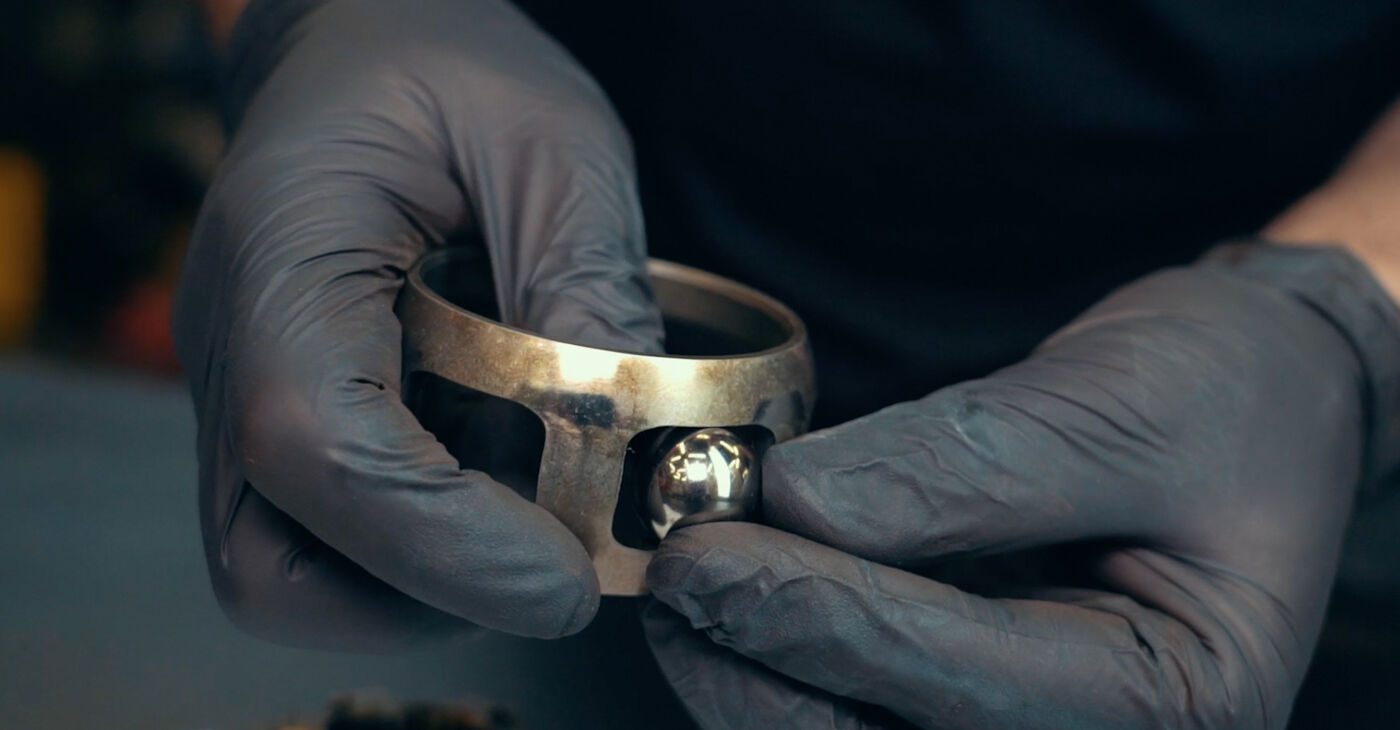
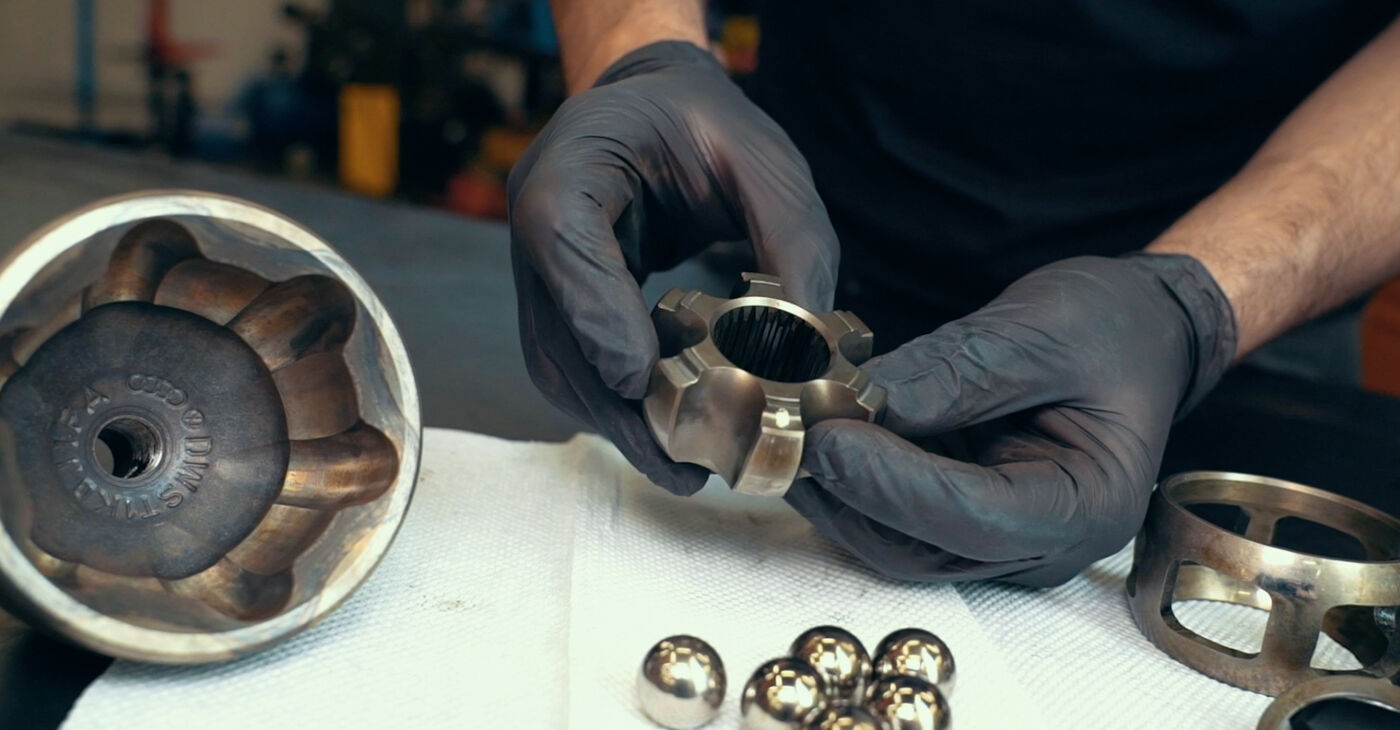
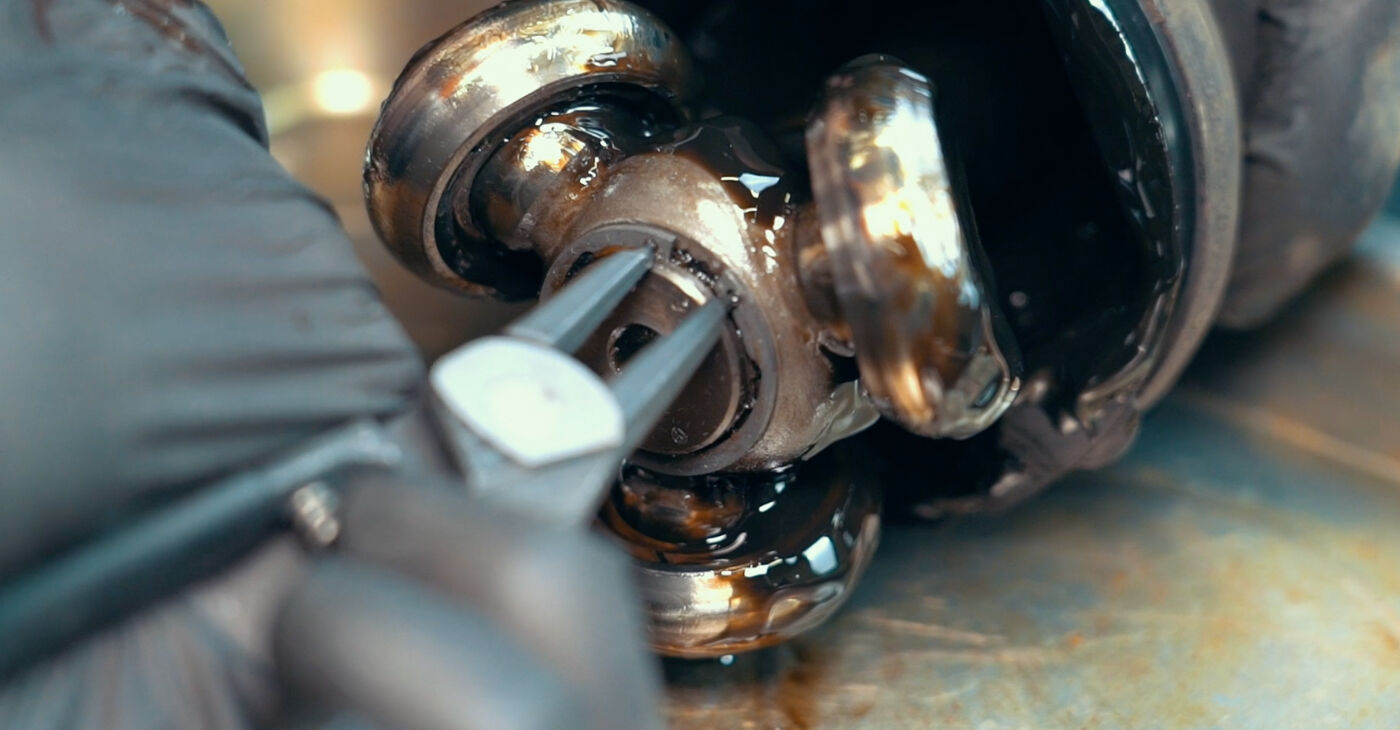
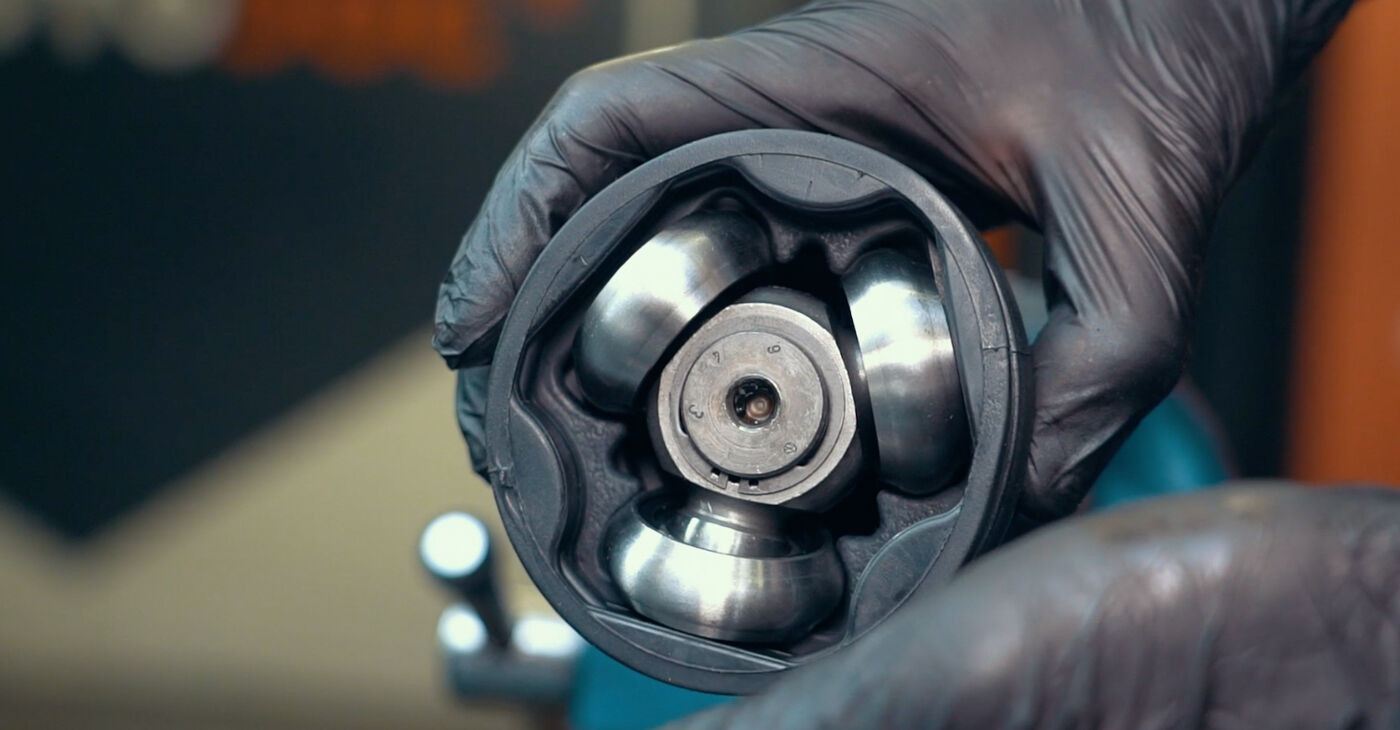
 Rotate the inner part of the CV joint in different directions as far as possible and remove all the balls one by oneAUTODOC recommends:To reassemble the unit correctly, remember the way the inner race should face
 - 14.
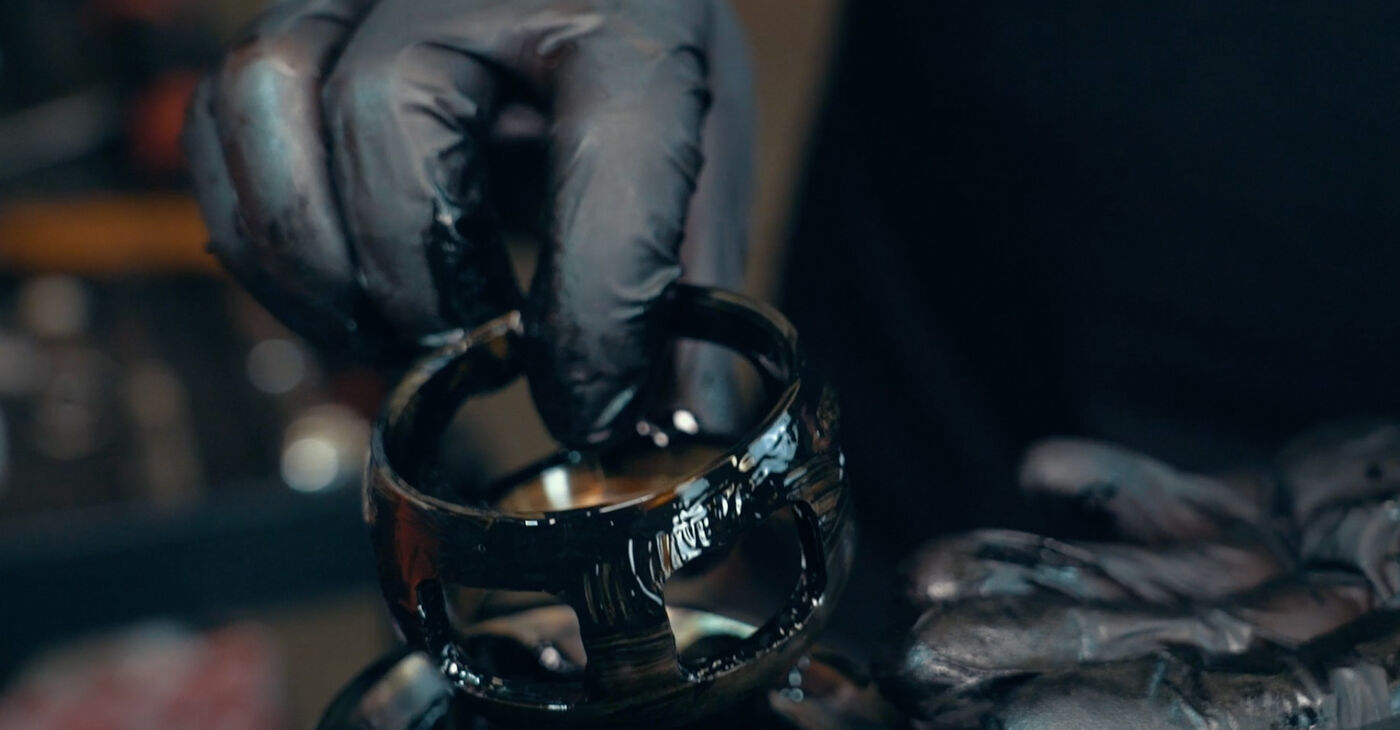
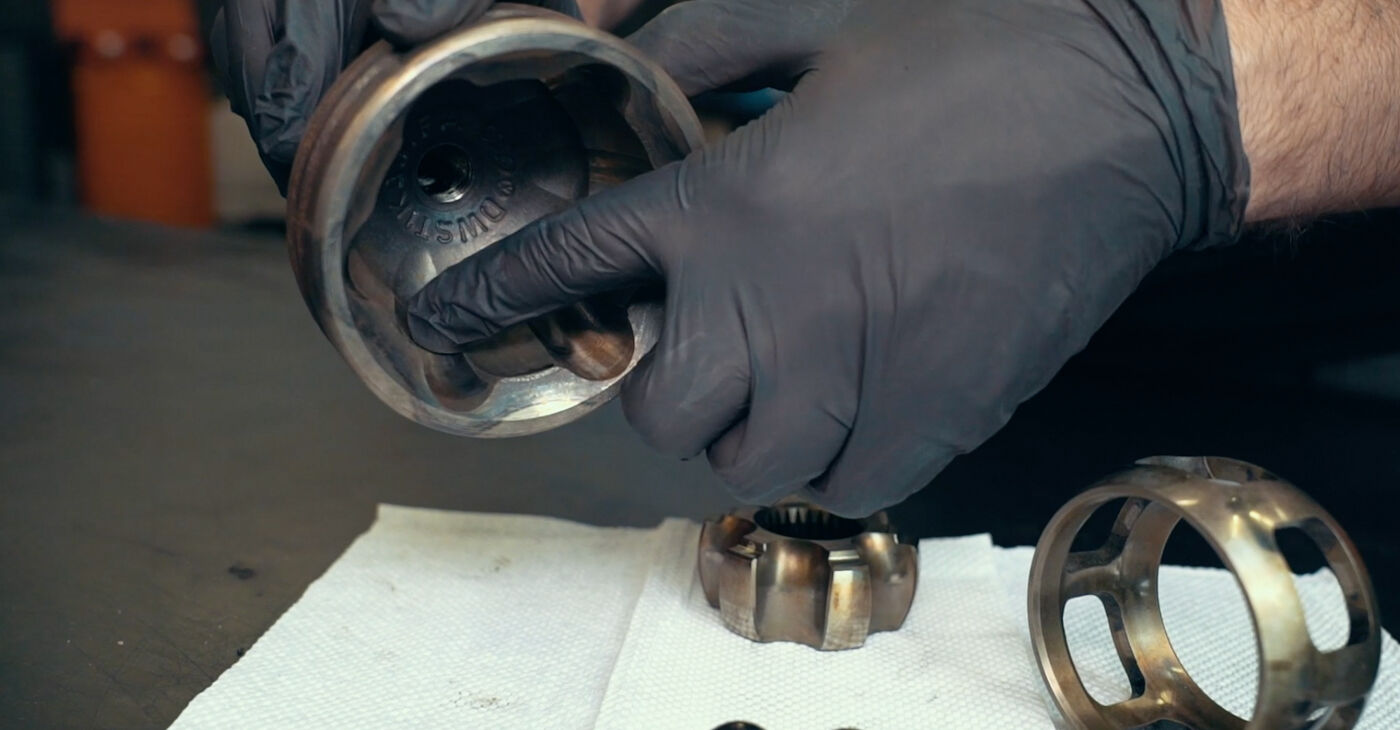
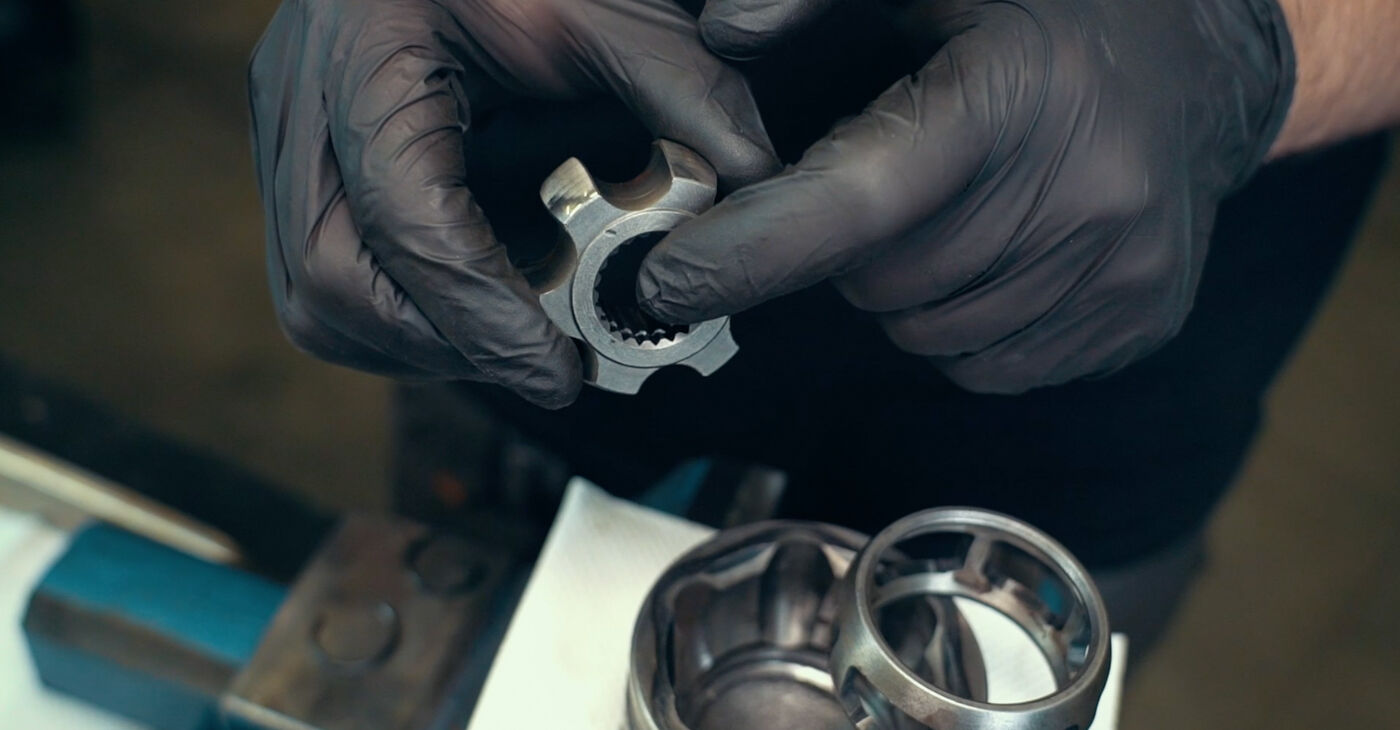
 Rotate the cage 90° and remove it
 - 15.
 For this part, you should also note which side faces the assembly
 - 16.
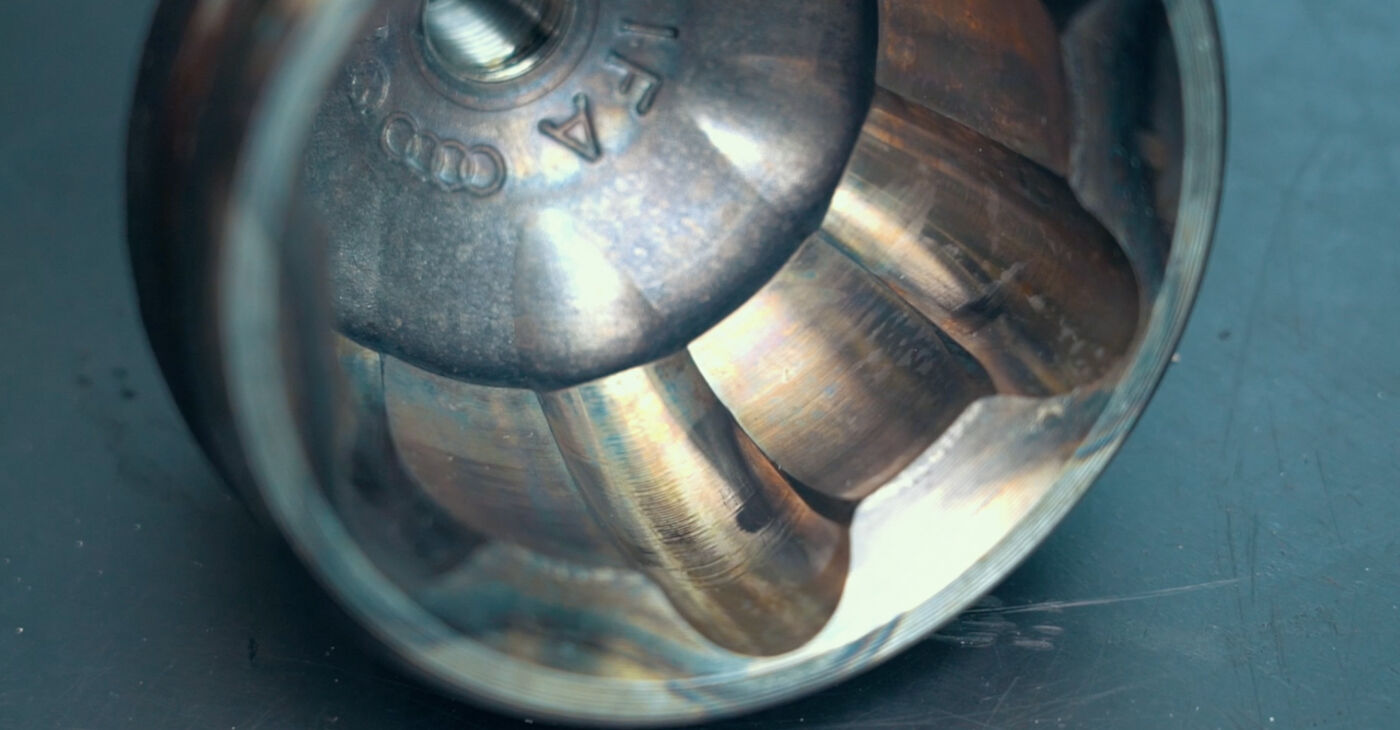 Assess the amount of wear of the CV joint housing grooves
 - 17.
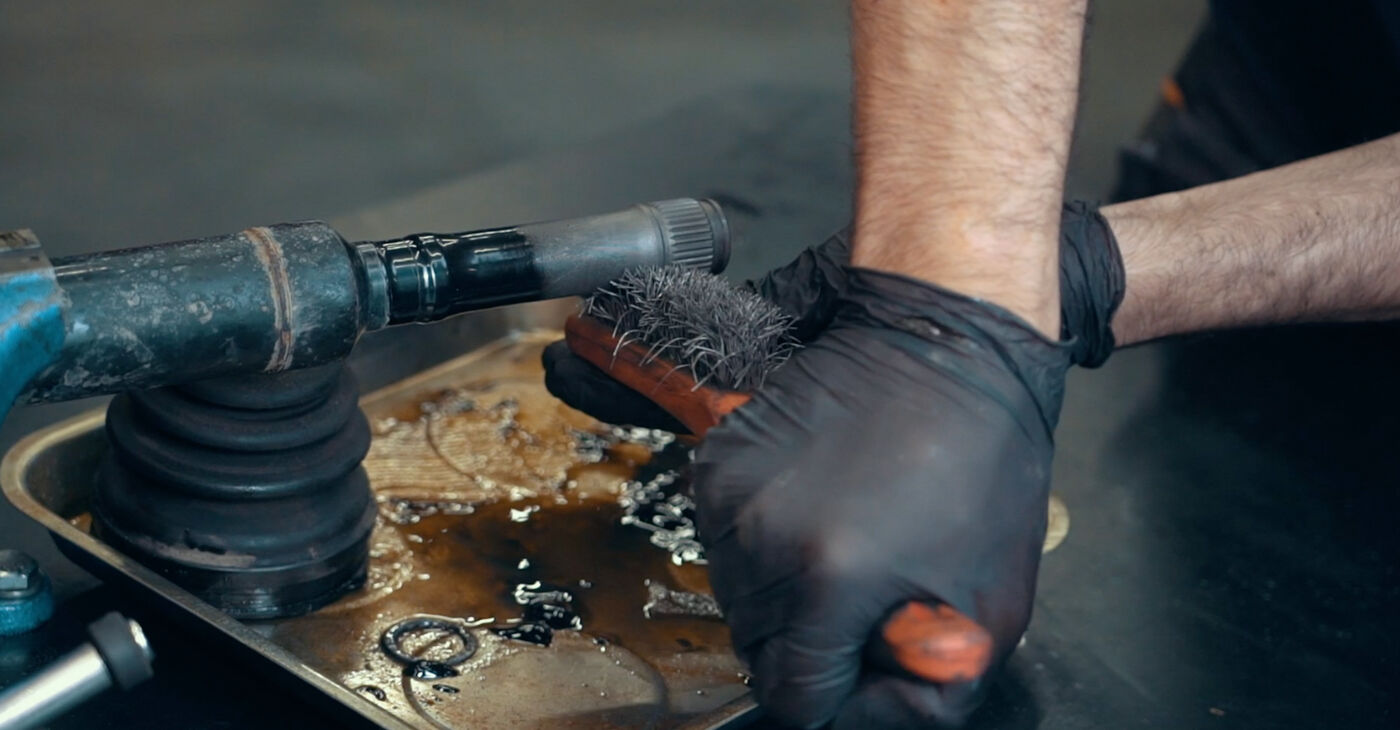
 Thoroughly clean all parts of the joint
 - 18.
 Check that the CV joint components are in good condition
 - 19.
 Inspect them for scoring, deformation, and other damage
 - 20.
 Make sure that there are no signs of wear on the cage windows
 - 21.
 Inspect the inner race
 - 22.
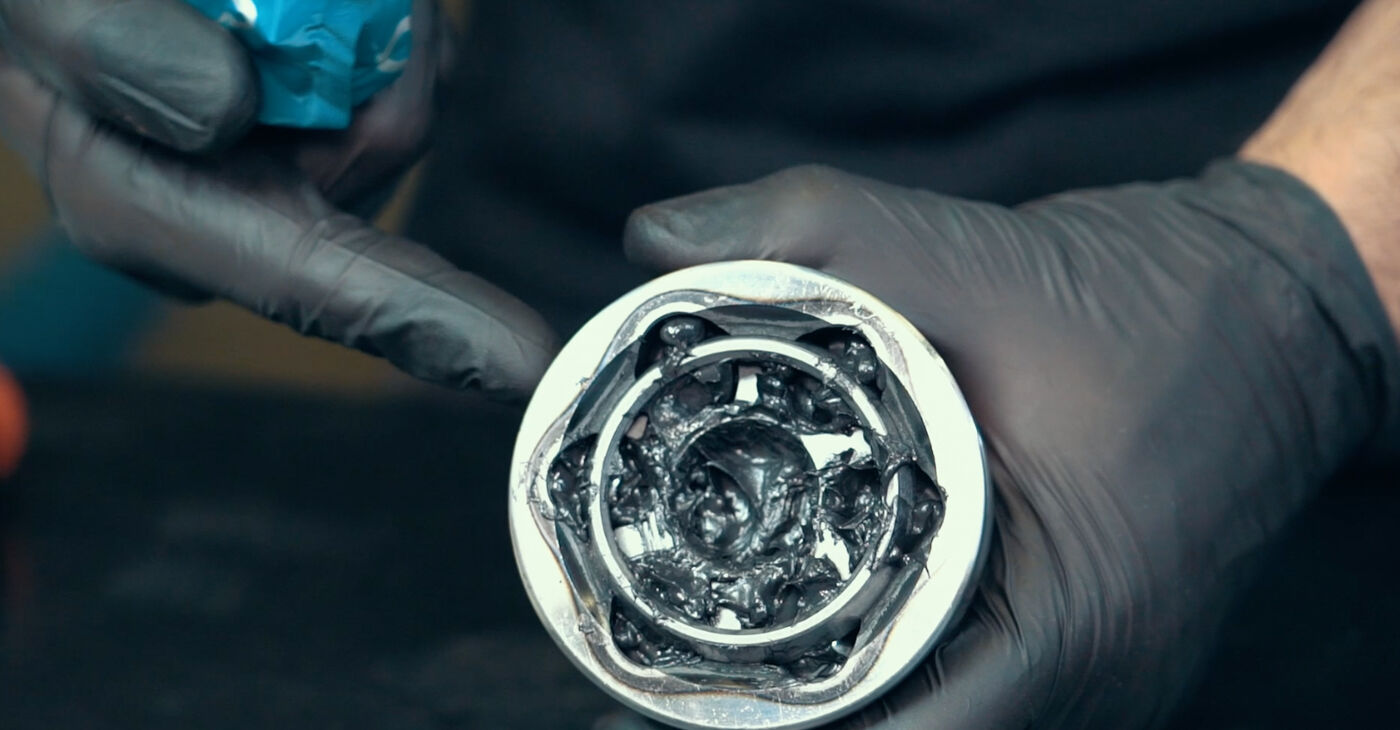
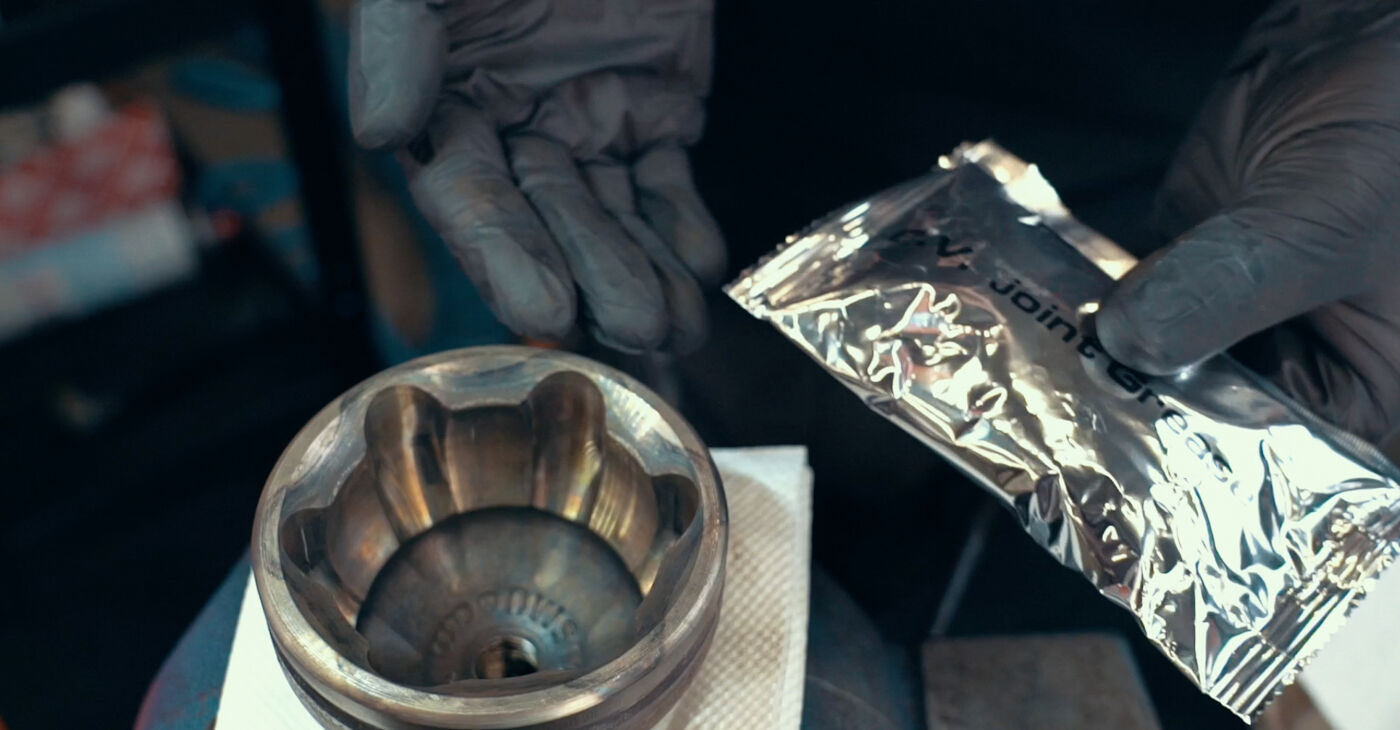 Use special grease for CV jointsImportant!Please note that the grease for the outer and inner CV joints is different.Do not mix greases of different types
 - 23.
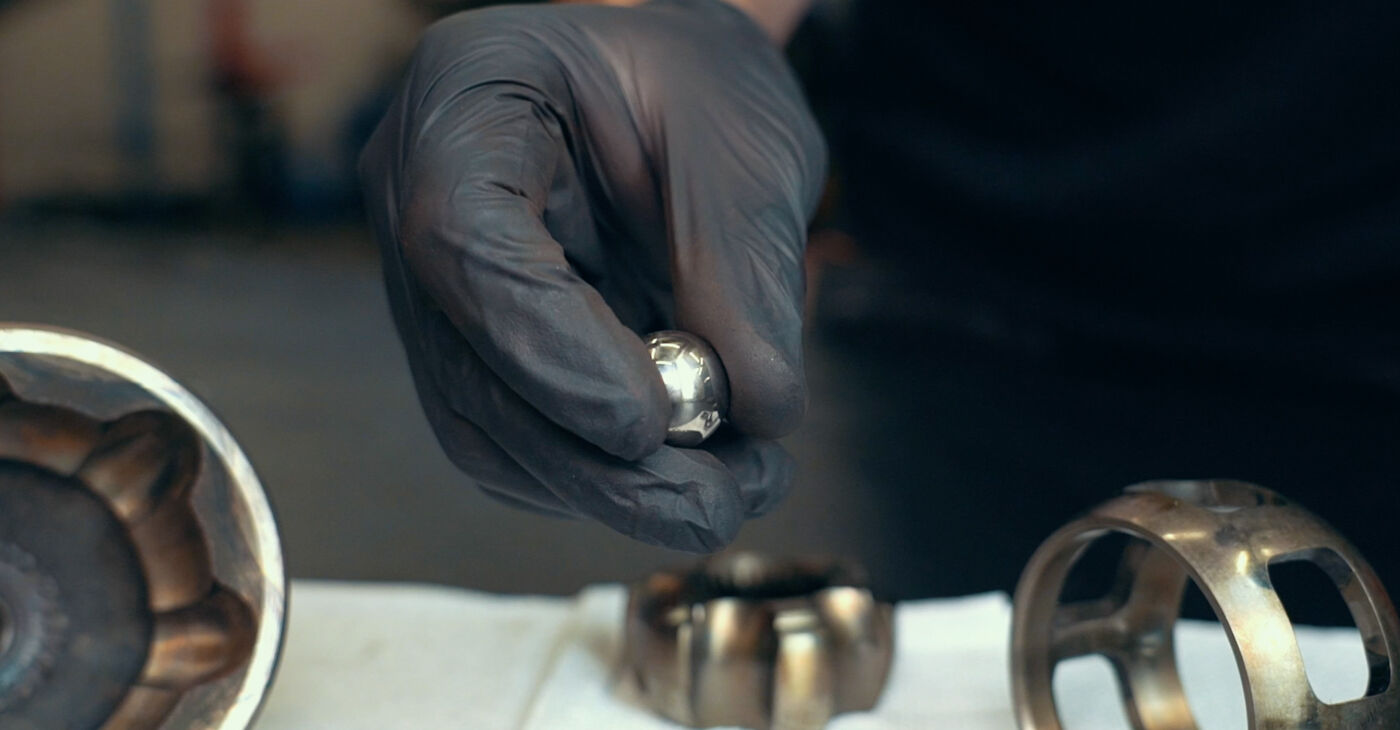
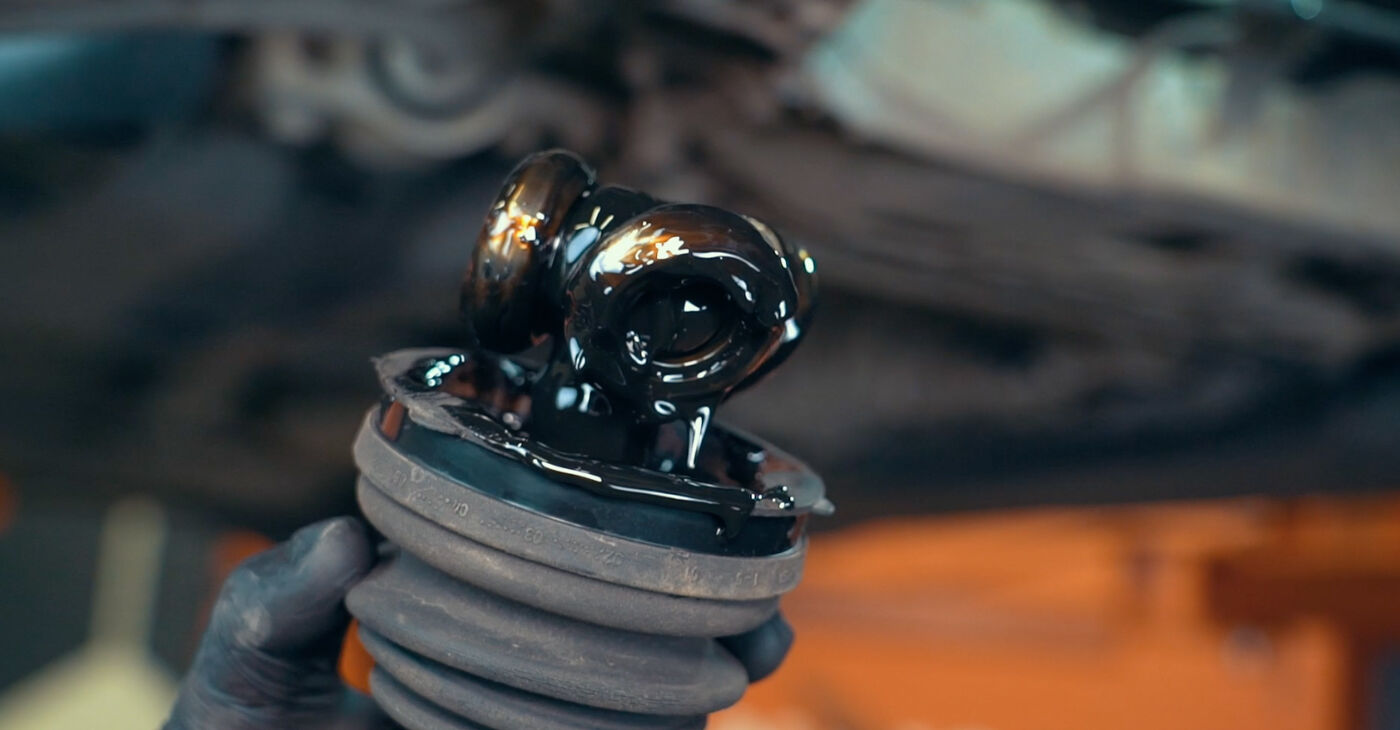
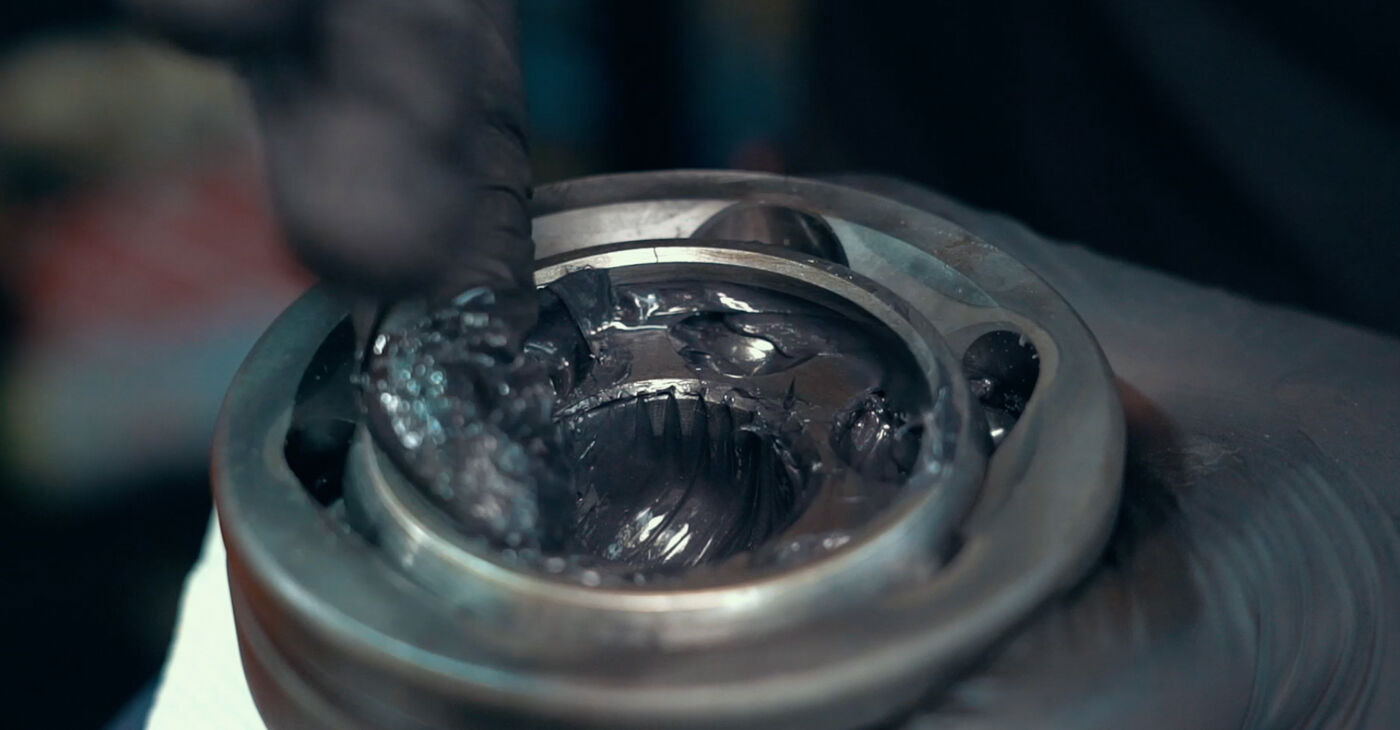 After cleaning the components, reassemble the CV joint and pack it with grease
 - 24.
 Prevent grease from getting on the outside of the CV joint housing so that the boot can be fitted securely
 - 25.
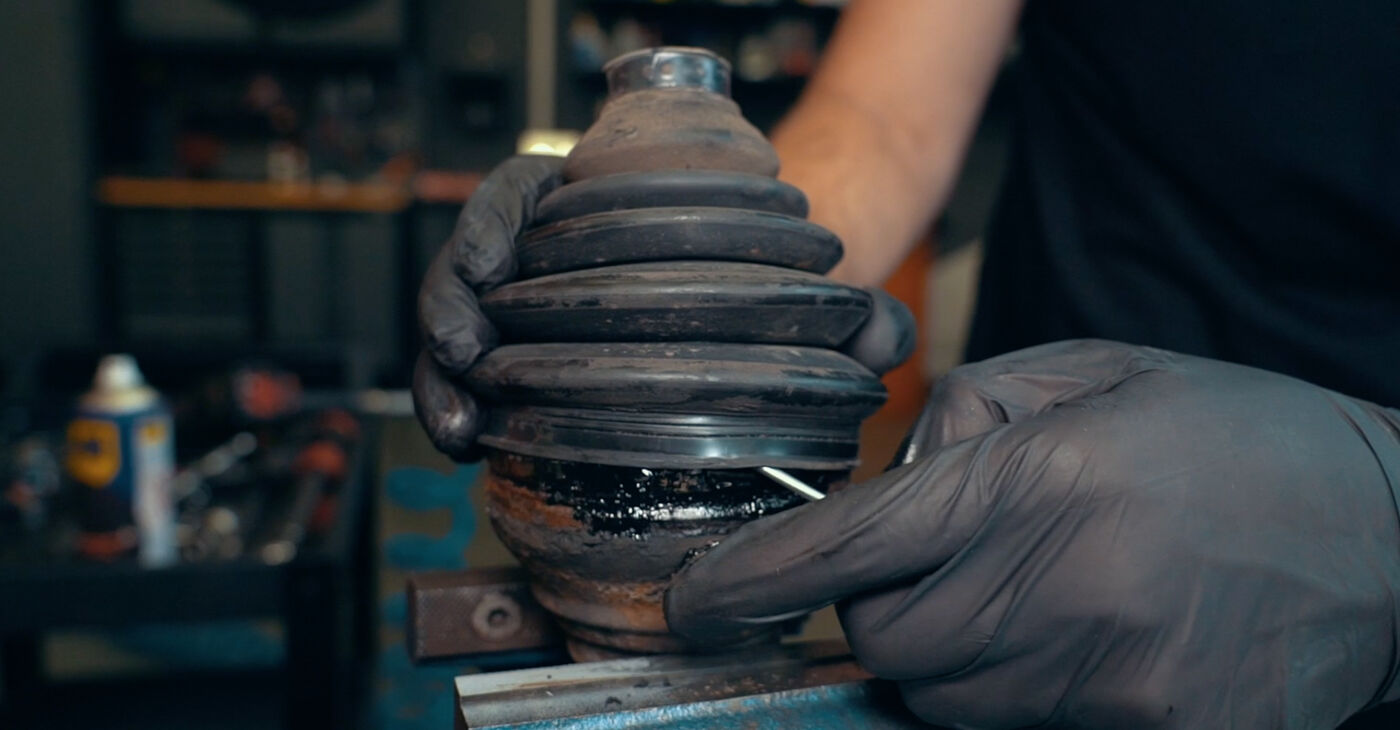
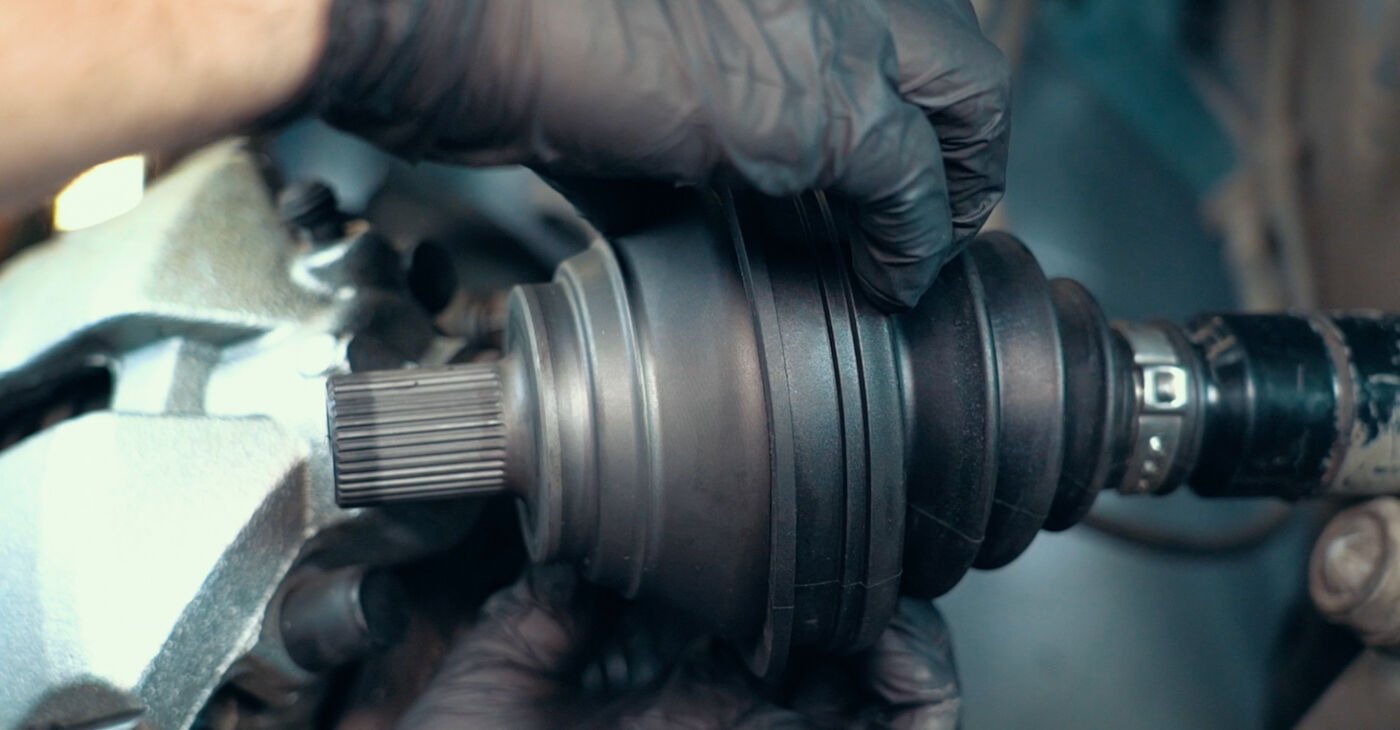
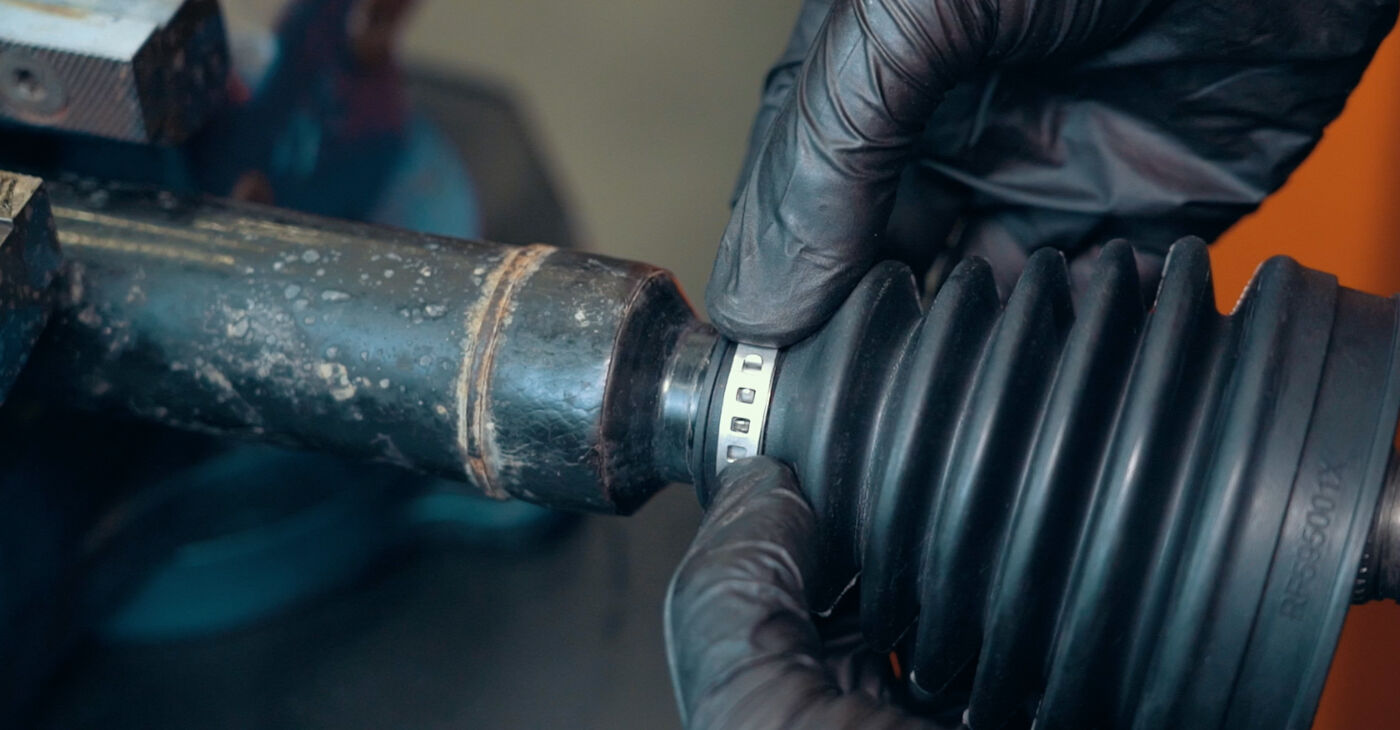
 Degrease the CV boot’s mounting seat and slide it onto the axle shaft
 - 26.
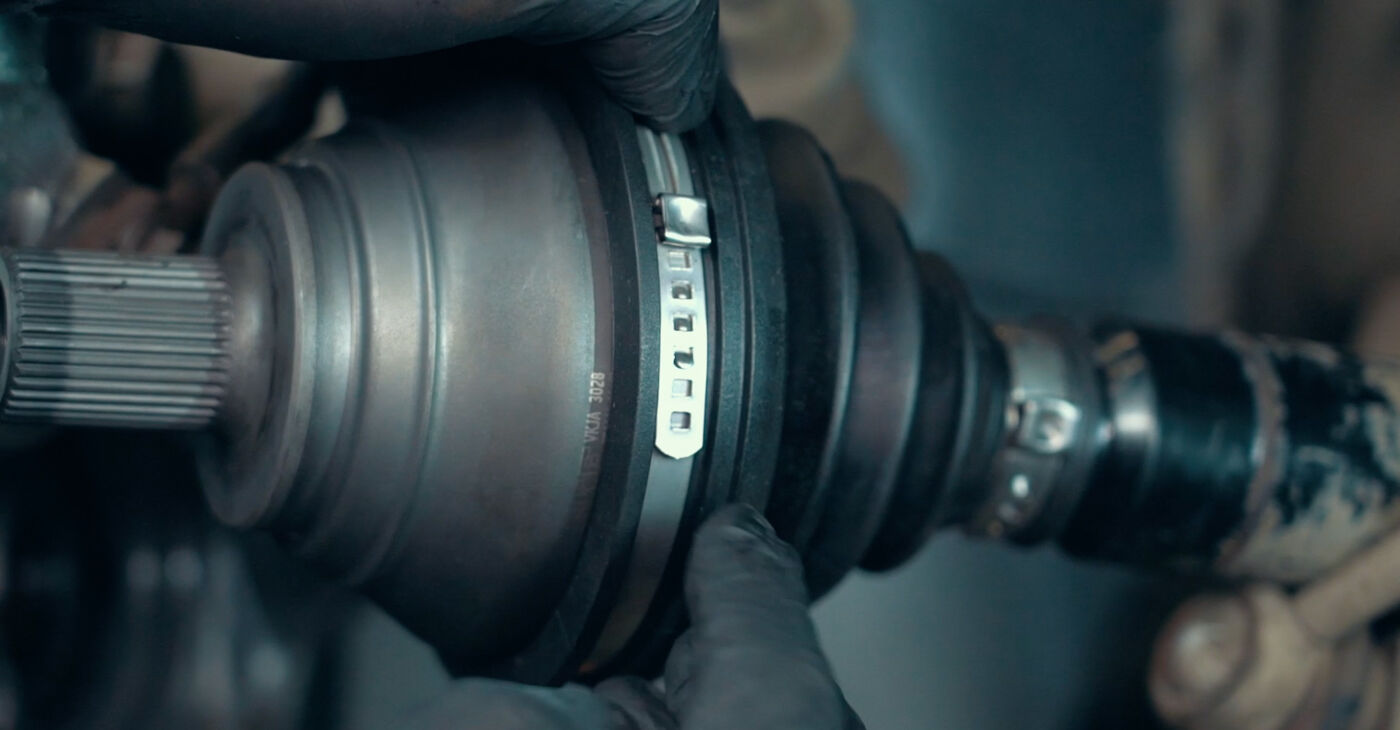
 Tighten the clamp and turn the boot inside out to prevent it from getting dirty
 - 27.
 Install the thrust washer and plastic bushing
 - 28.
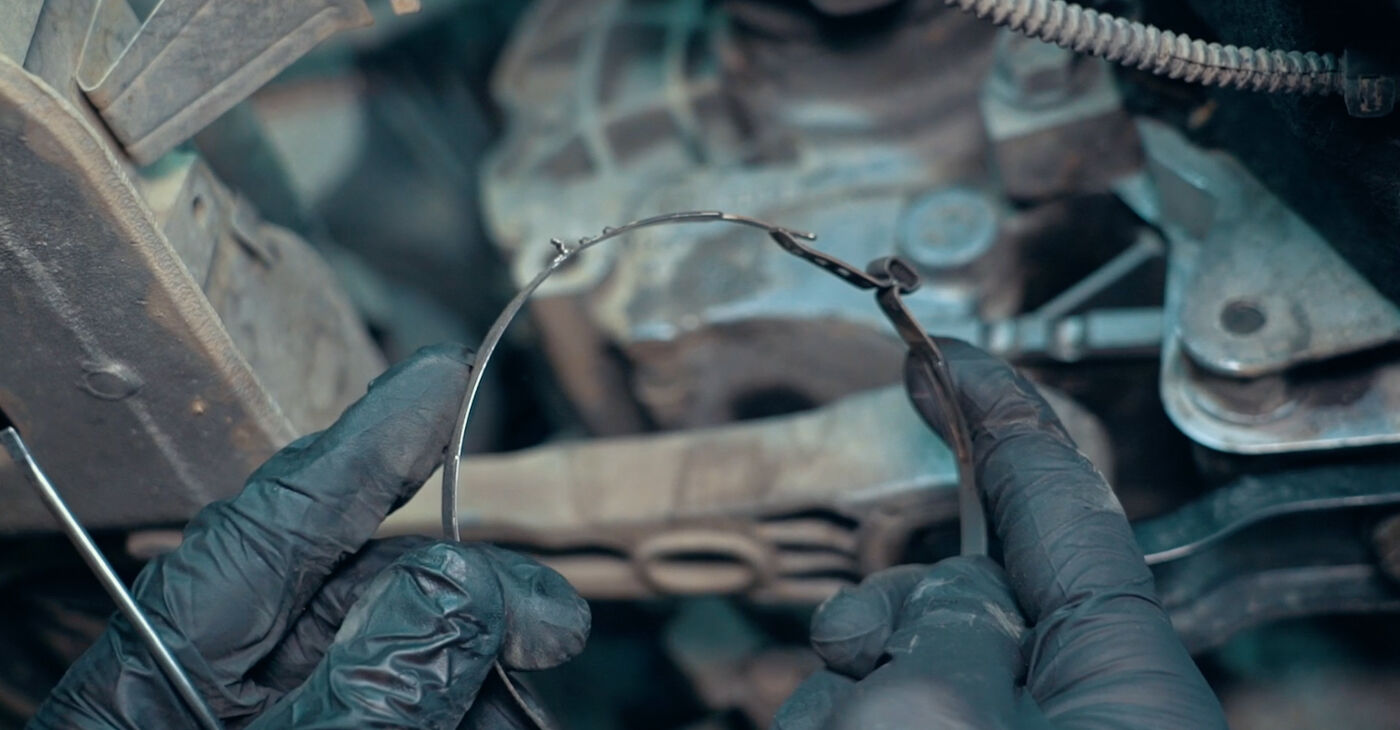
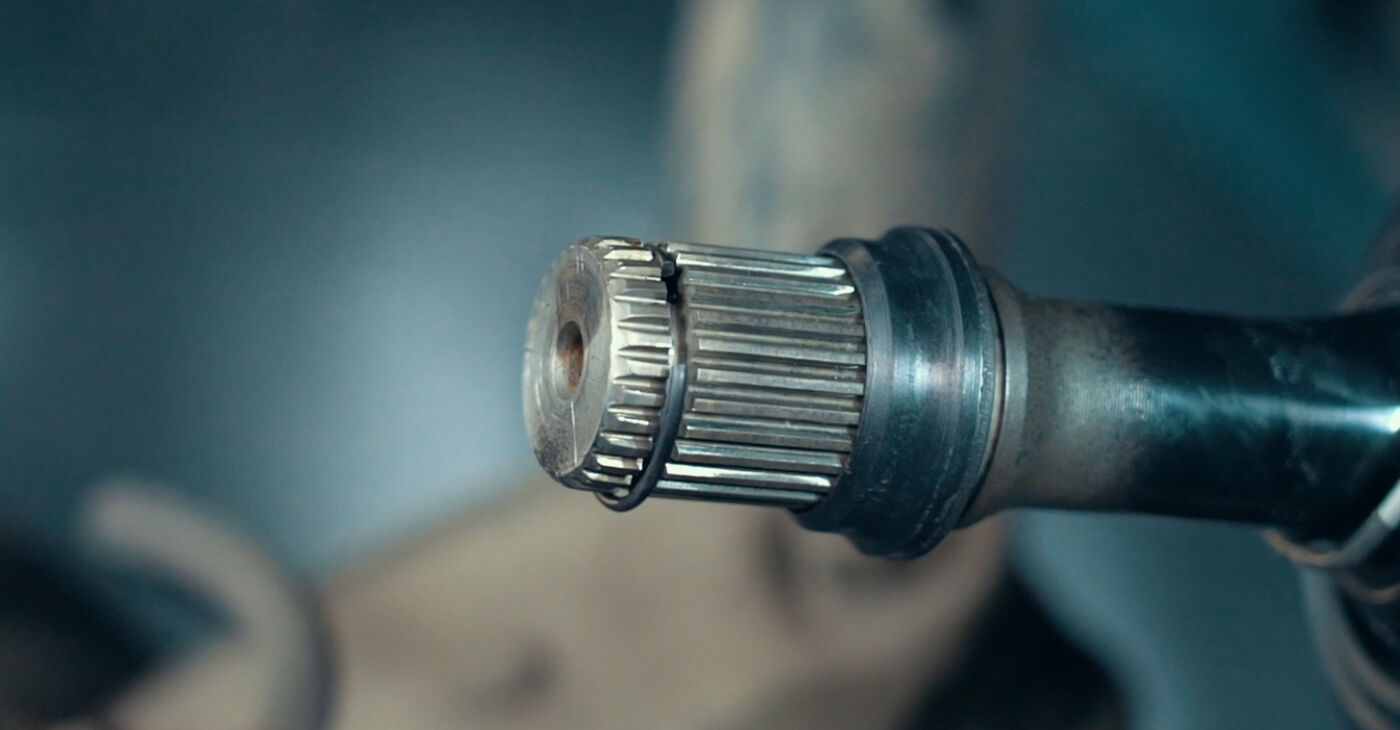 Fit a new circlip
 - 29.
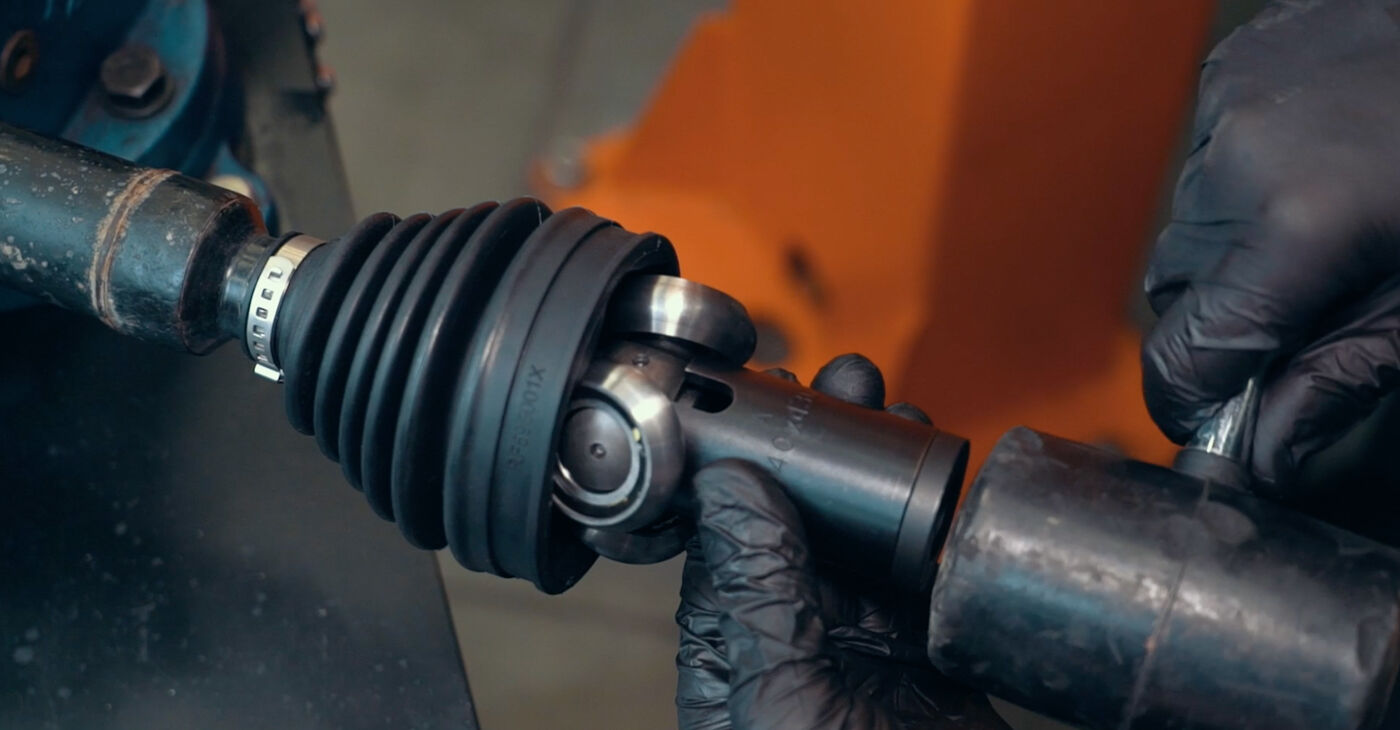
 Align the splines of the CV joint with those on the axle shaft
 - 30.
 Push the CV joint to overcome the resistance of the circlip and click the joint into placeBe careful!To avoid damaging the splines, force must be applied to the housing via a sleeve or driver of a suitable diameter
 - 31.
 Align the joint so that it is positioned at a right angle to the axle shaft
 - 32.
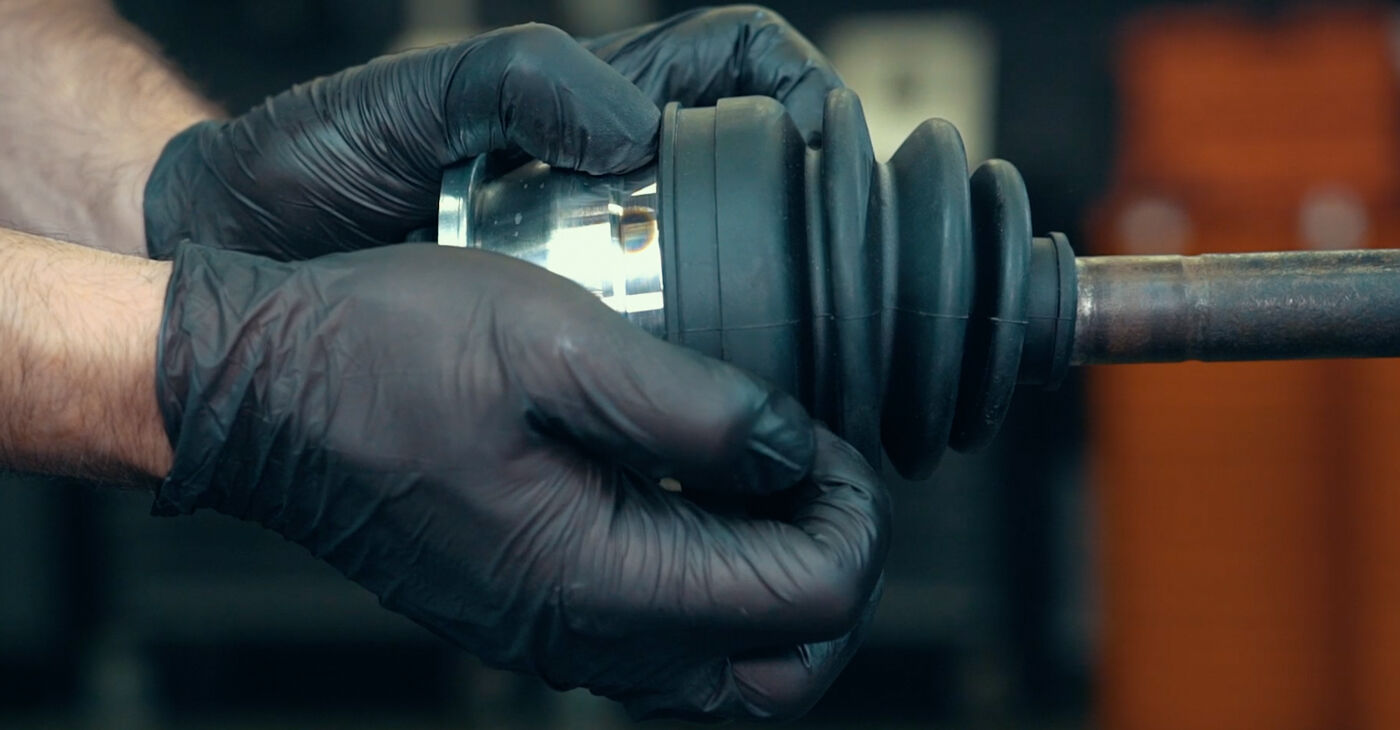
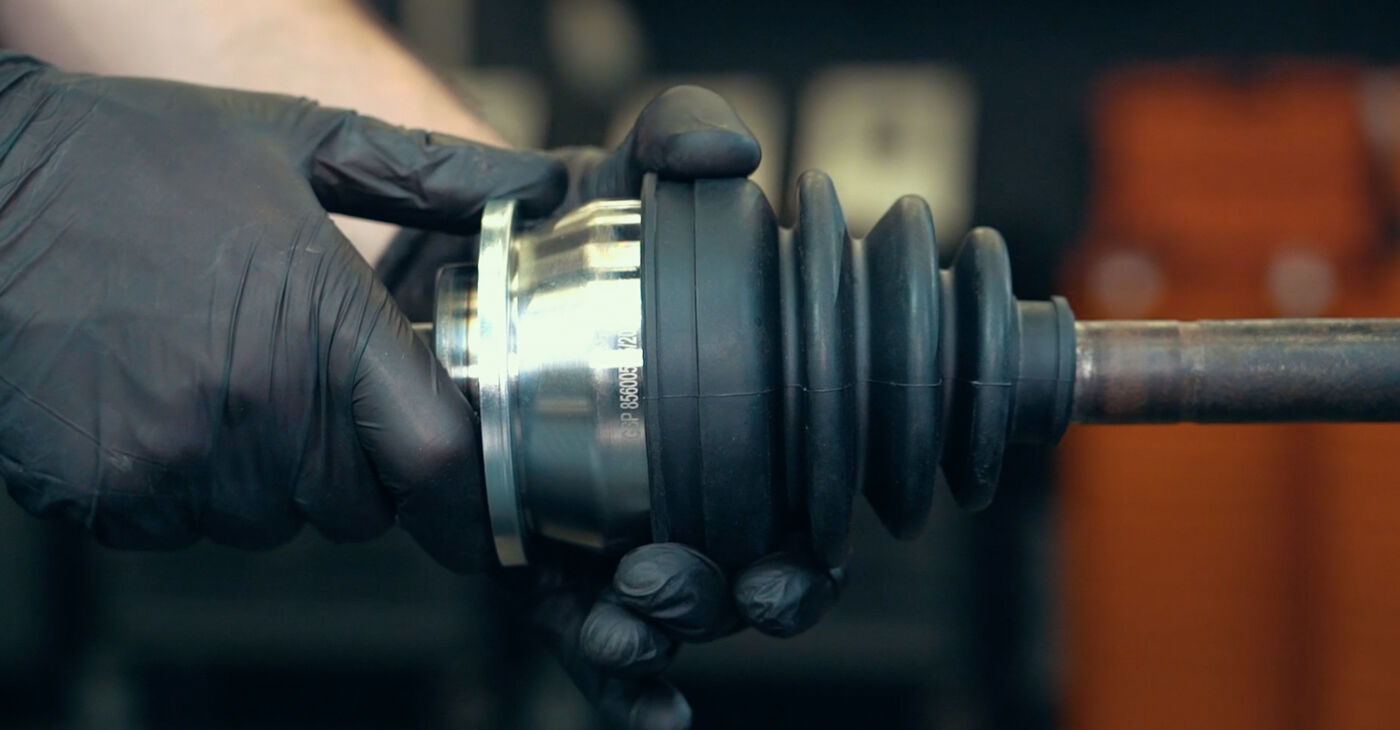
 Degrease the surface of the CV joint housing and put the boot on carefully
 - 33.
 Make sure that the clamps are installed correctly and that the boot is fitted in its mounting seat
 - 34.
 Removing this type of CV joint may require a special tool


Was this manual helpful?
Please rate this manual on a scale from 1 to 5. If you have any questions, feel free to ask us.
Users voted – 0
Unlock your car maintenance assistant!
Track expenses, manage logs, schedule replacements, and more.
Popular Drive Shaft and CV Joint maintenance tutorials
 Free download PDF
 1.4 MB
 Free download PDF2.71 MB
 Free download PDF2.64 MB
 Free download PDF2.59 MB
 Free download PDF2.59 MB
 Free download PDF2.6 MB
 Free download PDF2.65 MB
 Free download PDF2.66 MB
 Free download PDF2.59 MB
Top auto repair manuals
 Free download PDF1.51 MB
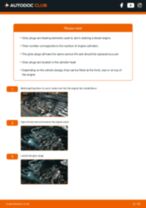 Free download PDF1.62 MB
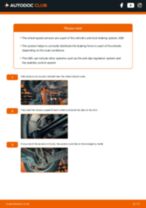 Free download PDF1.64 MB
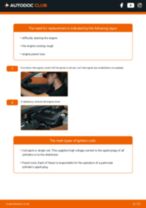 Free download PDF1.98 MB
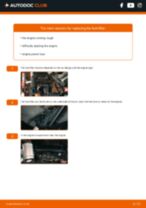 Free download PDF2 MB
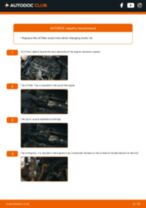 Free download PDF2.82 MB
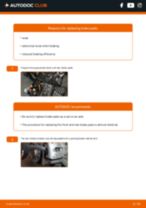 Free download PDF2.84 MB
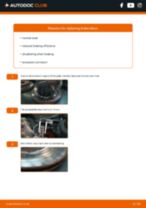 Free download PDF2.92 MB
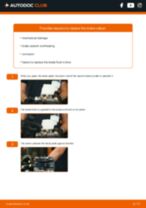 Free download PDF2.91 MB


Time to replace parts? Get even better deals in our Shop app.

SCAN ME