Holes, tears and burns in your car seats can make your interior look shabby and worn out. Restore your upholstery to its former glory with our guide! This guide will walk you through how to repair a torn car seat, whether it’s cloth, vinyl, or genuine leather.
Having a tear or hole in your car seat upholstery can be incredibly frustrating. Unlike many other aesthetic car problems, gashes in the upholstery won’t simply disappear with a wipe or an easy replacement. They can make the interior of your car feel shabby and uncared for. Even worse, the longer they are there, the greater the chance that they will get worse. A small hole can turn into a rip, which can turn into a tear, which can turn into a giant, gaping gash with foam spilling out that you can’t take your eyes off!
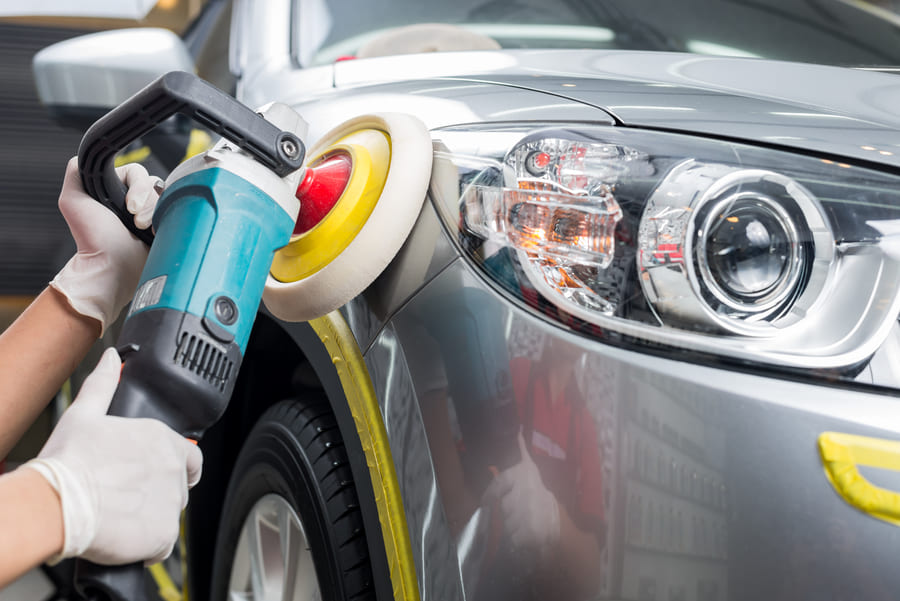
Taking your car to a garage to get the upholstery repaired or replaced can be expensive, but it’s also something you can do yourself. Professional car upholstery repair services can be costly, but many common issues can be fixed at home. Repairing or replacing car upholstery isn’t always easy and you may need some tools, but with a bit of patience and our comprehensive guide, you can definitely get it done. With a bit of patience and the right tools, car seat fabric repair becomes a manageable task, even for beginners. There are various ways to renew upholstery, and a wide range of aftermarket kits are available to completely replace car seats or patch up any problems. Whatever material your car seats are made of, and whatever the issue, we have ideas and tips to help you get rid of rips and make your car look factory fresh again.
Types of Upholstery
Before you can repair your car seat upholstery, it is important to know what type of material you are dealing with, as they all have different characteristics and require different approaches.
Car seats are usually covered in one of the following materials:
Nylon is one of the most common types of automotive upholstery. It is known for its durability and ability to withstand heavy use. However, nylon is quite porous and will pick up dirt and debris every time you drive, so you may decide to replace it earlier than you would other materials.
Polyester is another popular choice for automotive upholstery; it is designed to resemble suede. This soft fabric is comfortable, but can rip and tear easily.
Vinyl has long been a popular upholstery choice due to its strength and how easy it is to clean. However, if it gets ripped or a hole appears, it can be a little harder to repair.
It might look like leather, but it is an animal-friendly imitation: Faux leather upholstery is a popular choice for luxury cars as it is relatively easy to keep clean and scratch-resistant.
Leather seats are often a sign of a high-end luxury car. However, leather upholstery requires special care and cleaning products to maintain its appearance, and it is extremely resistant and strong. However, it is much more difficult to repair than cheaper materials. Repairs to leather, especially new or light-coloured leather, can be very noticeable if not carried out correctly.
Common Upholstery Problems
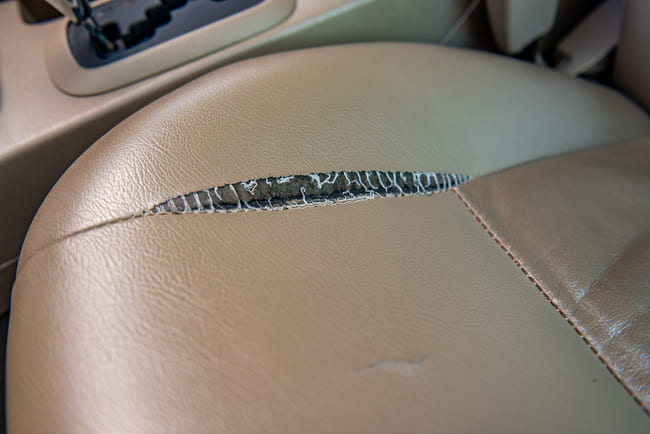
One of the most common issues with car seats is tears or rips. These can be caused by clothing catching on the seat or by hard or sharp edges of luggage or other items cutting into them. Frayed seat edges or seams are also common and are mostly due to age. Seams can also become unstitched, though this is unlikely. Burns, often caused by cigarettes, can ruin the surface of your seats. There can also be problems with car seat padding. If a rip is deep enough, the padding can poke out; alternatively, it can simply become too compressed and no longer supportive. Specifically with regard to leather or vinyl seats, they can start to ‘crack’ or develop imperfections, such as small scratches. Each of these problems requires a different approach, so it is important to correctly identify the problem before starting repairs.
Tools Needed
The tools you need will depend on the repair required, but these are some that might come in handy for general repairs or car upholstery maintenance:
- Clean cloth(s)
- Canvas patches to act as seat backing
- Fine or medium sandpaper
- A leather repair kit, paints or pre/post-treatment solutions (depending on the type of repair required)
- Tweezers
- Scrubbing pads
- Palette knife
- Rubbing alcohol
- Scissors


Repairing Minor Issues
Firstly, let’s address some of the most common minor issues, such as rips and tears. However, it is important to acknowledge that if you do it yourself, a repaired seat tear will never be completely unnoticeable. If you want it to look like new, you’ll need to take it to a professional upholsterer. Small holes, tears, rips or burns in cloth or fabric car seats can be repaired.
Fabric car seat repair also involves carefully selecting patch materials that can withstand daily wear and match the original seat texture. The best way to repair fabric seats is usually to use a patch on the seat cover to hide this kind of wear and tear, and to support the remaining seat fabric. Try to find a patch that matches not just the colour, but also the type or pattern of the seat you are working on. Make sure you find material that is strong enough to withstand regular use. Ask for recommendations at a local garage or check online to see if you can find specific fabric for this kind of repair.
Before applying it to the seat, you will need to cut the fabric to match the size of the hole or length of the rip. The patch should comfortably cover the hole or tear, and you can decide how much excess material will join the current seat fabric. Place the patch directly over the hole or small tear; hopefully it will blend seamlessly into the seat cover.
There are two ways to apply the patch: you can use an adhesive patch, or sew or stitch the material directly to the seat. Most patches can be attached using a contact adhesive, which is typically available in a spray. You can also use heat (from an iron or heat gun) to ensure a strong bond to the material. Some people worry that it won’t be as effective if they don’t stitch, but adhesive works just as well.
Tears in Cloth/Fabric Seats
Using a curved needle and thread, hold the two sides of the torn fabric together and stitch the tear using an X-stitch from top to bottom. Another technique is car seat stitching repair, which is helpful when tears appear along seams or joints. Over this, apply a larger patch; this initial X stitch will hold the sides together underneath the patch. The process from here is very similar to the one described above. Choose a patch that matches the fabric of the seat cover, then use an adhesive to cover up the stitching. You won’t need to use much adhesive here, as it is the stitching that holds the seat together, not the glue.
For rips or tears larger than a couple of inches, a patch won’t be suitable as it will leave the seat looking mismatched and ugly. From an aesthetic perspective, professional repair is always the best option in this situation, but there are some DIY solutions available. The first is to stitch the tear back together.
Tears in Leather, Faux Leather or Vinyl
Tears in these materials are slightly trickier than tears in fabric seats, not least because the materials require very different treatment. Ripped car seat repair in leather materials typically requires patching, filling, and repainting for a professional finish.
First, make sure the fabric is not connected to any seat padding or other securing materials; Learning how to repair car seat upholstery made from leather or vinyl can save hundreds in restoration costs. We just want access to the fabric itself. If it is, you may need to use a piece of plastic or a knife to free the material from the padding. Make sure you do this carefully.
Next, apply adhesive to the patch; you won’t need much, but enough to ensure it sticks to both sides. Slide the patch behind the seat upholstery, ensuring it touches both sides. Hold the gap closed by taking both sides of the rip and keeping them together while the glue dries (it isn’t as easy as it sounds). It is important to use a suitable patch fabric. A scrap of suede or heavy-duty duck cloth, such as that used for uniforms, works well. For woven cloth, the critical factor is that it does not stretch or change shape when under stress, i.e. when you sit on it. If the colour matches the seat, this is an added bonus.
Next, apply consistent weight or pressure to the area so the patch sticks effectively with adhesive, as it can take some time for the glue to dry. Car seat hole repair on leather surfaces often involves flexible filler products that can be shaped and coloured. You can use any kind of weight or a pressure clamp to keep it in place while it dries.
Leather surfaces are always curved due to the padding pushing them upwards, so you need to press hard enough to flatten the curve. If the rip is quite big, make sure you use a weight big enough to cover almost the entire gap. Otherwise, one side will be outweighed, which could cause the gap to stretch open again and get even worse. If possible, use clamps to narrow the gap while applying pressure. As for the adhesive, it is best to check for a fabric-specific one. We’ll look at some good brands for this later on.
If the leather is thick, once the gap is closed, you can use a filler to make the surface even. Various fillers will work; see below for some product recommendations. The main requirements are that the filler is flexible and non-shrinking, and that it can be coloured or painted.
Cracks, Creases and Holes in Leather or Vinyl
Repairing cracks and creases in leather and vinyl is also more complicated than dealing with fabric seats. However, there are a lot more products that can help with this process, so there’s no need to feel daunted!
The first step is to ensure that the seats are completely clean. To repair fabric car seat areas, always begin by inspecting whether the padding underneath has been compromised. Using specific leather seat cleaning products will ensure that any fillers or sealants applied afterwards will stick well to the surface of the leather seats.
For small cracks, a quick fix is to use a leather colour restorer or restoration product. These are widely available and simply add colour back to faded leather. They will not change the surface, but will make the leather look new. However, this is only a very short-term solution.
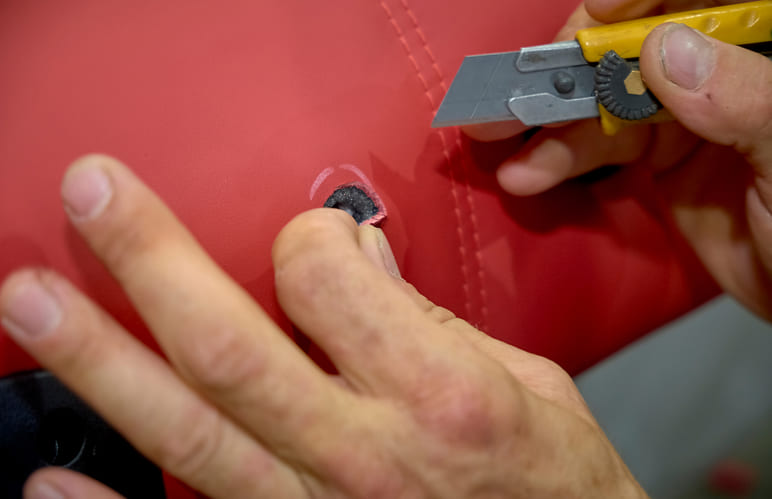
For small holes, a leather and vinyl compound or filler can be used to fill the gap. This can then be painted to blend in with the leather seat, though for this to be effective, the whole seat should be coated. Some are heat-activated, meaning you will need a heat source to melt the compound. Using a small trowel or spatula, insert and spread the filler into the holes. It is best to do this in stages and layers to achieve the best finish and strongest repair. Fill the hole layer by layer until it is flush with the surrounding leather. Run your fingers over the surface to ensure it is completely flat and level. Different products need to be applied in different ways, so check the instructions that come with each one. Once you are happy that the layer is relatively flush with the rest of the seat, use a non-stick silicone pad to create a smooth finish, and then paint it to match the rest of the seat.
For anything more serious than discolouration and cracks, a heavier-duty repair is required. Use masking tape to cover any parts of the seat that aren’t leather, such as the plastic fixture used to adjust the seat’s incline angle, or any fabric beneath the leather. Then use soft sandpaper to create a uniform and level surface by levelling down the existing damaged leather and removing any loose or compromised leather. There may be lots of peaks and valleys, or the leather may be coming loose, but it is important to make the surface as level as possible, either by sanding or by cutting off any protruding pieces. The more even the surface, the less filler will be needed, and the better and longer it will look and last.
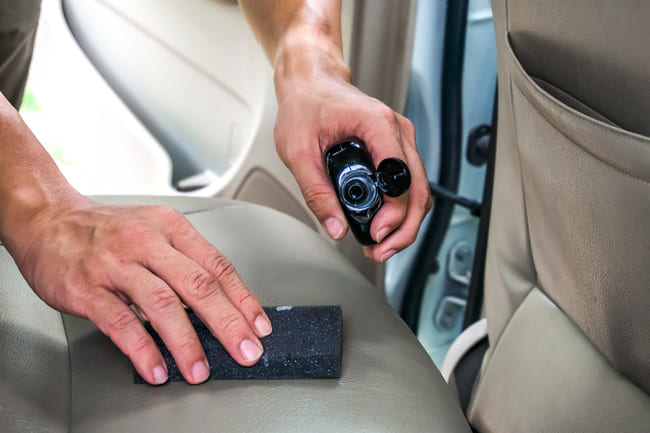
As with small holes, we are going to use a leather or vinyl filler for cracks. Many of these are specially designed to reduce the appearance of cracks and take around 20–30 minutes to dry and seal. They often aren’t heat-activated, but using a heat gun can speed up the process. Spread the sealant or filler evenly across the cracks, blending it seamlessly with the surface and wiping away any excess. Apply only a small amount at a time, using a spatula and your fingers in tight areas, and make sure not to use too much. Once you are satisfied that the cracks have been filled and the surface is relatively even, lightly re-sand to remove any tiny crests or uneven surfaces created by the filler. You can repeat this process as many times as necessary to achieve the desired result.
If the cracks have worn the seat down completely, especially around the seat’s curvature, it may need to be restitched and replaced. While there are limitations to what can be achieved with products designed to repair small cracks, these can still be smoothed out using fillers and painted to blend in. While the end result won’t be perfect, it will be cosmetically and aesthetically better than before, and it can strengthen the area to prevent further damage.
Painting Leather
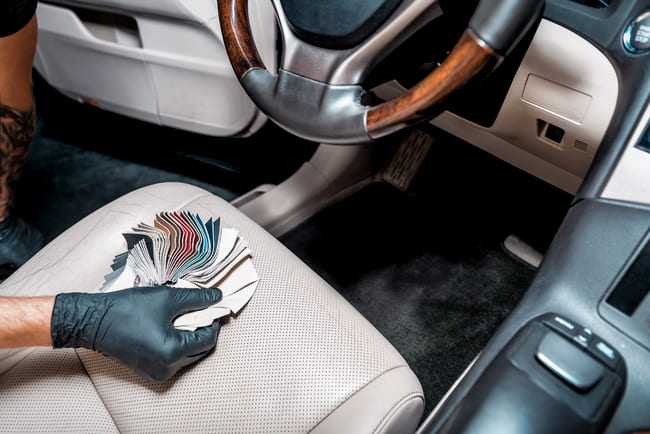
Once the cracks and holes have been repaired, it is time to paint. Use a topcoat selector to choose a shade for the seat. There are a variety of products for this purpose, but Global Smart Repairs offers an excellent range to help you mix and match to find the right colour. When figuring out how to repair leather car seats, it’s important to use cleaners, sealants, and colorants made specifically for automotive interiors.
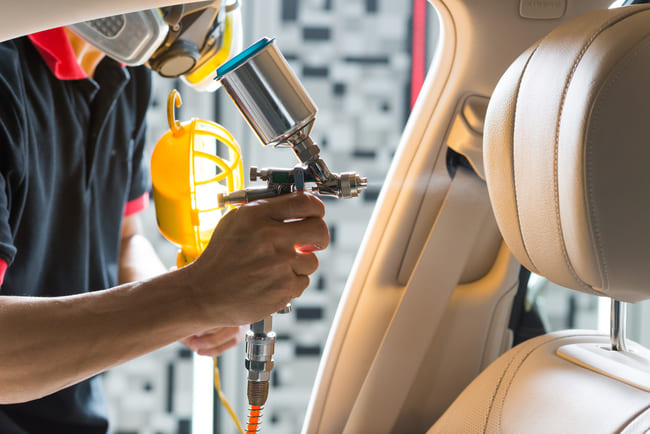
Once you have selected your colour, use a spray gun to paint the entire seat, not just the damaged area. This ensures that the repaired area is not obvious. Apply the paint evenly and not too thickly. Keep the spray gun close to the surface so that the paint is smooth and still wet when it hits the surface. Aim for a light but adequate coating, moving the spray gun around as you go to find the right distance. Make sure that the paint is specifically designed for leather, as normal water-based paint will not work. Water-based paints are not durable and do not contain the chemical and UV-resistant properties that specific leather paints do. Once you are satisfied with the paintwork, you can apply a protective coating to further increase its durability.

 @user_391476715.09.2025 12:07Member
What a fantastic, detailed guide on car seat repair! Your tips are clear, practical, and inspiring—thank you for empowering readers to tackle such projects themselves.
 @Graziana Venturi15.09.2025 12:17@user_3914767Moderator
We're glad you enjoy our content!


Comments – 2