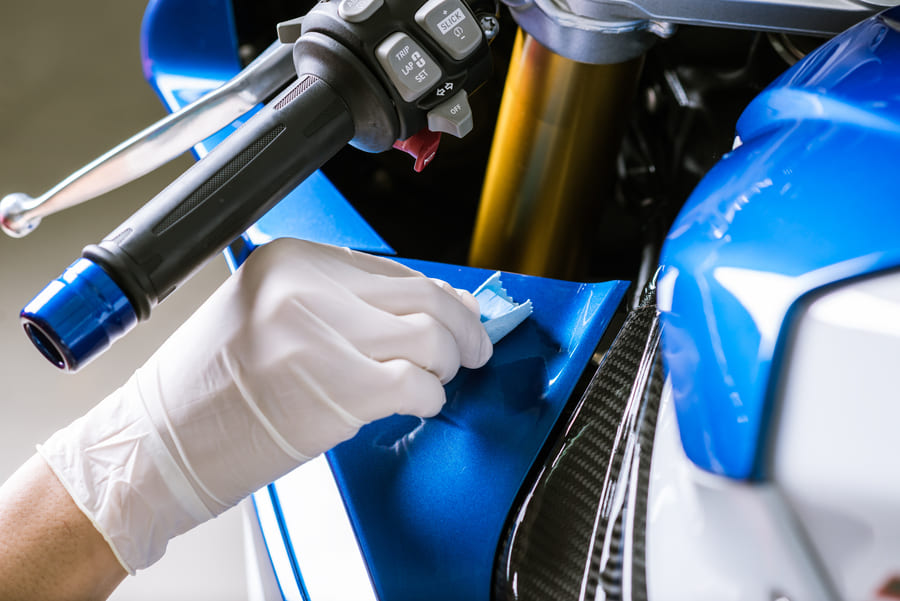
At some point, most people find themselves in a situation where they have to paint their vehicle, whether it is a car, lorry, or motorcycle. Perhaps you want to freshen up your bike because of age or accidental damage. No matter what the reason, here are some tips to take your bike from eye-sore to eye-candy.
Do-It-Yourself materials
Don’t be afraid of the process, it’s not rocket science and can be a lot of fun and very rewarding if you take your time and work carefully.
Here is a list of things you should get if you want to make your project a reality.Before you can repaint the frame of your motorbike, you must remove all attachments, including the engine and tank. Take your time and write down any special features so that you can reassemble the motorbike later. When painting, you should also work in a room protected from dust and other influences that could damage your paint job. Ideally, the temperature in this space should be around 20 degrees.


Do I have to remove the engine?
No, this isn’t an absolute. It is possible for you to paint without the trouble of taking off the engine. You have to tape off all the parts you don’t want to spray onto. This includes all of the aluminium components. Do this carefully, as you don’t want to cause any unnecessary damage.
Watch out for rust deposits
Before you paint the frame, you must sandblast or sandpaper the surface. For the frame, the more extensive sandblasting is recommended, as this also removes any rusty patches. If your thorough inspection reveals that the frame is rust-free, you can also sand it down by hand. If you are wet sanding, make sure that you use plenty of water and only roughen the surface. Tip: It is not necessary to sand the metal completely bare. It is only necessary to work a little more thoroughly on the edges and angles so that the primer will stick properly.
Use silicone remover or brake cleaner
It is very important to remove all dust particles left over from sanding, otherwise there will be unsightly dust inclusions afterwards. Don’t be tempted to use a paper towel for this step, because fibres may be left in the rough surface. In order for the primer and later, also the paint, to adhere to the motorbike frame, you must clean it carefully with silicone remover. This will remove residues such as grease or other dirt and grime. If no silicone remover is available, brake cleaner is a good alternative.
Painting the frame
If you paint the motorbike frame yourself, you can of course do this with spray cans. This applies to both the primer and the layers of paint. First shake the can well and then apply the primer in even movements with short sprays until the frame is completely covered. The distance when applying the primer should be at least 30 centimetres. Allow the primer to dry, then clean it once more and lightly sand again. You can now apply the varnish in several thin layers and let it dry for at least 15 to 30 minutes between each step. Again, work with short sprays to avoid the formation of bubbles and droplets. Here, too, it is very important to spray evenly. If there is a drip, simply sand it down with 600-grit sandpaper and repaint. When the paint has dried, and all dust particles have been removed with compressed air, finish with the clear lacquer.
Painting the gas tank
Since you use the same products and materials as you would for painting the frame, the procedure is identical. However, there are a couple of steps involved in lacquering the tank. First you have to get rid of any fuel still remaining in the tank. Get a can with a funnel and close the fuel valve, detach the lines from the carburettors and then point them toward the funnel. You can now open the valve(s). After you have removed the fuel, go ahead and close the valve(s). Now you can take the tank off your motorcycle. You can detach the cap and valves, or you can keep them on if you wish but make sure to protect them with some adhesive tape.
How much does it cost to paint a motorcycle?
If you choose to have it done professionally, it depends on exactly what you want done. A tank respray can run from £100-£550, and a full bike respray ranges between £300-£750. If you want to have customised work done, you can expect to pay much more than that. If you decide to take on the job yourself, the materials could cost between £25-£100 depending on which equipment and materials you have on hand already.

Comment